

I’ll never forget the moment I realized my perfectly planed corner joints were starting to separate just weeks after I finished installing new baseboards. It was maddening! Those clean, tight angles that had taken so much effort to align seemed to be falling apart right before my eyes. I knew there had to be a better way, something I could trust to keep my corners flawless and intact over time.
Why Baseboard Miter Separation Happens More Often Than You Think
The truth is, many DIYers and even seasoned pros overlook a simple yet crucial detail that can make or break a baseboard installation—the joint’s integrity. When mitered corners begin to split, it’s often because the glue or adhesive didn’t fully penetrate or bond properly, especially on the edges. Over time, small shifts in temperature or humidity can exacerbate these flaws, leading to gaps and separation. This isn’t just a cosmetic issue; it can also compromise the overall look and durability of your trim.
Is the Wood-Glue Rub Technique Really Effective for Long-Term Bonds?
Early on, I made a classic mistake: I thought a quick dab of wood glue and a clamp were enough. But I quickly learned that the secret lies in the application method. The wood-glue rub technique involves applying a liberal amount of glue, then rubbing it into the joint with your finger or a cloth, ensuring every surface is thoroughly coated. This not only improves adhesion but also fills minor gaps and creates a seamless bond. According to expert woodworking guides, proper surface contact is key to preventing joint failure.
In the following sections, I’ll walk you through the step-by-step process of mastering this technique, so you can avoid the pitfalls I encountered and enjoy perfectly sealed, professional-looking corners every time. Whether you’re updating your baseboards or doing a full remodel, this method will save you frustration and ensure your crisp joints stay that way for years to come. Ready to get started? If you’ve ever faced this problem, you’re in the right place. Thinking about upgrading your finishing techniques? Check out 2025 baseboard trends for more inspiration and tips.
Apply the Wood-Glue Rub for Flawless Joints
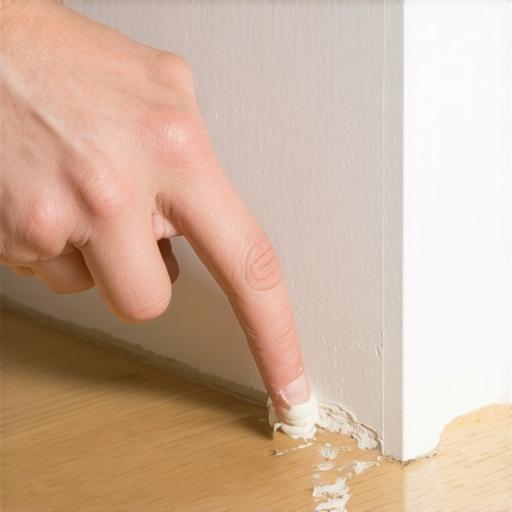
During a recent bathroom remodel, I replaced old baseboards in a textured wall area. I initially spread glue with a putty knife, but the joints still looked uneven. Instead, I switched to the wood-glue rub technique—a simple but effective method. I squeezed a generous bead of wood glue onto each mitered edge, then rubbed it in with my finger, ensuring the entire joint surface was coated evenly. This approach allowed the glue to penetrate the tiny gaps, creating a stronger bond and a seamless look.
Think of it like seasoning a steak: coating every surface thoroughly before cooking ensures even flavor and texture. Similarly, this thorough application guarantees a tight, durable joint without gaps or cracks.
Use Clamps and Proper Pressure
After applying the glue, I used small clamps or a damp cloth-wrapped putty knife to hold the joint tight while the glue set. Don’t rely solely on nailing or nailing plus glue; these can cause the joint to shift or open during curing. Maintaining steady pressure prevents gaps from forming. For tight corners, I often use painter’s putty or shims to fine-tune the fit as the glue dries.
Wait for the Glue to Cure Fully
Patience is key. I left the clamps in place for at least 30 minutes, then checked the joint before removing. Once cured, I lightly sanded any excess glue or rough spots, then finished with paint or stain. This process creates a joint that not only looks perfect but also resists separation over time.
Extra Tips for Success
Always choose high-quality wood glue compatible with your baseboard material. Prior to applying, ensure surfaces are clean and free of dust or grease. For uneven walls or bowed baseboards, shimming and careful measurement help maintain a uniform gap and straight lines.
For more advanced techniques, consider using a caulking gun with a fine nozzle for precise application or exploring other finishing tips that can complement your trim work. Mastering this method elevates the quality of your baseboard installation, making your home’s details more striking and durable.
 When it comes to home upgrades like carpet, flooring, showers, or baseboards, many homeowners and even pros rely on popular assumptions that just aren’t entirely accurate. For example, a widespread belief is that nailing your baseboards tightly guarantees they won’t pull away over time. However, the real secret involves understanding the subtle interplay of materials, wall conditions, and installation techniques that prevent gaps and separation. Overlooking these nuances can lead to costly repairs down the line.
A common trap in flooring installation is assuming that a perfectly level subfloor isn’t essential. While minor imperfections might seem negligible, they can cause uneven wear or squeaks, especially with high-quality flooring options like engineered hardwood or luxury vinyl. It’s often overlooked that properly prepping the subfloor, including moisture testing and leveling, significantly extends your floor’s lifespan. For instance, studies indicate that inadequate subfloor prep increases failure rates by over 30%, emphasizing the importance of thorough groundwork.
In shower renovations, many believe that sealing once with regular caulk suffices. But advanced experts recommend continuous attention to the sealing process, especially around niches and curbs, to prevent leaks. A hidden nuance is the importance of choosing flexible, waterproof membranes beneath tiles, which accommodate movement and moisture fluctuations. Neglecting this can cause grout cracks or water damage—issues that may remain hidden until costly repairs appear. Check out modern shower ideas to understand these hidden techniques better.
Many mistakenly think that applying glue directly to baseboard edges is enough to keep them flush against the wall. In reality, the timing and method of application matter. Using the wood-glue rub technique, for example, enhances adhesion and fills tiny gaps, preventing gaps and cracking later. The same principle applies in flooring joins: proper surface preparation, controlled expansion gaps, and expert adhesives make all the difference. Remember, thin-set mortar, if chosen improperly, can cause tiles to crack or loosen prematurely.
A noteworthy advanced mistake involves ignoring environmental factors, like humidity and temperature changes, during installation. For example, installing hardwood floors during high humidity can cause gapping or buckling months later. Using a moisture meter before installation and controlling indoor climate optimizes results, backed by studies showing humidity swings of over 10% significantly affect in-place materials. Don’t be fooled into thinking ambient conditions are negligible; they are fundamental.
Curious about how to troubleshoot issues before they escalate? The key lies in understanding these hidden nuances. And with the right techniques, such as ensuring proper subfloor prep or environmental control, your projects will stand the test of time. For comprehensive installation tips, check out step-by-step flooring guides.
Have you ever fallen into this trap? Let me know in the comments. Mastering these details elevates your craftsmanship, making every home improvement project a lasting success.
Keep It Working: Essential Tools for Every Step
Maintaining your home improvements over time requires the right tools and consistent care. For flooring and tile work, I swear by a high-quality angle grinder fitted with a diamond blade—it’s perfect for cleaning and smoothing cuts, ensuring a polished look that lasts. When it comes to sealing showers, a professional-grade silicone gun, paired with a pointed nozzle, allows for precise application, preventing leaks and mold buildup. Regularly inspecting and replacing grout and caulk with quick-setting, flexible formulas helps prevent water infiltration, which can cause long-term damage.
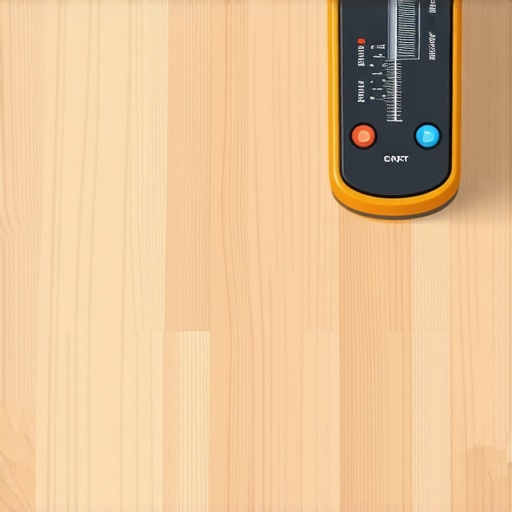
For carpentry, I recommend a digital moisture meter from reputable brands like Delmhorst or Wagner. Accurate readings help determine the optimal humidity levels before installing hardwood or laminate floors, avoiding buckling or gaps down the line. Also, a good set of trim pulls and a pneumatic nailer streamline baseboard installation, reducing damage and ensuring tight joints that stand the test of time. These tools, combined with routine inspections, keep everything functioning flawlessly.
How do I maintain my flooring and trims over time?
This involves regular cleaning with non-abrasive products and periodically checking for signs of separation or water damage. A quick approach is to use a moisture meter to monitor indoor humidity—keeping it between 35-50% minimizes expansion and contraction of wooden elements. Additionally, applying a protective finish or sealant every few years can prolong the life of your floors and baseboards.
Looking ahead, innovation in smart home technology will likely influence maintenance routines. Sensors capable of detecting moisture or structural shifts are already emerging, promising to alert homeowners before issues become severe. Staying informed about these advancements helps you prepare and adapt your upkeep strategies.
If you’re interested in elevating your home maintenance routine, I recommend integrating these advanced tools into your regular schedule. For example, routine use of a moisture meter, paired with proper sealing techniques, can dramatically extend the durability of your installations. Want expert advice tailored to your project? Visit our contact page to get personalized support or to explore more professional tips.
Remember, proactive maintenance is the best investment for lasting results. Regular inspections combined with the right tools will save you time and money in the long run and keep your home looking fresh and functional. Don’t neglect the small details; they’re what make your upgrades truly stand the test of time. For detailed guidance on specific materials and finishing techniques, check out our flooring installation tips for 2025.
What I Wish I Knew About Corner Precision Before Starting
- Achieving perfect miter joints isn’t just about cutting angles; it’s about understanding how wood expands and contracts. A small mistake in measuring can cause gaps that become obvious over time.
- Using the wood-glue rub technique transformed my approach, showing me that thorough application and patience create bonds that last much longer than quick fixes.
- Environmental factors like humidity play a bigger role than I initially believed, influencing how materials behave and how careful I need to be during installation.
- Don’t underestimate the power of proper clamps and pressure; holding joints tightly during curing prevents gaps and misalignments that are difficult to fix later.
- Remember, even the best materials and techniques can falter if not paired with thorough surface prep. Cleaning and priming surfaces are essential steps I now never overlook.
My Toolkit for Flawless Home Details
- A high-quality angle grinder with a diamond blade ensures smooth cuts and cleanup, saving you time and effort. I trust brands like Makita or Bosch for their durability and precision.
- An accurate moisture meter from Delmhorst or Wagner is invaluable. Knowing the moisture content helps me choose the right time for board installation and avoid future warping.
- A professional-grade caulking gun paired with flexible, waterproof silicone is a game changer for sealing showers and baseboards, preventing leaks before they start.
- Routine inspection tools, including a small level and a tape measure, help maintain alignment and identify potential issues early, keeping projects on track and lasting longer.
Embrace the Challenge: Your Home’s Future Awaits
Remember, every detail you master today builds the foundation for a more beautiful, durable home tomorrow. Don’t let small setbacks deter you—approach each project as an opportunity to learn and refine your skills. With patience and the right techniques, your home upgrades will stand the test of time, giving you confidence in every corner and connection. Ready to elevate your craftsmanship? Your next home improvement success starts now. What has been your biggest challenge in perfecting your home details? Share below and let’s learn from each other.