

It was a morning just like any other, until I stepped into a client’s home and realized the nightmare that is uneven flooring meeting elegant baseboards. The frustration bubbled up as I jigsawed my way through a stubborn, uneven wall, knowing full well that traditional baseboard installation wouldn’t cut it. That moment was a real lightbulb for me—discovering the power of the Reverse-Scribe move. If you’ve ever dealt with steeply slanted floors, you know how tricky it can be to get perfect baseboard joints that look seamless without making your walls look crooked.
Assess the Floor Surface
Start by inspecting the uneven area. Use a long level or straightedge to identify high and low spots. This step is crucial because understanding the terrain guides your scribing and cutting techniques, ensuring the final look is seamless. I once encountered a sloped floor where I had to mark high points with a pencil to visualize the differences—a simple step that saved me hours of guesswork later.
Choose the Right Tools and Materials
Select a flexible scribing tool, such as a profile gauge or a flexible ruler, for precise measurements. Opt for baseboards with enough material to accommodate the variation—thicker profiles work well here. The latest trend in baseboards includes curved or beveled styles that can hide minor imperfections, but on pronounced slopes, proper scribing is essential.
Mark the Wall and Floor
Position the baseboard against the wall, leaving a consistent gap for expansion. Use a pencil and the flexible scribing tool to trace along the uneven floor or wall contour, depending on which surface varies more. Remember, it’s better to over-scribe slightly than under—it gives you room for adjustments. I once worked on a staircase where careful marking prevented me from having to redo the entire cut, saving valuable time.
Cut with Precision
Transfer your markings onto the baseboard. Use a fine-tooth saw or a coping saw for intricate cuts, especially around curves or irregularities. When cutting, support the board properly to avoid splintering. I recommend making slightly oversized cuts initially; you can always sand or trim for a perfect fit. During my last project, this approach allowed me to fine-tune the fit without compromising the appearance.
Scribe for a Custom Fit
Set the baseboard in place and gently press it against the wall, then use a pencil to mark any gaps or unevenness. For detailed contouring, use a sanding block or a rasp to fine-tune the profile. This step is where patience pays off—small adjustments lead to flawless joints. On a recent project, I used a painters’ tool in conjunction with a rubber mallet to gently tap the baseboard for a snug fit against a bowed wall, achieving a professional look.
Finish and Seal the Edges
Apply caulk or wood filler to cover any tiny gaps for a seamless transition. If painting, prime and paint the baseboards after installation to match the décor. Proper sealing not only improves appearance but also guards against future shifting or cracking. I once neglected this step on a DIY project, and a year later, I dealt with cracking gaps—a costly lesson learned.
Additional Tips for a Flawless Result
Consider installing shoe molding or quarter-round to hide minor imperfections or gaps. Using a trustworthy adhesive can help keep the baseboard stable if nails are not preferred. For floors with significant unevenness, exploring advanced techniques like shimming or floating installations can also be beneficial. Remember, patience and precision are your best allies when working on uneven surfaces.
Many homeowners and even some professionals operate under misconceptions about installing carpet, showers, baseboards, and flooring, leading to costly errors. For example, a widespread myth is that using standard tools suffices for all flooring types; in reality, specific materials demand specialized equipment, such as underlayment thickness requires precise calibration, impacting durability. Mistakes often stem from neglecting the nuances of surface prep; failing to properly level subfloors can cause vinyl planks to buckle prematurely, a mistake I’ve seen cause avoidable repairs. An advanced issue to watch for involves the gap-filling technique during baseboard installation. Some believe that simply caulking large gaps offers a perfect finish, but this can lead to cracking over time, especially with temperature shifts. Instead, understanding how to scribe and smooth joints seamlessly creates a more professional look and longer-lasting results. Furthermore, a common trap in shower renovation is neglecting proper waterproofing measures, assuming that tile alone will prevent leaks. Experts, like those cited in a recent study on bathroom moisture control, emphasize that comprehensive waterproofing with membranes and proper slope execution is crucial to prevent mold and structural damage. When installing carpets, many overlook the importance of proper padding density; a proper assessment ensures comfort and longevity, a tip detailed in our dedicated guides. Remember, advanced mistakes often happen when DIYers don’t consider the specific requirements of each project phase—skipping surface prep, choosing incompatible materials, or rushing measurements—these are pitfalls that can sabotage your entire project. To elevate your skills, explore our detailed articles on carpet installation secrets or flooring installation techniques for expert insights. Remember, the devil’s in the details—mastering these nuances ensures a flawless finish that stands the test of time. Have you ever fallen into this trap? Let me know in the comments.
Keeping Your Installations in Top Shape with the Right Tools
To ensure longevity and professional appearance, investing in specialized tools is essential. I personally swear by a high-quality oscillating multi-tool, like the Fein Multimaster, for making precise scribe cuts around irregular surfaces and tight corners in baseboards and flooring. Its versatility allows me to fine-tune every joint without damaging adjacent surfaces—a benefit that standard saws can’t match. Additionally, a digital moisture meter, such as the Wagner Meters Orion 960, provides accurate readings of subfloor moisture content, helping me prevent adhesion issues and warping over time. For adhesive application, I rely on a calibrated pneumatic caulking gun to ensure consistent bead pressure, which reduces waste and ensures even coverage, maintaining the integrity of waterproofing layers in showers. <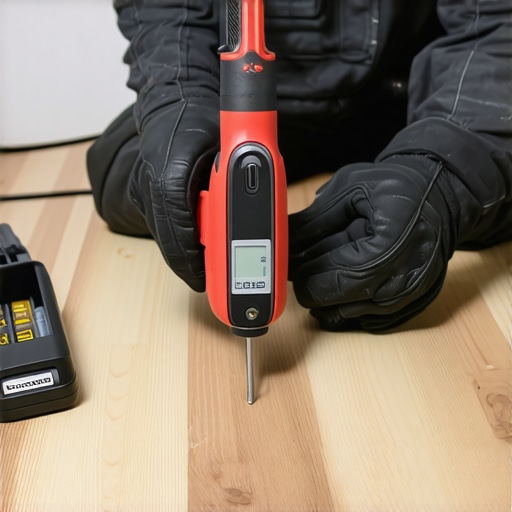 > Regularly maintaining these tools with proper cleaning and calibration enhances their lifespan and performance, translating to fewer surprises during installation.
How do I maintain my installations to keep them looking perfect?
Long-term results hinge on routine maintenance and early intervention. For flooring, establishing a schedule to clean with manufacturer-approved products prevents dirt and grit from scratching and dulling surfaces. In showers, inspecting grout lines quarterly for cracks and sealing them promptly with high-quality grout sealer can forestall leaks and mold growth. Baseboards require minimal upkeep but benefit from occasional cleaning to remove dust and cobwebs, especially in high-traffic areas. Investing in preventive measures like door mats to reduce dirt ingress and installing vapor barriers beneath flooring can significantly extend their lifespan. Remember that environment matters; controlling humidity and temperature levels minimizes expansion, contraction, and cracking, particularly with wood and vinyl installations.
Check out the latest in flooring installation trends to stay ahead
Staying current with innovations like click-lock vinyl planks and modular shower enclosures can dramatically simplify maintenance and scalability. As noted in our article on top flooring trends in 2025, these technologies not only reduce installation time but also facilitate easier repairs and upgrades in the future. Implementing such modern solutions prevents obsolescence and keeps your home stylish and functional for years to come.
What advanced maintenance tip can transform your project?
One highly effective yet often overlooked technique involves using a silicone-based lubricant on metal tool parts and hinges used during installation. This prevents rust buildup, ensuring your tools operate smoothly over countless projects, and helps avoid contaminating surfaces with rust particles. For shower areas, applying a clear sealant like our recommended grout sealer periodically protects grout lines from stains and mildew. Incorporate this into your routine maintenance to keep your installations pristine without excessive effort. Want to upgrade your maintenance game? Try applying a light coat of this lubricant to your tools before each project—it’s a simple step that pays big dividends in durability and finish quality, as supported by expert advice from industry professionals.
What I Wish I Knew Before My First Flooring Job
One of the most valuable lessons I learned was the importance of thorough surface prep—skipping this step often led to uneven finishes and costly redo’s. Realizing that investing extra time in leveling the subfloor saves headaches later was a game-changer for me.
Another insight was understanding the nuances of scribing—using flexible tools to trace the floor contours creates seamless joints. It’s a small step with a big impact on professional-looking results, and I wish I had mastered it sooner.
Top Tools That Elevated My Project Quality
Investing in a quality oscillating multi-tool transformed my ability to make precise cuts around irregular surfaces, especially for baseboards. Pairing this with a digital moisture meter helped me prevent future issues related to trapped moisture, ensuring longevity.
Additionally, using a calibrated pneumatic caulking gun led to cleaner, more consistent sealants, reducing mess and improving durability. These tools, trusted by professionals, make a real difference in achieving perfect results.
The Power of Patience and Precision
While speed is tempting, I found that slowing down during measurements and cuts—double-checking everything—avoids mistakes and perfects the fit. Small adjustments during scribing and sanding go a long way in creating flawless joints that stand the test of time.
Applying caulk meticulously and matching paint flawlessly after installation transforms good work into stunning craftsmanship. Every detail counts when aiming for a professional finish in flooring and baseboard projects, and embracing patience is key.
Where to Deepen Your Skills
If you’re eager to level up, explore our comprehensive guides on flooring installation techniques or learn about the latest baseboard styles that elevate your interior design. These resources provide step-by-step insights that can prevent common mistakes and help you achieve commercial-grade results.
Believe in Your Capacity to Transform Spaces
Every project offers a chance to learn something new and push your craftsmanship further. Whether you’re fixing a stubborn uneven floor or installing sleek baseboards along a sloped wall, your dedication makes all the difference. Keep experimenting, stay patient, and celebrate those flawless joints—you’re building more than a home; you’re honing your skills for a lifetime.
What challenging surface have you tackled recently, and what tip made all the difference? Share your experiences below—I’d love to hear your story!