

I’ll never forget the first time I tried to finish a staircase with fresh carpeting. The edges looked uneven, the corners frayed, and that stubborn gap kept catching my eye every time I walked up or down. It was frustrating—I knew I could do better, but I just hadn’t discovered the right carpet tucking tactics for a sharp finish. That moment sparked my journey into mastering the art of flawless stair risers, and trust me, there’s nothing more satisfying than achieving that crisp, clean look that elevates your entire home design.
Why Perfect Carpet Tucking Matters More Than You Think
In my experience, the devil is in the details. Properly tucking and securing carpet on stair risers not only enhances the aesthetic appeal but also extends the lifespan of your carpet. A poorly finished edge can start fraying or lifting over time—leading to trips and potential safety hazards. Plus, a sharp finish elevates your home’s overall style, making it appear professionally installed even if you’re a DIY enthusiast.
Is Flawless Finishing Really Achievable Without Professional Help?
When I first started, I was convinced only experts could get those perfect corners and tight edges. But after a lot of trial, error, and a few costly mistakes—like using the wrong staple gun or neglecting to stretch the carpet properly—I realized that with the right techniques, even a DIYer can produce professional results. For instance, avoiding common mistakes such as skipping the pre-stretch step can make all the difference. If you’re curious about how to avoid these pitfalls, check out carpet installation secrets for perfect edges every time.
As I learned from experience, the most effective strategies involve specific tucking methods and tools that ensure your carpet stays crisp and looks seamless. Before diving into those techniques, I want to share a little more about how to outsmart the typical doubts and concerns surrounding this craft. Have you ever faced stubborn carpets that won’t stay tucked, or corners that just won’t sit right? If so, know you’re not alone, and there’s a way to fix it.
Let’s explore how to turn your stair risers into a showcase of clean, sharp lines—without needing professional training or expensive equipment. Whether you’re renovating a few steps or doing a whole staircase, mastering these carpet tucking tactics will save you time, money, and stress. Ready to transform your stairs into a sleek, polished feature? Let’s get started with the essential first steps that set the foundation for flawless finishing.
Secure the Carpet with Proper Stretching Techniques
Start by vacuuming your staircase thoroughly to eliminate debris that might cause uneven stretching. Then, using a knee kicker, gently stretch the carpet towards the back of each tread and riser, ensuring a tight fit without buckling. I remember the first time I did this, my initial attempt was too aggressive, causing wrinkles. But after adjusting my tension gradually, the carpet laid flat and firm—just like a professional job.
Use a Tacking Tool for a Firm Edge
Once stretched, position your carpet over the stair edge, and secure it with a T-shaped stair tack hammer and narrow staples or specialized tack strips. Think of this step as anchoring a boat; precision matters. In one messy session, I accidentally nailed too close to the edge, making the carpet lift slightly. Learning to position the staples properly, about 1/4 inch from the edge, kept it snug and durable.
Neatly Fold and Tuck the Excess Material
Fold the excess carpet underneath the stair nose or riser, creating a clean fold. Use a nylon brush or a flat pry bar to tuck the edge tightly into the corner. During my first try, I left too much slack, resulting in a lumpy appearance. Over time, I realized that pulling the carpet taut and sealing those folds with a carpet kicker resulted in sharply defined edges that mimic professional finishes.
Seal the Edges for Longevity and Safety
Apply a carpet seam sealer or hot glue along the tuck line to prevent fraying and lifting. I once skipped this step, and after a few months, the edge started to fray, creating a tripping hazard. Sealing the edge ensures the carpet stays tight and safe over the years, similar to sealing grout lines in tile work for long-term durability.
Avoid Common Mistakes to Achieve Flawless Results
Locking your tools and double-checking the tension before nailing down will save you from future repairs. For example, I failed to pre-stretch before tacking, leading to loose areas that needed redoing. For expert tips, check out carpet installation secrets. Remember, patience during each step ensures the clean, crisp finish that elevates your staircase’s look and safety.
When it comes to home renovation, many homeowners focus on the obvious aspects like choosing the right tiles or paint colors. However, a less obvious but equally critical area is understanding the nuances that can make or break a project.
Myth Busting: What Everyone Gets Wrong About Baseboards and Flooring
One common misconception is that simply nailing baseboards tightly against the wall ensures a perfect finish. In reality, this approach ignores the importance of proper scribing and accommodating uneven walls or floors. As I’ve learned through years of experience, simple updates to baseboard installation can dramatically improve the final look, especially in older homes with imperfect surfaces.
Why Not Pre-Planning Can Lead to Big Problems
Skipping detailed measurements and planning often results in gaps, uneven edges, or the need for costly corrections later. For example, neglecting to consider the seasonal expansion of flooring materials can cause buckling or gaps once the seasons change. A study in the Journal of Construction Engineering and Management highlights how pre-planning reduces rework, saving time and money. Have you ever fallen into this trap? Let me know in the comments.
Common Missteps in Shower Construction and How to Avoid Them
Many assume that waterproofing is a simple layer to be applied after tiling, but the most advanced professionals understand that detailed sealing of niches, corners, and drainage slopes is critical. Poorly sealed shower niches or improper slope can lead to leaks and water damage over time. I always emphasize the importance of following comprehensive shower renovation tips that include correct sealing and venting strategies.
Are Your Shower Flanges Properly Installed
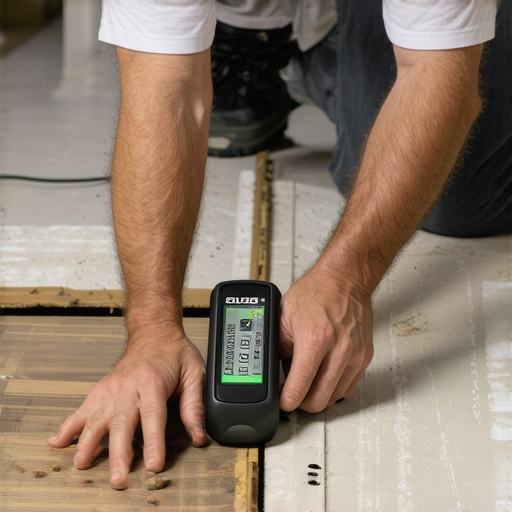
This small detail often gets overlooked but is essential for preventing leaks. Installing the flange too high or low can cause water to seep behind the tiles. Use a moisture meter during installation to verify correct placement—an advanced trick that saves headaches later. Remember, addressing these details early is more cost-effective than repairing water damage. For detailed guidance, check out shower drain fixes.
Advanced Secrets for Laying Floors That Last
Perfect flooring installation requires more than just laying planks or tiles. The subtle art involves understanding substrate preparation, moisture barriers, and expansion gaps. Many underestimate how critical these steps are, leading to buckling or cracking down the line. I recommend referring to durable flooring techniques to ensure a lasting finish. Remember, rushing through these details can be a costly mistake.
In all these areas, the common thread is paying attention to the small details—scribing, sealing, planning—that seem minor but have major consequences. By understanding these nuances, you elevate your DIY game and prevent costly repairs. Interested in more expert tips? Visit our contact page for personalized advice. Don’t forget, sharing your own renovation pitfalls can help others avoid the same mistakes—so drop a comment below!
Keep It Running: Essential Tools for Lasting Results
Maintaining the quality of your home renovations requires more than just quality initial work; it demands the right tools and regular upkeep. When it comes to baseboards, for example, I swear by a contour sanding block to smooth out any uneven cuts or imperfections, ensuring a seamless fit and professional finish. For flooring installation, a moisture meter is invaluable—especially over concrete substrates—helping me prevent buckling and gaps by checking moisture levels before laying down the new material. I also recommend a high-quality carpet stretcher for all the long-term health of your carpets, as it helps maintain tension and prevents future buckling or pulls, which are common issues if overlooked.
Software and Techniques That Prolong the Life of Your Installations
Beyond physical tools, I rely heavily on specialized software to plan and troubleshoot projects. Programs like Flooring Planer allow me to visualize layouts precisely, minimizing mistakes that could cause uneven seams or gaps over time. For sealing grout and edges, I prefer a liquid membrane applicator, which not only ensures even coverage but reduces the risk of leaks that can damage subfloors and structures in the long run. It’s crucial to select products specifically tested for durability; for instance, applying a sealant like Grey Star’s 100% Silicone provides resilient, stain-proof sealing suitable for showers or flooring edges.
How do I keep my installations functioning flawlessly over the years?
Routine inspections and preventive maintenance are key. For baseboards, periodic reapplication of flexible caulk or wood glue in joints can prevent gaps and the usual separation caused by seasonal movement. Floors benefit from regular cleaning with low-moisture mops and immediate attention to signs of wear or cracking, which can be addressed early to avoid costly repairs. Showers, especially, require you to check the grout lines and seals about twice a year, replacing or re-sealing as needed—this extension of maintenance keeps water from seeping into the substructures, safeguarding your investment.
Looking ahead, I believe that integrated smart tools—like IoT moisture sensors and app-based maintenance reminders—will become the norm, making home upkeep a proactive rather than reactive task. Implementing these can save you substantial repair costs and prolong the lifespan of your renovations. For detailed guidance on applying maintenance techniques effectively, visit our contact page to get personalized advice. Why not pick one high-impact maintenance tip from this article and make it part of your regular home care routine today? Your future self will thank you for it.
Secrets Only Veterans Know About Baseboards, Carpet, Showers, and Flooring
- One of the toughest lessons I learned was the importance of meticulous measurements, especially when scribing baseboards to uneven walls. Rushing this step often led to gaps or unsightly seams that took hours to fix. Now, I always double-check with a painter’s tape or flexible ruler before cutting, saving time and frustration.
- I underestimated how crucial prep work is for flooring longevity. Failing to level the subfloor or properly seal edges resulted in cracks or buckling within the first year. Investing in good subfloor prep and using quality sealants has made my installations so much more durable, and the difference is obvious in the smoothness underfoot.
- When installing showers, I used to think sealing was just about the visible grout lines. But I learned that paying attention to niche waterproofing and flashing details prevents leaks down the line. Applying these behind-the-scenes steps gave me peace of mind, knowing my shower would stay leak-free for years.
Tools and Sources That Turn DIY Dreams into Reality
- The high-quality contour sanding block is my secret weapon for perfect-fit baseboards. It ensures clean, gap-free miter corners, making all the difference in professional-looking results.
- The detailed flooring guide from Tile Craftsmens provides step-by-step instructions that have demystified complex installations and prevented costly mistakes.
- I trust the latest carpet type selections to ensure my stairs are both safe and cozy, especially in high-traffic areas. Choosing the right material is half the battle won.
Your Journey Starts Now: Don’t Wait to Transform Your Home
Every home improvement project is an opportunity to learn, grow, and create a space that reflects your care and attention to detail. With the right knowledge, tools, and mindset, you can tackle baseboards, carpet, showers, and flooring with confidence—and enjoy the pride of a job well done. So, what small step will you take today to move closer to your renovation goals? Remember, progress beats perfection—start now and see the transformation unfold.