

Ever had that sinking feeling when you step back after installing your baseboards and notice ugly gaps where they meet rounded bullnose corners? I remember my first attempt; I thought I was doing everything right, only to end up with gaps that made the whole room look amateurish. It’s frustrating, and honestly, it can make you doubt whether DIY is worth it. But let me tell you — there’s a better way. Today, I’ll share exactly how I finally cracked the code to fit baseboards flawlessly around those tricky curved corners, giving my rooms a polished, professional look without the gaps.
Why Gaps Around Rounded Corners Keep Us Up at Night
Getting baseboards to sit perfectly around rounded bullnose corners is one of those DIY challenges that feels deceptively simple at first. You measure, cut, and think, “This should work!” But the reality is often disappointing. Gaps appear, and then the frustration mounts. It’s not just about aesthetics—those gaps can also lead to issues like dust collection or even damage over time.
The root of the problem lies in the way standard cuts are designed for 90-degree corners, not curved ones. When you force a straight cut around a curve, it’s like trying to fit a square peg into a round hole. My early mistake was not adapting my approach for these curved areas, which resulted in gaps, uneven edges, and a lot of unnecessary rework.
Fortunately, after doing some research and experimenting, I discovered that with a little extra effort and the right techniques, you can achieve a seamless transition. It’s all about understanding the geometry of your curves and applying scribing or custom-cutting methods. For instance, learning how to scribe baseboards to fit snugly against curved surfaces can dramatically improve your results—something I wish I had known from the start. Learn more about how to choose the best baseboard styles to match your home’s aesthetic by visiting [this guide](https://tilecraftsmens.com/how-to-choose-the-perfect-baseboards-for-your-homes-style).
Now, you might be wondering—does all this sound like a lot of extra work? Believe me, I thought so at first. But once you master these techniques, you’ll save time in the long run and avoid those pesky gaps that ruin a room’s look. Plus, the satisfaction of transforming your space with professional-looking finishings is worth every minute. Trust me, it’s doable, and I’ll walk you through the steps.
Before we dive into the detailed methods, you might be skeptical—”Is it really possible to get perfect fits around curved corners?” I had that doubt, too. Early on, I made the mistake of cutting too much material and relying solely on guesswork. But over time, I learned that precision is key. Small adjustments, like using a contour scribe or a flexible coping saw, can make a world of difference.
If you’re ready to turn those gaps into a thing of the past and give your interiors a sleek, custom look, let’s explore the techniques that will make your baseboard installation around curves look flawless. Ready to step up your DIY game? Let’s get started.
Measure and Mark Precisely
Start by identifying the curve’s outline with a flexible contour gauge or by tracing it onto a piece of scrap paper. For example, I once bent a scrap strip of cardboard along the curve in my living room, which provided an exact template. Transfer this shape onto your baseboard to serve as a cutting guide. This initial step ensures your cuts will match the curve, reducing gaps and rework.
Use a Contour or Flexible Scribe
Utilize a contour gauge or a flexible scribing tool to transfer the curve onto your baseboard accurately. In my project, I pressed the contour gauge against the wall, squishing the teeth along the surface, then mirrored that shape onto the baseboard. This method captures even complex curves, providing a custom profile that fits snugly against the wall, unlike standard cuts that assume corner straightness.
Cut Slowly with Right Tools
Employ a fine-tooth handsaw or a jigsaw with a down-cut blade for precise cuts. When I cut my baseboard, I set the jigsaw to a slow speed, following my scribed line carefully. Slow, steady cuts prevent splintering and enhance accuracy. Remember, cutting just outside the scribed line allows for fine adjustments later, making final fitment easier.
Scribe to the Wall for Fine Tuning
Place the cut baseboard against the wall and use a compass or pencil to mark any spots where the board doesn’t sit flush. With a small, flat sander or file, gently sand the high spots. I once had a slight gap at the bottom of my curved baseboard; sanding it down a bit gave a perfect fit. This step ensures a seamless transition and avoids gaps that can catch dust or look unprofessional.
Join Multiple Pieces for Complex Curves
If the curve is wider than your board, cut multiple sections, then join them with miter or scarf joints. In my experience, using a miter saw set at 45° for angled joints, then sanding the joint to match the curve, creates an almost invisible seam. Clamping the pieces tightly during glue-up ensures alignment. Be sure to apply wood glue and clamp securely, then clean excess glue for a tidy finish.
Finish with Caulk and Paint
Hide minor imperfections by applying paintable caulk along the seams and nail holes. Use a putty knife to smooth it out. Once dry, sand lightly and paint to match the wall and baseboard color. This finishing touch makes your curved installation indistinguishable from a professional job, elevating the overall look of your space.
Remember, patience and precision pay off. Each curve might present its own challenge, but mastering these techniques will give you a flawless finish that even pros admire. For more tips on elevating your interior, check out baseboard styles that elevate your interior.
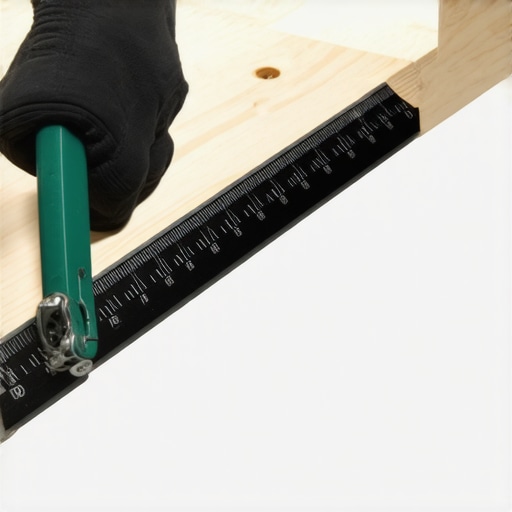 Many homeowners and even DIY enthusiasts believe they know the essentials of installing baseboards, flooring, and showers, but some misconceptions can lead to costly mistakes. Let’s dig deeper into the nuanced truths that often go unnoticed, challenging popular myths.
Myth 1: Straight cuts work for all corners
A prevalent misconception is that standard 45-degree miter cuts suffice for every corner. In reality, curved or irregular corners demand more advanced techniques like scribing or using a contour gauge. Relying solely on miter cuts can cause gaps and uneven finishes, especially around rounded or uneven surfaces. Mastering these nuances dramatically improves the quality of your finish, as highlighted in professional flooring guides. For example, when installing baseboards around irregular archways, precision scribing ensures a seamless appearance, elevating your work from amateur to professional.
Myth 2: Sealant or caulk can fix poor fitting joints
Some believe that applying caulk or sealant can cover up ill-fitting joints or gaps, but this is a trap. Sealants are meant for finishing touches, not for correcting poor cuts or misalignments. Relying on them can lead to future issues like cracking, mold, or water infiltration, especially in showers or moisture-prone areas. Proper fitting, combined with techniques like fine-tuning with a sander or accurate scribing, ensures a durable and aesthetically pleasing result. As expert sources suggest, investing time in precise measurements and cuts saves headaches down the line.
Is there a way to get perfect finishes around complex corner shapes?
Absolutely. The key lies in understanding the geometry of your wall or surface and applying the right tools, such as flexible scribing or contour gauges. For complex shapes, consider the technique of creating a template from cardboard or MDF, then transferring it onto your baseboard or molding. This approach allows for highly accurate cuts that conform perfectly to intricate surfaces. Developing these skills can set your project apart, making it look expertly crafted rather than DIY. For advanced tips, explore how to scribe baseboards to uneven surfaces or stone walls, which can be found on dedicated professional guides. Learn more about elevating your baseboard style here.
The common trap of ignoring material expansion
Another critical nuance many overlook is allowing for material expansion and contraction. For flooring, this means leaving expansion gaps along the perimeter to prevent buckling. In showers and wet areas, improper sealing and ignoring movement can cause leaks and damage over time. A common mistake is to install tiles or flooring without accounting for humidity and temperature changes, leading to cracks and gaps later. Recognizing these factors and incorporating proper techniques, like using expansion joints or flexible sealants, can prevent long-term disasters. Check out this guide for more insights on material expansion considerations.
Maintaining your flooring, baseboards, and showers over time is crucial to preserving their appearance and functionality. The right tools and consistent upkeep not only extend the lifespan of these installations but also ensure your DIY projects remain looking professional. One of my favorite strategies is investing in high-quality, specialized equipment that simplifies complex tasks. For instance, a carbide-tipped scribing tool allows for precise adaptation when working around uneven surfaces or intricate moldings, making your installations seamless and reducing the need for corrections later. To keep everything working smoothly, I recommend regularly inspecting your tools; sharpen blades and clean equipment after each project to prevent buildup and ensure accuracy. Using a moisture meter when installing flooring or tile is essential to prevent issues caused by humidity, which can lead to warping or cracking over time. As industry experts suggest, monitoring moisture levels helps in choosing the right materials and installation timing, ultimately saving you from costly repairs.
In the future, I believe the trend will lean heavily towards smart tools equipped with digital sensors and app integration. These innovations will provide real-time feedback on moisture, alignment, and even adhesive layers, making DIY renovations more foolproof. Staying ahead of technology ensures that your work remains durable and attractive for years to come.
How do I maintain my flooring and fixtures over time?
Consistent cleaning with appropriate products is vital—use gentle vacuums for carpets, pH-neutral cleaners for hardwoods, and non-abrasive scrubbers for tiles and showers. Sealant reapplied periodically keeps grout and caulk watertight, preventing leaks and damage. Regularly inspect for nibbling or cracking in baseboards and re-seal or re-paint as needed. For showers, monitor grout lines and apply sealant once a year to prevent water infiltration. Employing these maintenance routines preserves your investments and keeps your environment looking fresh. When it comes to tools, consider investing in a quality detail sander for fine-tuning baseboards or a digital moisture meter before flooring installation—these will prove invaluable on long-term projects. For instance, using a detailed sander can help you achieve perfect, seamless joints around curved corners, elevating your craftsmanship. Want to learn more about choosing the right tools? Check out the latest trends in baseboard styles for 2025.
By integrating these advanced tools and routine maintenance practices, you’ll keep your home looking its best while minimizing future problems. Don’t hesitate to try one of these suggestions—pick up a moisture meter or a carbide scribing tool and start your next project prepared for success!

Image showing a person using a digital moisture meter and a carbide scribing tool during a flooring or molding project. The tools are in focus, highlighting the importance of precision and monitoring in long-term maintenance.
What I Wish I Knew Before Tackling Rounded Corners
The biggest lightbulb moment for me was realizing that curves demand patience over speed. Rushing through scribing and cutting only led to gaps and frustration. Now, I understand that taking extra time to use contour gauges and create precise templates saves hours in rework and results in a professional finish.
Another lesson learned was that not every tool is created equal. A high-quality, flexible scribing tool transformed my ability to match complex surfaces. Investing in good tools, even for DIY projects, pays dividends in accuracy and ease, especially when working around irregular wall shapes.
Finally, I underestimated the importance of fine-tuning after the initial cut. Sanding small high spots and adjusting with detail files made all the difference in achieving seamless curves. No amount of precise measuring can replace the final finesse provided by these finishing touches—an insight that elevated my work exponentially.
My Trusted Arsenal for Perfect Baseboard Fitting
First, a contour gauge is indispensable. It captures any complex wall shape quickly and accurately. Second, a good-quality jigsaw with a down-cut blade makes precise cuts without splintering. Lastly, a lightweight, fine-grit sander helps smooth out imperfections, ensuring that your custom cuts blend perfectly. These tools have become my go-to for consistent, high-quality results, making my projects look truly professional.
Bring Your Home Improvement Passion to Life
Remember, tackling curved corners around baseboards isn’t just about making a room look good—it’s about challenging yourself and refining your craftsmanship. Each successful curve boosts confidence and inspires you to take on more complex projects. The journey from gaps and uneven edges to sleek, seamless finishes is incredibly rewarding. So, pick up that contour gauge, carve out time for precise working, and embrace the process. Your home deserves that touch of professional finesse—start transforming your space today. Have you ever struggled with revealing imperfections around a curved surface? Share your experience below; I’d love to hear your story and tips!