

I remember the first time I tackled installing baseboards in my living room. Everything looked good until I reached the outside corners. No matter how carefully I cut, there was always that tiny gap or an awkward misalignment. It was frustrating—for years, I accepted it as a design quirk. Then came that *lightbulb moment* when I discovered the back-bevel trick. Suddenly, those stubborn corners transformed into seamless, professional-looking joints. If you’ve ever struggled with achieving tight, crisp outside corners on baseboards, you’re not alone—and I’ve got good news: there’s a simple secret that can change your game.
Why Fixing Outside Baseboard Corners Matters More Than You Think
The appearance of your baseboards, especially at the corners, often gets overlooked. But I’ve learned that these small details can make or break the overall finish of a room. Poorly done corners can look messy and unprofessional, undermining even the most beautiful flooring or wall paint. Plus, gaps or uneven joints can lead to future problems like dirt accumulation or damage over time. Accurate, tight corners contribute to a clean, polished look and boost your home’s aesthetic value. Interestingly, according to industry experts, attention to detail in molding and trim installation can increase your property’s value and appeal (source: Tile Craftsmens). This makes mastering such techniques worthwhile, whether you’re a DIY enthusiast or a seasoned pro.
Have you ever faced the disappointment of crooked or gap-filled outside corners even after careful measuring?
Trust me, I made my fair share of early mistakes—like nailing too early or rushing my cuts—which only made the gaps worse. Without the proper technique, those imperfections become stubborn to fix. That’s why I want to share the secret I wish I knew from the start—the back-bevel method—and guide you towards flawless corners every time. Ready to see how it’s done? Let’s dive into this game-changing approach that will elevate your woodworking skills and give your space that professional touch.
Start with Precise Measurements and Cuts
Before applying the back-bevel trick, ensure your baseboard lengths are accurate. Use a good tape measure and a square to mark your cuts carefully. Remember, a slight miscalculation here can lead to gaps at the corners. I once rushed to measure and cut, which resulted in a crooked joint that I had to redo. Take your time to double-check measurements, especially when fitting pieces around corners.
Cut with the Correct Miter Angle
Traditional miter cuts are made at a 45-degree angle, but to achieve a tight outside corner, cut the miter slightly less, around 43-44 degrees. This slight adjustment allows the joint to close tightly without gaps. I learned this trick after a failed attempt where my corners kept opening up. Using a miter saw, set the angle carefully, and test your cut on scrap before proceeding.
Apply the Back-Bevel for a Seamless Fit
The core of this method involves shaving a small bevel along the back edge of your baseboard piece. Use a hand saw or sanding block to tilt the back edge at about 2 degrees. This bevel allows the joint to nestle neatly against the wall and adjoining piece, sealing gaps that normally appear with standard cuts. I applied this technique on a tricky corner, and the result was a nearly invisible joint that looked professional.
Steps to Create a Back-Bevel
Secure the baseboard in a clamp or on a stable surface. Using a fine hand saw or sander, tilt the back edge downward slightly—around 2 degrees. Keep the bevel consistent along the entire cut edge. This ensures a tight fit when mitered with the adjacent piece. I found that a small sanding block gives more control than a power tool for precise beveling.
Dry Fit and Adjust
Before nailing, do a dry fit of your pieces. Place them at the corner to check for gaps or misalignment. If gaps remain, gently sand the beveled edges until they close tightly. I often reposition the pieces multiple times, adjusting the bevel slightly until the fit is perfect. Remember, patience here saves you from post-install gaps or cracks.
Secure with Proper Fastening
Use finishing nails with a nail set to attach the baseboard. Avoid overdriving nails, which can cause warping or gaps. For tight corners, the back-bevel allows nails to sit flush without forcing the joint open. Once nailed, fill any small nail holes with wood filler and sand smooth for a seamless appearance.
Finish with Caulk and Paint
After installation, run a thin bead of caulk along the joint to seal minor imperfections. Smooth the caulk with a finger or a caulk tool. Finish with paint or stain as desired. The back-bevel technique reduces the need for extensive filling or touch-up, giving your corners a crisp, professional look.
Implementing this back-bevel method transformed my corner joints from messy to masterful. It’s a simple technique that pays off with high-quality results—perfect for DIYers aiming for a professional finish or seasoned pros looking to save time and material on corrections. Whether you’re installing baseboards in a new room or fixing existing ones, this approach will elevate your craftsmanship.
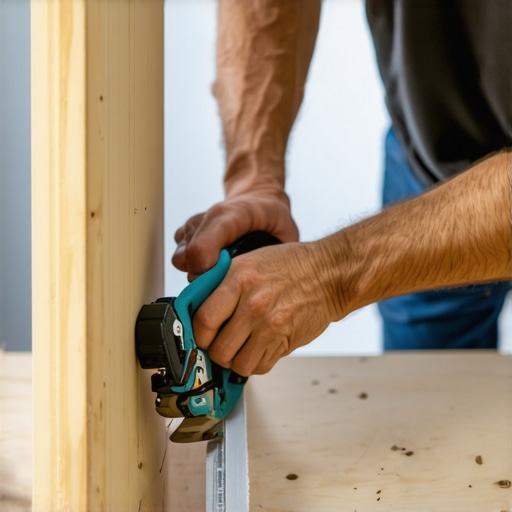 While many assume that installing baseboards, flooring, showers, and carpets is straightforward, there’s often more beneath the surface that can trip up even experienced DIYers. A prevalent misconception is that a perfect finish hinges solely on precise measurements and cuts. In reality, understanding subtle nuances like back-beveling, proper sealing, and material acclimation can make the difference between a professional look and a botched job. For example, many people overlook the importance of back-beveling when installing baseboards, which helps achieve tight, clean corners—something I emphasize in my guides on [baseboard-styles](https://tilecraftsmens.com/how-to-choose-the-perfect-baseboards-for-your-homes-style) and [baseboard-trends](https://tilecraftsmens.com/baseboard-trends-in-2025-fresh-styles-for-every-room). An additional trap is assuming that shimming or caulking alone can fix structural irregularities. Advanced installers know that addressing subfloor unevenness or wall irregularities upfront saves time and results in a smoother finish. A common myth about flooring is that underlayment is always optional. However, experts like [Tile Craftsmens](https://tilecraftsmens.com/your-guide-to-durable-flooring-installation-for-a-stylish-home) stress that proper underlayment enhances stability and longevity, especially for vinyl and laminate floors. When it comes to showers, many believe that sealing is a one-time task. Yet, the reality is that continuous maintenance and understanding sealing nuances can prevent leaks and costly repairs in the future. Also, carpet installation often gets simplified down to stretching and tacking, but without properly considering carpet type, padding quality, and subfloor condition, outcomes can be disappointing. For detailed insights, review our [carpet-install-prescription](https://tilecraftsmens.com/carpet-install-secrets-achieving-flawless-results-every-time).
Prioritize Quality Tools to Ensure Lasting Results
Investing in the right equipment is crucial for achieving durable, professional finishes in projects like baseboard installation or flooring. I personally swear by a high-quality miter saw with adjustable bevel settings—it allows precise cuts at various angles, especially when back-beveling for tight corners. Additionally, a personal favorite is a digital moisture meter, which I use rigorously before installing wooden floors over concrete. Ensuring the subfloor’s dryness prevents future buckling or gaps, saving time and money down the line.
Regular Maintenance Keeps Installations in Top Shape
Even the best installations can degrade over time if neglected. Routine checks on caulking around showers and sealing grout lines help prevent water infiltration that causes mold or structural damage. For flooring, periodically cleaning with non-abrasive products preserves the finish and prevents dirt buildup in seams or grout lines. My approach also includes inspecting baseboards for nail pops or cracks, which are common after seasonal humidity shifts. Addressing these issues promptly extends the lifespan of your work and maintains visual appeal.
Utilize Software for Precise Planning and Tracking
Modern project management software like Houzz or even basic spreadsheets dramatically improve my workflow. I use them to plan cut lists, schedule maintenance reminders, and track material inventories. For example, I document every cut angle and measurement in my digital logs, making future repairs or adjustments straightforward. As technology advances, we can expect more integration of 3D modeling tools that simulate how specific baseboard profiles will look before installation, reducing guesswork and waste.
Getting Ready for Scaling Projects
When expanding your projects, such as upgrading to larger showers or detailed flooring patterns, systematic planning becomes essential. My advice is to create templates using high-quality cardboard, which helps visualize fit and scale without costly mistakes. Additionally, adopting modular tools—like adjustable saw guides—allows for quick adaptation to different project sizes and complexities. Embracing these techniques prepares you to handle larger or more intricate renovations confidently, ensuring consistency and quality across multiple areas.
Question: How do I maintain my home’s finishes over time?
Implementing routine inspections, cleaning, and timely repairs is key to preserving your renovation work. For instance, reviewing grout lines in your shower and resealing as needed can prevent leaks and mold. Similarly, checking baseboard nails and reapplying caulk can keep a clean, seamless look. Staying proactive not only extends the life of your installations but also keeps your home looking sharp. To master this, I recommend trying the simple yet effective technique of using a microfiber cloth dipped in a mixture of mild detergent and water for regular cleaning, which minimizes wear and tear. For detailed guidelines, visit our shower repair resources.
Remember, the key to long-term success lies in pairing quality tools with consistent maintenance. This proactive approach ensures your investment continually pays off, from flawless baseboards to durable flooring. For more in-depth advice on choosing tools tailored for specific projects, explore our comprehensive guides and keep your craft sharp.

Prompt: An organized toolbox with premium finishing tools, measuring devices, and maintenance supplies, on a workbench.
What I Wish I Knew About Outside Corners All Along
- Fighting uneven corners taught me that patience and small adjustments can save hours of frustration, especially when I started relying on back-beveling rather than forcing joints tight.
- Discovering that even the tiniest bevel at the back of a baseboard could make outside corners seamless changed my entire approach to trim installation.
- Learning from missteps, I realized that rushing measurements and ignoring the importance of precise angles only leads to more gaps—perfection requires deliberate care and technique.
- Understanding the subtle difference between standard miter cuts and those modified with a back-bevel helped me achieve professional-quality results without expensive tools.
- Mastering this trick boosted my confidence, proving that small, informed tweaks can elevate DIY projects to nearly pro standards—making every room look polished and refined.
Tools and Resources That Elevated My Craft
- High-quality miter saw with adjustable angle settings: It allowed me precise control over cuts, especially when fine-tuning angles for a perfect fit.
- Fine sanding blocks and hand saws: These gave me the flexibility to create consistent back-bevels for seamless corners.
- Detailed tutorials from trusted sources: Resources like the in-depth guides on how to choose the perfect baseboards and durable flooring installation helped me understand nuances I hadn’t considered before.
- Quality measuring tools and guides: Precise measurements are the foundation, so investing in a good tape measure and squares is non-negotiable.
Embrace the Journey—Transform Your Space Today
Achieving flawless outside baseboard corners might seem daunting at first, but with patience and the right techniques, you can elevate your home’s interior to a professional level. Remember, every detail counts—your efforts not only beautify your space but also boost your confidence in your DIY skills. Don’t hesitate to experiment with back-beveling on scrap pieces before tackling your actual project, and soon you’ll enjoy crisp, seamless corners that stand the test of time. Your home deserves that polished touch—so grab your tools, apply what you’ve learned, and watch your skills grow with every project you undertake. Ready to turn your renovation dreams into reality? Start today, and let those corners be a testament to your craftsmanship!