

It was a typical Saturday morning when I stepped into my shower, only to find a small puddle creeping out from beneath my newly installed shower bench. That lightbulb moment hit hard—I had overlooked the importance of proper sealing, and now I was facing a potential water disaster. If you’ve ever experienced a leak from a shower bench, you know how frustrating—and costly—that can be. But here’s the good news: with the right techniques and materials, you can prevent leaks before they start.
Understanding the Root Cause of Shower Bench Leaks
Many homeowners and even seasoned installers underestimate how crucial it is to seal shower benches correctly. The primary culprit? Inadequate waterproofing and failure to use modern liquid membrane solutions. When moisture seeps into unsealed gaps, it leads to mold, wood rot, and structural damage. Early mistakes, like neglecting to apply a liquid membrane or incorrectly installing the drain flange, can turn a simple shower upgrade into a living nightmare. I’ve been there myself, having learned the hard way that a little oversight can have long-term consequences.
Have you ever faced that sneaky leak after a shower renovation? You’re not alone. To ensure your bathroom stays dry and durable, it’s essential to understand why proper sealing methods matter—and how liquid membranes are changing the game.
Is Waterproofing Really Worth the Extra Step?
Absolutely. Skipping this step might save a few bucks upfront, but it costs much more down the road. Studies show that water intrusion is the leading cause of bathroom renovations, often requiring costly repairs. That’s why I always advocate for an extra layer of protection, especially in high-moisture areas.
Join me as we explore how liquid membrane solutions can be your best defense against leaks, transforming your shower from a potential water hazard into a fortress of durability. For more detailed insights into upgrading your bathroom for longevity, check out [this comprehensive guide on bathroom renovations](https://tilecraftsmens.com/upgrade-your-bathroom-the-ultimate-shower-renovation-guide). Now, let’s dive into the specific steps that will keep your shower bench watertight for years to come.
Prep the Surface Properly
Begin by removing any debris, dust, or old sealant from the shower bench using a utility knife and a brush. Use a damp cloth to wipe down the area thoroughly, ensuring no loose particles remain. This step is like preparing a canvas before painting—clean and smooth surfaces guarantee better adhesion of your sealant.
Apply Liquid Membrane for Ultimate Waterproofing
Choose a high-quality liquid membrane product suited for wet areas, such as elastomeric coatings. Using a 3-inch brush or a roller, evenly coat the entire surface of the bench, including the sides and any corners. Think of this as sealing a envelope—you want a continuous, seamless barrier. Work in thin coats to avoid drips, waiting the specified time between layers.
Layering Matters
If the manufacturer recommends multiple coats, apply them exactly as instructed. Remember, thicker isn’t better here—over-application can lead to cracking. I once applied a single thick coat, which dried unevenly and cracked, compromising waterproofing. Multiple thin coats create a more durable, flexible film that protects against water intrusion.
Seal the Drain Flange and Gaps
Pay special attention to the drain flange. Use a compatible marine-grade or construction silicone to seal around it, applying a generous bead to prevent water from seeping into the subfloor. Similar to sealing a window frame, a good bead prevents leaks. Avoid using inexpensive silicone, which can shrink or crack over time, leaving gaps for water to escape.
Secure with Tape During Curing
If needed, tape off the edges or corners to ensure the membrane stays in place while drying. For a neat finish, remove the tape once the membrane has fully cured, revealing crisp lines and a solid waterproof barrier.
Test for Leaks Before Final Tiling
Before proceeding, conduct a simple water test. Pour a few gallons of water onto the bench and observe for any signs of leaks or seepage underneath. Use a flash light if necessary. This test acts like a stress test—if water doesn’t escape after 30 minutes, your sealing is effective. If leaks appear, reapply the waterproofing and re-test.
Finish with a High-Quality Sealant
Once the liquid membrane has cured completely, apply a bead of silicone sealant along all edges, joints, and interfaces to accommodate movement and prevent cracks. This final barrier acts like the caulking around a bathtub—the seal that keeps water where it should be.
Remember, proper sealing doesn’t end with application. Regular inspections and maintenance, especially after cleaning or remodeling, help catch small issues before they escalate into costly repairs. For more insights on bathroom longevity, check out this comprehensive guide. Consistent diligence ensures your shower bench remains a beautiful, dry feature for years to come.
When it comes to renovation projects like flooring, shower upgrades, and baseboard installation, many homeowners and even seasoned contractors fall for oversimplified advice that can lead to costly mistakes. Let’s cut through the fluff and explore some of the most misunderstood concepts and hidden pitfalls that can sabotage your results.
One widespread myth is that leveling subfloors is always a matter of adding a self-leveling compound. In reality, as highlighted in expert discussions on [flooring installation mistakes](https://tilecraftsmens.com/flooring-installation-mistakes-to-avoid-for-a-seamless-look), understanding the moisture content and structural integrity of your subfloor is crucial before any leveling. Skipping these steps can cause uneven surfaces, leading to squeaks and cracks over time.
Concerning showers, many assume that applying waterproof membranes is a one-and-done task. But experienced installers know that the choice and application of these membranes, such as liquid versus sheet membranes, affects the longevity of the waterproofing layer. For instance, improperly overlapping or failing to seal seams can invite leaks that compromise the entire shower structure. For advanced tips, see [shower repairs for longevity](https://tilecraftsmens.com/shower-repairs-when-to-fix-vs-replace-for-longevity).
Baseboards often get a bad rap for being decorative, but the hidden nuance lies in their attachment methods. Naively nailing baseboards without pre-drilling on uneven walls or neglecting to use shims can lead to gaps, gaps that are hard to fix later. An often-overlooked detail is the use of the reverse scribing technique, which helps achieve tight joints on irregular surfaces. Check out [baseboard tips for perfect fit](https://tilecraftsmens.com/baseboard-styles-that-elevate-your-interior-design) to avoid these pitfalls.
Now, you might wonder: How do advanced professionals account for these subtleties during installation? The answer lies in a meticulous, methodical approach—using proper tools, understanding materials’ properties, and applying proven techniques like moisture testing before flooring or sealing every joint in a shower. For dedicated insights into top installation methods, visit [elite flooring installation](https://tilecraftsmens.com/transform-your-flooring-top-trends-in-installation-for-2025).
Have you ever fallen into this trap? Let me know in the comments. Mastering these hidden nuances ensures your renovation not only looks good but endures the test of time, saving you money and stress in the long run.
Keep Your Renovations Working: Essential Tools and Maintenance Tips
Maintaining the quality and longevity of your flooring, showers, and baseboards requires the right tools and a proactive approach. One of my go-to instruments for ensuring flawless installations is a high-precision moisture meter. I personally rely on models like the Protimeter Aquant because it provides accurate readings of subfloor moisture content, helping me decide the best time to proceed with flooring or tiling. Using a moisture meter is crucial; installing over damp subfloors leads to issues like buckling or mold, which is why I always perform moisture assessments before laying down new materials. As technology advances, smart sensors integrated into our tools predict potential issues, making future trend predictions favor more automated, real-time diagnostics for ongoing maintenance.
Powerful cleaning tools extend your installations’ lifespan. Regularly cleaning and inspecting grout lines, sealant joints, and baseboards prevents buildup of debris and mold, especially in damp areas like showers. I recommend investing in a steam cleaner with adjustable nozzles—it cleans deep without harsh chemicals, safeguarding your investments.
How do I maintain installations over time?
Establishing a routine inspection schedule is key. For example, checking for cracks or gaps around baseboards and sealing them promptly can prevent water infiltration and deterioration. When I notice minor caulk cracks, I use a flexible silicone sealant compatible with existing materials, sealing gaps before they cause damage. For shower sealing, reapplying silicone every couple of years maintains a water-tight barrier. Consistent upkeep, coupled with high-quality sealants and sealant tools, ensures long-term performance. To learn about choosing the right sealant or to explore more advanced maintenance techniques, visit this guide on bathroom upgrades.
In addition, tracking the performance of materials over years helps determine future trends. For instance, modern liquid membrane solutions are becoming more flexible and durable, and I predict that integrating IoT devices for continuous monitoring could revolutionize maintenance strategies—alerting homeowners before issues arise.
Don’t forget to invest in quality tools tailored to your specific projects. For flooring, a rotating manual puller helps ensure tight seams; for showers, a silicone finishing gun guarantees smooth, even bead application. Practicing these techniques will make maintenance second nature, ultimately saving time and money while keeping your installations performing flawlessly.
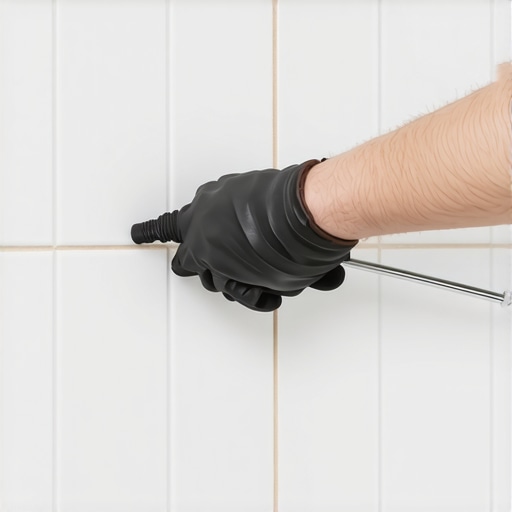
Remember, careful maintenance with the right equipment is the backbone of enduring craftsmanship. For advanced sealing techniques, consider trying the silicone-first method—it dramatically reduces leaks and extends the lifespan of your shower bench. Regularly updating your toolkit and schedule ensures your renovations keep looking and functioning like new for years to come.
What I Wish I Knew Before Sealing My Shower Bench
One of the toughest lessons I learned was that even a small oversight in sealing can lead to significant water damage over time. Proper application of liquid membranes and meticulous attention to seams have saved me countless headaches and repair costs. Trust me, rushing this step is the quickest way to regret your renovation choices.
How Cutting Corners Can Cost You Dearly
I once skipped a thorough moisture check before installing a new floor, thinking it was an unnecessary delay. That mistake resulted in buckling tiles and a need for rework, which could have been avoided with a simple moisture meter. Patience and proper prep are your best friends in renovation projects.
Secrets that Home Improvement Pros Keep Close
Affordable tools like high-quality silicone and a good curing test can make all the difference. I’ve found that investing in a reliable sealant gun and performing the water stress test before tiling ensures your waterproofing holds up under real-life conditions. These small steps have a disproportionate impact on long-term durability.
Resources that Elevated My Skills
My essential toolkit now includes a moisture meter from Protimeter, a professional-grade silicone, and a detailed installation guide from trusted sources like Tile Craftsmanship. These resources have improved my craftsmanship and confidence, helping me achieve results that last.
Push Yourself to Elevate Your Bathroom Game
Don’t let fear or uncertainty hold you back from creating a dry, durable, and beautiful shower space. Remember, every challenge is an opportunity to learn and improve. Your next project can be your best one yet—start with thorough planning, quality materials, and a mindset geared towards excellence.
Have you ever faced a leak that seemed minor but turned into a costly disaster? Share your story below—I’d love to hear how you handled it and what lessons you learned along the way.