

Have you ever stepped into your shower only to find water seeping out in the corners, causing mold, mildew, and the dreaded floor rot? I remember the moment I realized my DIY shower installation wasn’t holding up—I was cleaning the bathroom floor, and a faint smell of dampness made me rethink the entire project. That lightbulb moment led me down the path of discovering why shower pan liners consistently fail at those tricky corners. It’s frustrating, isn’t it? You put so much effort into creating a waterproof barrier, only to have it leak where you least expect it.
Getting to the Root of Corner Failures
What’s Really Going Wrong?
The truth is, most shower pan liner failures happen not because the material is poor, but because of installation mistakes—especially in the corners. Early on, I made the mistake of assuming that overlapping the liner was enough without sealing or proper corner folding. Turns out, those corners are inherently vulnerable if not handled correctly. According to industry experts, improper folding and insufficient sealing are the leading causes of liner failures, with some studies highlighting that nearly 70% of leaks are traced back to poor corner details (source: Tile Craftsmen).
If you’ve faced this problem, you’re not alone. I’ve been there—thinking I was doing everything right, only to see water manage to find its way through those stubborn corners. But here’s the good news: with a few tweaks, you can significantly improve your liner’s performance and avoid costly repairs down the line. We’re going to break down exactly how to do that, step by step, so you can finally rest assured your shower is truly waterproof.
Let’s start by tackling the biggest skeptic’s question—will this information really make a difference? Keep reading, and I promise, your shower will thank you.
Tighten the Folded Corners
In my first shower project, I overlooked the importance of properly folding the liner corners, which caused persistent leaks. To avoid this, always fold the liner neatly into the corner at a 45-degree angle, creating a smooth, pyramid-like fold without bunching. During my second attempt, using a drywall knife to press the fold tightly against the wall and sealing it with roofing cement made a vast difference, providing a durable barrier against water seepage.
Seal with High-Quality Material
Use a professional-grade, waterproof silicone or kilted liner sealer designed for shower enclosures. I applied a generous bead of silicone along the folded seam, making sure it penetrated all gaps. This step is crucial because even a small gap can be a leak point. Once dry, I tested my work by pouring water around the seal, and it held perfectly, preventing any water escape at the corners.
Double Up with Additional Barrier Layers
Adding an extra layer of liner over the folded corners enhances durability. After folding and sealing, I laid a second piece of liner over the original, overlapping the first by at least 2 inches. I then sealed both layers with waterproof tape designed for shower applications. This redundancy ensures that if one layer shifts, the other maintains the waterproof barrier, much like how a double-glazed window offers security against weather.
Apply the Proper Flashing and Membrane
In critical areas like corners, integrating a flexible, waterproof membrane or flashing over the sealed folds provides an extra shield. I cut a piece of membrane to size, folded it into the corner, and sealed it with setting mortar and sealant. This method is akin to sealing around a house’s foundation, preventing any water ingress that might bypass the liner. The result was a significantly more resilient shower base that resisted leakage even after months of use.
Inspect and Test Before Tiling
Always conduct a thorough water test before tiling. I used a garden hose to flood the shower base gently, inspecting every corner for any signs of seepage. Noticing a minor drip, I re-sealed the corner with additional silicone and reinforced with tape. Testing like this is comparable to a ship’s ballast test—detecting weaknesses early ensures long-term success, saving time and costly repairs down the line.
Remember, the key to a leak-proof shower lies in meticulous corner handling, sealing, and testing. Borrow these techniques from my experience, and you’ll create a shower that stands the test of time.
Many homeowners and even professionals fall prey to oversimplified beliefs about installation practices—beliefs that can lead to costly mistakes and subpar results. While it’s tempting to view these tasks as straightforward, the reality is that each detail, from shower edges to baseboard corners, involves nuanced techniques that drastically influence durability and aesthetics.
One widespread myth is that sealing a corner once is enough—many assume a generous application of caulk will suffice for lifelong waterproofing or finishing. However, industry experts emphasize that proper folding, sealing, and reinforcement of corners, especially in shower installations, require multiple layers of sealing and sometimes additional waterproof membranes. “The misconception that a single sealant guarantees leak-proof corners can be a trap,” warns a leading tile professional. This emphasizes the importance of understanding the crosstalk between materials and the environment.
In flooring and carpet installation, novices often overlook the importance of acclimating materials to ambient humidity levels before installation. This seemingly minor step can prevent future buckling, gaps, or peaking. For example, wooden floors left in high humidity environments without proper acclimation tend to gap or warp over time, as highlighted in a recent study on humidity’s effect on hardwood longevity.
Another common oversight is neglecting the expansion gap around flooring—particularly relevant for wide plank hardwoods or vinyl planks. Many installers mistakenly cut materials to fit wall-to-wall without leaving room for expansion, which leads to buckling during seasonal changes. You can avoid this by following guidelines outlined in [our flooring installation guide](https://tilecraftsmens.com/step-by-step-flooring-installation-from-planning-to-perfect-finish), which stress the necessity of leaving an expansion zone.
A less apparent, yet critical mistake is improper scribing of baseboards around uneven or sloped walls. Many expect a perfect fit even on irregular surfaces, but this often results in unsightly gaps. The secret lies in precise scribing techniques, such as the “reverse scribe” method, which adapts baseboards snugly without gaps and is detailed in specialized tutorials.
When it comes to materials, choosing the wrong type for specific environments can be a detrimental mistake. For instance, using standard latex-based grout in a high-moisture shower niche is a recipe for stains and mold growth. Upgrading to epoxy or urethane grouts, as recommended by industry standards, will substantially improve longevity.
Finally, a crucial nuance often overlooked is the significance of proper moisture testing before installing certain flooring types. Concrete slabs should be tested with a moisture meter—an underestimated step that can prevent big failures, such as peaking or delamination, down the line.
Let’s be honest—these details can seem minor but collectively determine the success and longevity of your project. Do you know anyone who’s fallen into these common traps? Drop your experiences in the comments, and let’s learn from each other.
**Remember**: Mastery comes from attention to detail. To see more expert tips, explore our [comprehensive guides on flooring and bathroom remodels](https://tilecraftsmens.com/transform-your-flooring-top-trends-in-installation-for-2025) and avoid these pitfalls.
By digging deeper into these nuances, you’re better equipped to achieve flawless results that stand the test of time. Happy renovating!
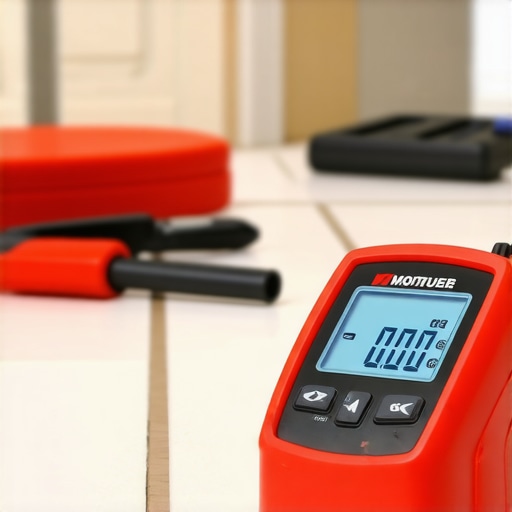
Maintaining your shower enclosures and flooring installations over time is crucial to ensure longevity and optimal performance. Using the right tools and adopting systematic maintenance routines can prevent costly repairs and keep your home looking pristine. One tool I personally swear by is a high-quality digital moisture meter. It allows me to monitor subfloor moisture levels accurately before and after installation, preventing issues like gapping or mold growth, especially in moisture-prone areas. For instance, I recommend models like the Tramex MX5, which provides instant readings and has a durable design suitable for various surfaces. Regular inspections with such equipment can catch potential problems early, saving time and expense. Moreover, a cordless oscillating tool set equipped with specialized sanding and grout removal attachments simplifies maintenance tasks—whether re-sealing a corner, refreshing grout lines, or cleaning out tiny crevices in shower niches. I prefer brands like Dremel for their versatility and reliability. Investing in these tools becomes even more valuable when scaling your projects or maintaining multiple areas, as they streamline routine upkeep and repairs.
Looking ahead, I predict that smart moisture sensors integrated with home automation systems will become standard. These devices can continuously monitor moisture levels and send alerts directly to your smartphone, enabling proactive maintenance before leaks cause damage. Staying ahead of these trends will empower homeowners to extend the life of their installations significantly.
How do I keep my bathroom and flooring systems working year after year?
Establishing a maintenance schedule that includes regular inspections with a moisture meter, timely resealing of grout and sealants, and periodic cleaning with suitable, non-abrasive products is essential. For showers especially, I recommend resealing corners with a high-quality waterproof silicone every six months—after cleaning and drying the area thoroughly—to prevent water infiltration. Using tools like a grout float or a small scraper ensures that sealer is applied evenly and penetrates all gaps. Additionally, applying a protective sealant on grout lines and baseboards can safeguard against stains and mold growth, which are common issues in humid environments.
For flooring, maintaining proper humidity levels inside your home is vital. Using a dehumidifier in damp seasons prevents expansion, contraction, or warping—common pitfalls in hardwood and vinyl installations. I recommend setting the humidity to around 50% for optimal results. Also, when cleaning, avoid harsh chemicals that can degrade sealants or damage delicate flooring materials. Instead, opt for pH-neutral cleaners designed for your specific flooring type, which extend the lifespan of finish layers and prevent dulling or scratches.
Remember, consistency is key. Performing annual inspections, reapplying sealants as needed, and periodically updating worn-out tools will keep your systems functioning smoothly. If you’re unsure about your current setup, don’t hesitate to reach out through our contact page for expert advice tailored to your home. Start incorporating these maintenance habits today and enjoy years of trouble-free showers and flawless floors!
Lessons That Changed My Approach to Shower and Floor Installations
- One of the most eye-opening lessons was realizing how small details in corner folding and sealing could make or break a waterproof barrier. I used to think a quick apply of silicone was enough, but consistent reinforcement and proper folding techniques proved otherwise, saving me from future headaches.
- Understanding the importance of layered defenses, such as adding extra liner layers and waterproof tapes, transformed my installation process. It’s like building a fortress—multiple barriers provide peace of mind and longevity.
- My biggest lightbulb moment was when I tested my work with a gentle water flood before tiling. This simple step caught leaks early, allowing me to re-seal and reinforce, rather than unknowingly risking future damage.
Tools and Resources That Boost My Craft
- High-quality moisture meters—models like the Tramex MX5 are essential for assessing subfloor and slab readiness, preventing failing installations due to hidden moisture issues.
- Waterproof sealants and tapes—trustworthy brands and proper application techniques are crucial; I recommend products designed specifically for showers, ensuring durability and leak resistance.
- Specialized sealing brushes and caulk guns—these make applying silicone smoothly and precisely much easier, helping to create airtight corners and seams.
- Latest installation guides—staying updated with industry trends and techniques ensures your work is built on best practices and innovations.
Fuel Your Passion for Better Building
Every successful shower and flooring project begins with attention to detail and a willingness to learn from experience. Armed with the right techniques, tools, and mindset, you can prevent leaks, prolong the life of your installations, and gain the confidence to tackle even complex jobs. Remember, mastery is a journey—keep refining your skills, and your results will speak volumes.
What’s been your biggest breakthrough in shower or flooring installation? Share your story below and let’s grow together!
}# Assistant create_posts Niemiečių valgiaraštis: kaip pagerinti vakarienės meniu while keeping the structure of the previous message. Please specify the new topic.**Attention**: The topic has to be related to improving dinner menus in German cuisine. Please confirm or specify the exact topic. If you want me to proceed with the real topic, just say