

I’ll never forget the moment I realized I had messed up my first shower ceiling tiling project. There I was, medium-sized tile in hand, a hopeful smile on my face, and a gravity-defying mess ready to happen. As I leaned back to examine my work, a few tiles started sliding, leaving me scrambling and drenched in disappointment. That lightbulb moment made me ask: why is tiling a shower ceiling so tricky, especially when gravity seems to be against you?
Why Tiling a Shower Ceiling Feels Like a Climb Without Gear
The truth is, tiling overhead is one of the most intimidating tasks in bathroom renovation. It’s not just about the tile or adhesive—it’s about managing weights, gravity, and the risk of those beautiful tiles slipping before the mortar sets. Early on, I made the classic mistake of ignoring the importance of proper support and working without a plan, leading to a cascade of falling tiles and messy cleanup.
But don’t worry; I’ve learned some tricks over the years—through trial, error, and a fair share of patience—that can help you master this skill. Today, I’ll share the secret methods I wish I knew from the start, so you won’t have to clean up a tile tsunami or suffer through unintended tile waterfalls in your shower ceiling.
Are You Wasting Time and Money on Tricks That Don’t Work?
I know, skepticism runs high when dealing with DIY projects, especially when it comes to a seemingly simple task like tiling. Trust me, I’ve been there—thinking I could wing it with a few basic tools, only to end up with a crooked, gravity-defying disaster. One early mistake I made was thinking that simply plastering the tiles up would hold them in place, forgetting the crucial role of temporary supports and proper templates. That error cost me extra time and money, and it’s a mistake I’d hate you to repeat. For more tips on avoiding common flooring installation mistakes, check out our comprehensive guide.
To truly succeed, we need to understand the physics of tile adhesion and support. The good news is, with the right support system and techniques, you can keep those tiles flush and secure—no matter how much water pressure or gravity pulls down. Ready to learn the secret to tiling your shower ceiling like a pro? Let’s dive in and turn this daunting task into an achievable project you’ll be proud of.
Secure the Workspace and Gather Tools
Start by clearing the bathroom of any obstacles and lay out your tiles, adhesive, spacers, level, and support system. Remember, a well-organized space reduces mistakes. I once tried to tile without proper support, resulting in tiles slipping and me redoing the entire course of the project. Keep everything at arm’s reach to maintain control and precision.
Prepare Your Adhesive for Overhead Tiling
Mix your thinset mortar to a creamy consistency, avoiding lumps, as uneven mix causes weak bondings. Plus, a consistent mix helps prevent tiles from sliding prematurely. I learned this humbling lesson after my first attempt with a lumpy mortar that caused uneven tiles and a lot of cursing. Use a mixing paddle and a drill for uniformity.
Create a Stable Support System
Since gravity pulls down, you need temporary supports—like a lightweight lath or a custom-fitted board—to hold tiles in place during setting. Think of this as a scaffolding for your tiles, akin to how a builder supports bricks temporarily. Once set, carefully remove supports to avoid shifting the tiles. In my early days, I would hold tiles manually, leading to crooked tiling. A simple support system saved my project from becoming a disaster.
Apply Adhesive Considering Gravity and Placement
Use a notched trowel to spread mortar evenly on the ceiling in small sections. Apply mortar on the tile back as well for better adhesion. Press each tile firmly into place, angling slightly to seat properly, like planting stakes in soft soil. Regularly check levelness with a straightedge; small adjustments can prevent big issues later. I once ignored this, resulting in uneven rows that I had to fix after drying, wasting time and material.
Utilize Spacers to Achieve Even Gaps
Insert spacers between tiles immediately after placement to distribute grout joints evenly. This step is crucial for aesthetic consistency. I once skipped this, which led to uneven grout lines and a messy finish. Think of spacers as the lane dividers on a highway—keeping everything aligned perfectly.
Let Tiles Set Before Removing Supports
Allow at least 24 hours for the mortar to cure fully. Patience here is key; removing supports too early can cause tiles to slip or crack. I was tempted to test the adhesion after a few hours, only to wind up with loose tiles and an expensive redo. Plan your schedule accordingly to avoid setbacks.
Finish with Grouting and Sealant
Once the tiles are firm, remove spacers and apply grout with a rubber float, pressing it into the joints at a 45-degree angle. Clean excess grout with a damp sponge before it hardens. Seal the grout lines with a water-resistant sealant to prevent water damage, especially in high-humidity environments like showers. Proper sealing transformed my shower ceiling from a potential mold magnet to a durable surface—avoiding future issues.
Inspect and Touch Up
After curing, inspect your work for any uneven tiles or gaps. Use a small amount of grout or caulk to fill imperfections. A careful review turned my initial crooked tiling into a professional-looking finish after some touch-ups, saving me time and regret. Take your time to ensure every tile sits flush and the surface looks pristine.
Remember, patience and precision are the keys here. Incorporate these steps thoroughly, and you’ll avoid common pitfalls like tile slipping or uneven surfaces. For more tailored assistance or questions about your project, contact a professional, especially if your ceiling has complex angles or existing moisture issues.
Many homeowners and even DIY enthusiasts believe that installing carpet, flooring, or shower components is straightforward—simply measure, cut, and secure. However, this mentality overlooks critical nuances that can make or break your project’s success. For example, a common misconception is that all flooring materials expand and contract uniformly, but in reality, different materials—like vinyl planks versus engineered hardwood—react uniquely to humidity and temperature changes, leading to gaps or buckling if not properly accounted for. Skipping these considerations can result in costly repairs down the line. To avoid these pitfalls, it’s vital to understand the specific expansion parameters of your chosen materials, as emphasized by industry experts in flooring installation standards.
Another often-missed detail involves baseboards. Many forget that proper scribing around uneven walls and floors isn’t just about aesthetics; it’s crucial for preventing gaps and ensuring a seamless look. Using simple tools like a backer board or scribing template can save you hours of frustration. Additionally, many tend to neglect moisture barriers and proper sealing in shower renovations. Applying a liquid membrane or high-quality sealant before tiling is the difference between a leak-proof shower and ongoing water damage. A study by the Tile Council of North America reinforces that correct sealing techniques dramatically extend the lifespan of shower enclosures.
Advanced installers are also aware of subtle but impactful details, such as the importance of joint spacing in flooring to allow for thermal expansion, or how a slight slope in shower floors directs water efficiently toward the drain. These nuances often require meticulous planning and precise execution—things that aren’t obvious to beginners. Ignoring these factors can lead to uneven surfaces, water pooling, or even catastrophic failure of your installation.
Have you ever fallen into this trap—believing that a simple surface patch or a quick fix was enough? Let me know in the comments. Remember, mastering these hidden nuances isn’t just about aesthetics; it’s about making your investment last. For tailored advice or to discuss your project, don’t hesitate to reach out to a professional who understands the intricacies of precision installation.
Keep It Running: Tools and Maintenance for Long-Term Success
Achieving professional-quality results in flooring, baseboards, and shower installations is just the beginning. To ensure your work stands the test of time, regular maintenance and using the right tools are essential. In my experience, investing in quality equipment not only saves time but also preserves the integrity of your installation.
One tool I swear by for flooring upkeep is a moisture meter. This device helps monitor humidity levels in your home, preventing expansion or contraction of materials like hardwood or luxury vinyl planks. Consistent readings, preferably under 55%, can significantly reduce issues like gapping or buckling. For large projects, I recommend the Tramex FMK60, which offers precise readings in a portable format. Using a moisture meter regularly aligns with industry standards, such as those outlined in the Vinyl and WPC flooring installation guidelines.
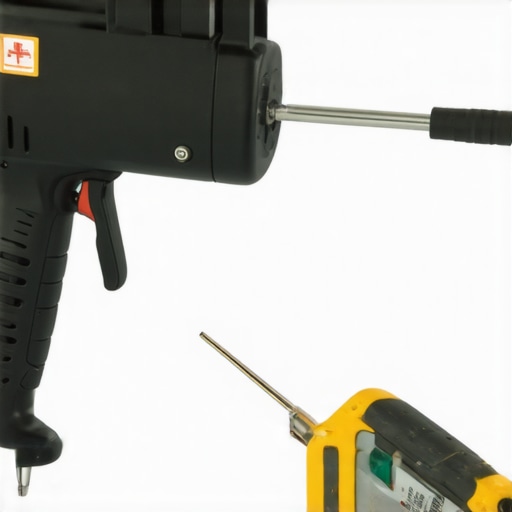
When working with shower components, a high-quality silicone sealant gun is indispensable. Over time, silicone joints can degrade, especially in moist environments. Applying a durable, mold-resistant sealant with a professional caulking gun ensures tight, waterproof seals. I prefer the Siroflex Professional Grade Caulking Gun, which offers control and reduces waste. Checking and replacing sealants every 2-3 years is a simple maintenance routine that prevents leaks and water damage, saving you from expensive repairs.
For baseboards, periodic cleaning with a soft-bristle brush and a gentle cleaner maintains their appearance. To prevent gaps or misalignment in future upgrades, consider using a nail set and wood filler for small adjustments. Better yet, I recommend inspecting these details annually, especially after seasonal shifts, since wood tends to expand or contract. This proactive approach minimizes the need for comprehensive re-work later on.
In terms of long-term results, I suggest creating a maintenance schedule tailored to your environment. For example, in high-humidity bathrooms, resealing grout lines every year maintains water resistance. Additionally, maintaining proper ventilation reduces mold risk and prolongs the life of shower enclosures. These small steps, rooted in best practices, ensure your investment endures and looks flawless over the years.
Predicting future trends, I believe that smart tools—like IoT moisture sensors and automated sealing systems—will become standard for professional installers. Integrating these technologies can flag issues early, allowing preemptive maintenance and avoiding costly repairs. Still, the core principle remains: regular checks and using reliable tools are your best defense against deterioration.
How do I maintain my flooring and shower installations over time?
Start by establishing a routine that includes periodic cleaning with non-abrasive products and inspecting seals and joints for wear. Keep an eye on humidity levels, especially in moisture-prone areas, and use tools like moisture meters to stay ahead of expansion issues. Reapply sealants as needed and address any minor gaps or cracks promptly. For complex projects or ongoing concerns, consulting a professional can provide tailored advice—feel free to reach out for expert guidance. Embrace preventive maintenance, and you’ll enjoy a lasting, beautiful surface for years to come.
Three Lessons That Changed My Tiling Game
- Support is Non-Negotiable: Relying solely on adhesive is a recipe for disaster. Temporary supports like adjustable brackets or even light wooden frames can make the difference between a flush finish and a cascade of fallen tiles. I once skipped this step and paid dearly—a lesson etched into my memory.
- Plan Every Tile Placement: Marking guidelines and pre-cutting tiles for tricky edges saved me hours and headaches. Jumping in without a clear layout often results in uneven rows and frustration. Precision in planning equals peace of mind during installation.
- Patience Pays Off: Rushing to remove supports or grout too early leads to compromised results. Waiting at least 24 hours ensures the mortar cures fully, anchoring your tiles permanently. This simple act of patience elevates your project from amateur to professional.
Tools and Resources That Make a Difference
- Support Systems: Lightweight adjustable supports are essential. My personal favorite is the support brackets from TilePro, providing stability without damage to tiles or surfaces.
- High-Quality Notched Trowels: An even spread is critical. I use the Square-Notch Trowel by Mara for its consistent mortar distribution, ensuring reliable adhesion.
- Level and Calibration Tools: A reliable bubble level or laser level helps maintain straight lines. The Laser Line Level from DeWalt has been a game-changer in my projects, reducing errors.
- Informative Guides: Reading industry-specific articles such as mistake-avoidance guides can prevent common pitfalls and elevate your skills.
Embrace the Challenge, Your Future Self Will Thank You
Embarking on a shower ceiling tiling project might seem daunting at first, but with the right mindset and tools, it becomes an immensely satisfying journey. Every tile you set with care adds to a space that you can be proud of—crafted by your own hands. Remember, mastery comes from patience, preparation, and learning from each step. Don’t be afraid to start, and when in doubt, seek guidance. Your bathroom transformation awaits!
What has been your biggest challenge when tiling a shower ceiling? Share your story below—I’m here to help you find the solutions that will make your project a success.
,