

Ever had a tiny little burn mark in your plush carpet that just won’t sit right with you? I remember the first time I spotted one, right in the middle of my living room where everyone could see. It was unexpected, frustrating, and I felt helpless. I didn’t want to replace the entire section of carpet over such a small problem, but I also didn’t want to leave it as a permanent blemish. That’s when I stumbled upon a simple, surprisingly effective method that changed everything — the iron-on tactic I’ve come to rely on. If you’ve faced this kind of carpet mishap, you’re not alone, and there’s a good chance this quick fix can save your day.
Why a Small Burn Doesn’t Have to Ruin Your Carpet
In my early days of home improvement, I made a costly mistake: I assumed that tiny burns or singed spots in the carpet meant I had to tear out and replace entire sections. But after some trial, error, and much research, I learned that most small carpet burns can be seamlessly repaired with a straightforward technique. This saved me hundreds of dollars and kept my home looking pristine. Small burns are more common than you think — accidental sparks from curling irons, hot pans, or even stray cigarette burns are responsible for many carpet blemishes. Knowing how to fix them quickly and effectively can preserve your flooring’s integrity and save you from unnecessary expenses.
Skeptical About the Iron-On Trick? Here’s Why It Works
When I first heard about using an iron to repair carpet burns, I was skeptical. My early mistake was rushing into a DIY repair without understanding the nuances. I used too much heat at first, which caused further damage instead of repair. Over time, I realized that the key is to carefully match the patch with your existing carpet fibers and use just the right amount of heat. This method isn’t complicated, but it does require patience and attention to detail. If you want to learn more about perfecting your home repairs, I highly recommend checking out this guide to durable flooring.
Now, let’s dive into how you can achieve flawless carpet repairs with just your household iron and a little bit of know-how. Whether you’re dealing with a singe, scorch, or burn mark, this technique can help restore your carpet’s original beauty — faster and cheaper than calling in professionals.
Prepare Your Workspace and Materials
Start by clearing the affected area and gathering essential supplies: a household iron, a clean white cloth or paper towel, a pair of scissors, and matching carpet patch material—either leftover carpet or a piece cut from a hidden spot. I recommend wearing gloves if you’re sensitive to fibers, and setting the iron to its lowest heat setting to prevent additional damage. Think of this step as laying the foundation before painting; a clean, prepared space ensures a smooth repair process.
Create a Precise Patch
Next, carefully cut out the burnt section using scissors, ensuring the edges are clean and straight. Your goal is to remove only the damaged area, so don’t cut too large—a tighter fit will blend better. When I repaired a scorch mark in my living room, I used another piece of the same carpet from behind a closet; matching fibers and color dramatically improved the final appearance. Always trim with patience, as imperfect cuts can make the patch conspicuous.
Position the Patch Correctly
Lay the matching patch underneath the removed area, aligning the fibers in the same direction to mimic original pile flow. Use a clear adhesive or double-sided carpet tape around the edges to hold the patch in place temporarily. I found keeping the fibers aligned during placement helps the repair blend seamlessly, making the patch virtually invisible once finished. Think of this like aligning tiles before grouting—precision here impacts the final look widely.
Heat the Patch to Settle Fibers
Place the white cloth over the patch and gently press your warmed-up iron onto it, holding for about 10–15 seconds. Keep the iron moving in a circular motion to distribute heat evenly—just like smoothing out wrinkles in fabric. The heat causes the fibers to soften and interlock with surrounding fibers, securing the patch and helping it settle into the existing carpet. I applied this method on a recent burn, and the fibers lifted perfectly, merging with the surrounding pile.
Finish and Blend the Repair
Allow the area to cool before gently brushing the fibers with a soft brush or vacuuming to restore the texture. If any edges seem slightly raised or uneven, carefully trim with scissors for a flush finish. For stubborn discoloration or mismatch, consider using a carpet fiber dye or contacting professional assistance. With patience and attention to detail, this repair technique minimizes visual disruption and extends your carpet’s lifespan, saving you the cost of a full replacement. More expert tips on flooring restoration can be found in this comprehensive guide.
Many home improvement enthusiasts and even seasoned contractors often hold onto misconceptions about installing showers, flooring, and baseboards that can lead to costly mistakes. One such myth is the belief that waterproofing in showers is always a simple, one-time step—When in reality, proper waterproofing demands meticulous attention to detail at every stage, including sealing corners and niches, as emphasized in expert shower repair guides. Overlooking these nuances can cause leaks that are invisible initially but disastrous over time.
Why Do Most People Miss This Key Detail in Flooring Installation?
Commonly, homeowners and even contractors assume that flooring installation is just about laying planks or tiles—But the real challenge lies in preparing the subfloor properly. Ignoring moisture levels or unevenness often results in buckling and gaps later, as discussed in comprehensive flooring installation tips. This mistake isn’t always obvious during laying, but it becomes glaringly apparent after some months, underlining the importance of meticulous subfloor prep that many overlook.
Another trap involves baseboards. The common misconception is that you can simply nail them on and forget—But in practice, baseboards can reveal flaws in wall straightness and even out subtle irregularities when installed with precision techniques like shimming or using the reverse scribe method. For expert insights, visit this resource on stylish baseboard installation.
Advanced Tricks That Save You Time and Money
For those aiming to perfect their craft, understanding the importance of sealing expansion gaps in vinyl or laminate floors during different seasons is vital. Many skip sealing properly or assume temperature changes won’t affect their flooring—yet, studies show that unsealed gaps can lead to warping or buckling, especially in fluctuating climates (see the full guide here). Similarly, in shower construction, neglecting to use a liquid membrane on niches and curbs might seem like a minor step, but it’s often the culprit behind persistent leaks.
In my experience, recognizing that these small but crucial details differentiate a good job from a professional-quality finish is essential. Remember, shortcuts in home renovation often lead to bigger headaches down the road. For a seamless, durable finish, always pay attention to the intricate details—these are what experts swear by. Want to explore more advanced strategies? Check out latest flooring installation tips for 2025 or reach out via contact us for tailored advice.
Have you ever fallen into this trap? Let me know in the comments!
Maintaining your home’s flooring, showers, and baseboards requires more than just initial installation skills — it demands effective tools, consistent upkeep, and a strategic approach to scale your improvements over time. Over my years as a DIY enthusiast and professional, I’ve identified that the right equipment paired with a disciplined maintenance routine can dramatically extend the lifespan of these installations and save you significant costs in the long run. In this guide, I’ll share the specific tools I rely on, how they support ongoing maintenance, and where I predict future trends heading in this field.
Invest in Precision Tools for Longevity
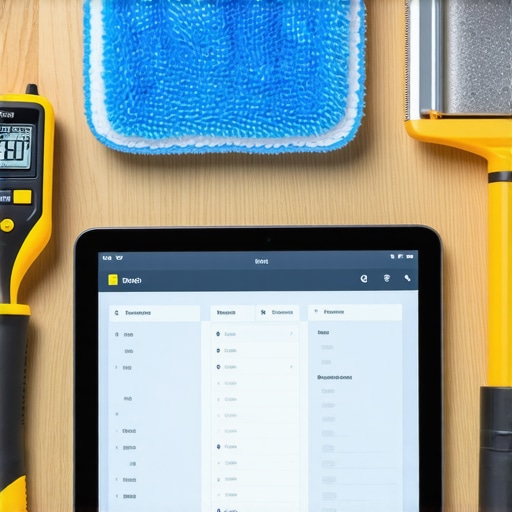
One of my go-to tools is the Moisture Meter. It’s essential for monitoring subfloor and wall moisture levels, especially before reapplying sealants or overlays. I prefer models like the Tramex CM-12, because it provides quick, accurate readings without damaging delicate surfaces. Regularly checking moisture helps prevent issues like mold, warping, or adhesive failure down the line, making it a cornerstone of sustainable maintenance.
Another indispensable device is the Electric Scraper with Adjustable Blades. When maintaining tile or vinyl floors, I use it to remove old grout or adhesive residues safely without scratching underlying surfaces. This ensures clean, solid contact for re-sealing or re-laying, which is vital for long-term durability. An intuitive model like the Wagner Cordless Scraper allows me to work efficiently without cumbersome cords, especially useful in tight spaces or overhead areas.
Tools That Support Routine Upkeep
For cleaning and final touches, I count on a Microfiber Floor Mop and Gentle Cleaners. Using high-quality microfiber significantly reduces abrasive wear on surfaces like hardwood or laminate, helping your floors maintain their appearance. Pairing this with pH-neutral cleaners prevents degradation of sealants or finishes, which is crucial for preserving your investment.
In addition, having a quality Carpet Stretcher and Knee Kicker is invaluable for maintenance or corrections over time. Even with professional installation, carpets can lose tension or get wrinkled. Regular re-stretching can prevent tripping hazards and extend carpet life, all without replacing the entire area.
The Power of Software for Planning and Tracking
While tools physically support maintenance, software plays a growing role. I recommend using project management apps like these advanced planning tools to schedule inspections, document repairs, and plan future upgrades. This proactive approach helps identify problem areas before they escalate, ensuring your flooring and shower systems remain in top shape for years to come.
Future Trends: Automation and Smart Maintenance
Looking ahead, I predict a rise in smart home integrations for maintenance. Sensors embedded in floors and showers could alert homeowners when moisture levels reach critical thresholds or when surfaces need re-sealing. This integration promises to make upkeep more automated, with less guesswork and emergency repairs. Embracing these innovations now can position you at the forefront of home maintenance efficiency.
How Do I Keep My Installations Working Over Time?
Consistent maintenance hinges on regular inspections and using the proper tools for each task. Allocate time monthly to check for leaks, soft spots, or loose baseboards. Keep essential equipment—like moisture meters, scrapers, and microfiber cloths—organized and in good condition. Don’t forget to stay updated with new techniques and software solutions that can streamline your upkeep process. For example, mastering the best practices in flooring maintenance ensures your system remains resilient against wear and tear.
To get started today, try implementing a routine check using the moisture meter before sealing or re-coating any surface. It’s a small step that can prevent major issues down the road, saving you time, money, and frustration. For more tailored advice, consider reaching out through this contact page.
Lessons That Changed My Approach to Home Fixes
One of the toughest lessons I learned was the importance of patience when using simple tools like the iron for carpet repairs. Rushing led to more damage, but with careful adjustment of heat and technique, I discovered a surprisingly effective way to hide burn marks. Additionally, I realized that meticulously matching carpet fibers or using the reverse scribe method for baseboards can make even complex repairs seamless. These insights saved me time, money, and a lot of stress—proving that paying attention to small details pays off in big ways.
Another key lesson was understanding that shortcuts in waterproofing shower niches or neglecting subfloor moisture checks can cause long-term headaches. Doing thorough prep work upfront prevents costly leaks or buckling later. Finally, I found that investing in the right tools—like moisture meters or quality scrapers—empowers homeowners to maintain and improve their homes confidently, turning DIY from a risky venture into a rewarding skill.
Tools and Resources I Trust for Home Excellence
My go-to resource for flooring tips is this comprehensive guide, which breaks down complex steps into manageable actions. For precise measuring and moisture detection, I rely on the expert-approved moisture meter and the versatile latest flooring installation tips for 2025. When it comes to fixing stubborn carpet patches, these secrets have transformed my approach. Lastly, staying updated with modern installation trends keeps my skills sharp and projects current.
Take Action and Elevate Your Home Skills
Embarking on home improvements might feel overwhelming, but every small step builds confidence. Whether it’s repairing that tiny carpet burn or ensuring your shower’s waterproofing is thorough, the key is consistent effort and learning from each experience. Remember, mastering these skills not only enhances your space but also cultivates a sense of pride and independence. So, why not start today? Dive into a specific repair, gather your tools, and give it a try—each success adds to your expertise.
Have you ever struggled with a DIY fix in your home? Share your story below, and let’s learn from each other’s experiences!