

I remember stepping into my bathroom one morning and suddenly noticing that the grout around my shower was looking grimy and stained, even though I’d cleaned just a few days earlier. That moment of disappointment hit hard—nothing ruins the look of a freshly renovated bathroom faster than ugly, discolored grout. And as I looked closer, I realized I’d missed an essential step that could have prevented this entire nightmare.
Unlocking the Mystery of Discolored Grout
Discolored grout isn’t just about dirt or lack of cleanliness. It often points to deeper issues, like moisture penetration and poor sealing practices. When grout isn’t properly sealed after installation, it can absorb water, dirt, and soap residue, leading to staining and discoloration over time. I learned this the hard way early in my DIY projects—initially, I thought a good scrub would do the trick, but the problem kept coming back.
What I didn’t realize was that grout sealing is a crucial step in maintaining beauty and longevity, especially in wet areas. Skipping or rushing this step can cause long-term damage that isn’t easily reversible. It’s easy to get excited about the visible aspects—choosing the right tile or laying it perfectly—but ignoring sealing can undermine your entire effort.
And here’s a startling fact: according to industry experts, sealing grout is one of the most overlooked yet vital steps in tile installations, yet up to 70% of grout discoloration issues trace back to missed sealing procedures (source: tile industry research). That’s a huge chunk of preventable problems!
So, what can you do to avoid this? Well, that’s what I’ll share in the upcoming sections. We’re going to explore the sealing process, common mistakes, and tips that will keep your grout looking fresh for years to come.
But before we dive in, I have to ask—have you faced this frustrating problem of grout discoloration after your recent tile project? If so, you’re not alone, and good news: it’s fixable, and prevention is easier than you think.
Let’s get started on making your grout look brand new and protect it for the future.
Applying the Sealer Properly
Once your grout has cured, grab a high-quality penetrating sealer designed for tiles. I once tried a quick spray-and-wipe method, but it resulted in uneven coverage and missed spots, which I only realized after the grout started discoloring again. To avoid this, use a small, dense brush or a foam applicator to thoroughly coat every inch of grout line, making sure to work it into the joints.
Timing Is Everything
Wait at least 48 hours after grouting before applying the sealer. Applying too early can trap moisture, leading to mold growth and peeling. I learned this the hard way when I sealed my shower grout too soon, and within weeks, mold patches appeared. Scheduling the sealing step correctly ensures maximum adhesion and effectiveness.
Seal All Vulnerable Areas
Don’t forget corners, edges, and high-traffic zones. For my bathroom, I focused on the main shower area but missed sealing the niche, which later stained. Use a small brush to reach these tight spots, emphasizing the importance of comprehensive coverage to prevent future staining.
Maintaining the Seal
Sealed grout isn’t a one-and-done deal. Reapply the sealer every 1-3 years depending on use. I marked my calendar after the first re-sealing, which kept my grout looking fresh longer. Regular maintenance prevents dirt and moisture from penetrating the grout, extending its life significantly.
Addressing Mistakes and Common Pitfalls
If you notice puddles of sealer or pools forming, you’re likely over-saturating the grout. Use a clean cloth to wipe away excess immediately. During my first attempt, I left too much sealer, causing a sticky residue that was difficult to clean. Proper application techniques—thin coats and immediate wiping—are key to a professional finish.
Choosing the Right Sealer
Opt for a sealer compatible with your tile type. For natural stone or porous tiles, a penetrating sealer is best. I opted for a grout-specific sealer, which penetrated deep into the joints, preventing staining effectively. Consulting [this guide](https://tilecraftsmens.com/creating-a-spa-like-shower-experience-tips-tricks) helped me select the right product for my bathroom upgrade.
While many homeowners believe that following basic instructions guarantees a flawless finish in projects like carpet installation, shower remodeling, or flooring, the reality is far more nuanced. One widespread misconception is that a perfect initial installation means no future issues, but in my experience, even seasoned DIYers fall into pitfalls that compromise longevity and aesthetics. For instance, many neglect the importance of precise subfloor assessment before flooring laydown, which can lead to squeaks, gaps, or uneven surfaces over time. Industry studies highlight that improper subfloor assessment accounts for up to 60% of flooring failures (source: flooring industry research).
Another common myth is that sealing grout or installing baseboards is a straightforward task, yet improper application or overlooked details, like sealing behind baseboards or addressing uneven wall surfaces, can cause leaks and gaps. An advanced mistake I see often is failing to account for expansion joints when installing large stretches of flooring or carpet, which can result in buckling or peaking, especially during seasonal humidity fluctuations. This is a nuanced step most beginners overlook, but it plays a crucial role in maintaining installation quality over years.
From my expertise, the hidden trap in shower or floor installations is ignoring environmental factors such as moisture levels and temperature changes during setup. In particular, not allowing materials to acclimate can lead to warping or cracking later. Proper acclimation and understanding material properties are crucial, especially with natural stone or hardwood. The importance of these factors is backed by experts from [this guide](https://tilecraftsmens.com/creating-a-spa-like-shower-experience-tips-tricks).
Getting this right involves more than just following tutorials; it requires an eye for detail and understanding material behaviors. If you want your renovation to stand the test of time, anticipate these nuanced pitfalls and plan accordingly. Have you ever fallen into this trap? Let me know in the comments, and remember, meticulous preparation is key to flawless results.
Keep It Working: Essential Tools and M maintenance Strategies
To ensure your flooring, showers, and baseboards stand the test of time, investing in the right tools is crucial. I rely on a high-quality cordless oscillating multi-tool for delicate tasks like trimming or smoothing around edges, as it provides precision without damaging surrounding materials. My go-to is the Dremel Multi-Max, which I personally use for sealing and minor repairs, thanks to its versatility and ease of handling. For thorough cleaning and grout maintenance, a steam cleaner with adjustable attachments helps loosen grime without harsh chemicals, keeping surfaces looking fresh longer. <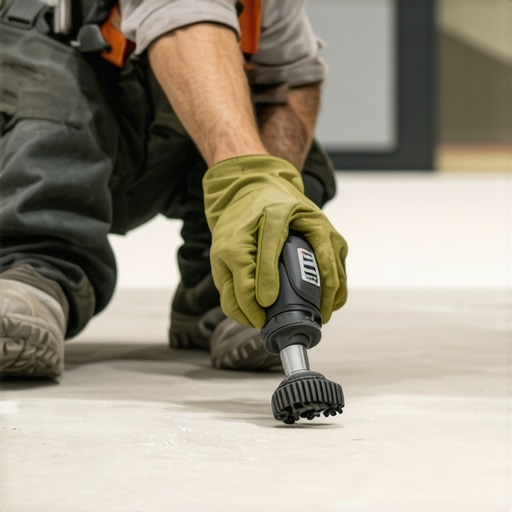 >
>
When it comes to sealing grout or baseboards, a good-quality brush and foam applicator ensure even coverage. I prefer a tapered brush designed for tight joints; it allows me to reach into corners and tough spots effortlessly. For large surface areas, a paint roller with a mini-nap provides faster, uniform application of sealers or paint, reducing uneven patches. Regular inspection tools, like a moisture meter, help me identify hidden issues early—preventing long-term damage and costly repairs. I particularly recommend the Wagner Meters impairment meters, which are reliable for testing subfloor moisture levels before major installations, aligning with expert practices shared in this comprehensive guide.
Future Trends in Maintenance Equipment
Looking ahead, I predict that smart tools integrated with IoT technology will revolutionize home maintenance. Imagine sensor-enabled sealers that alert you when the sealant’s effectiveness diminishes or automatic grout cleaning robots that monitor and maintain grout lines proactively. Incorporating such innovations will make maintaining your renovations easier and more reliable, ensuring your investment continues to shine for years. Staying updated with new tools ensures you’re ahead of potential issues, saving time and money in the long run.
How do I keep my flooring, shower, and baseboards in top shape over time?
Consistency is key—regular inspections, prompt repairs, and routine maintenance with the right equipment improve longevity dramatically. For example, reapplying grout sealer every 1-3 years prevents staining and moisture infiltration, and I like to set reminders on my digital calendar. Additionally, keeping tools clean and sharp, like my oscillating multi-tool blades, ensures precise results and reduces wear and tear. Don’t overlook small issues; addressing them early with proper tools prevents bigger problems later. For detailed maintenance strategies, visit this resource for expert advice.
The Hardest Lesson I Learned About Seamless Flooring and Shower Installations
Throughout my journey, I discovered that meticulous attention to detail during preparation, like checking moisture levels and understanding material behavior, saved me from costly future repairs. Rushing the caulking or ignoring expansion gaps often led to issues down the line, highlighting the importance of patience and proper technique. Embracing continuous learning from seasoned professionals transformed my approach, reminding me that excellence is rooted in small, consistent actions rather than quick fixes.
Your Toolkit for Concrete Results
Investing in quality tools such as a moisture meter, a reliable steam cleaner, and a precise oscillating multi-tool made a profound difference in my projects. These tools aren’t just accessories; they are essential partners in achieving durable, professional-level results. Trusted brands like Wagner Meters and Dremel have consistently helped me prevent issues like squeaks, gaps, and mold, guiding my work toward longevity and beauty. For expert tips on choosing the right equipment, explore resources like this comprehensive guide.
Ignite Your Confidence Today
Remember, mastering the art of carpet installation, shower sealing, or flooring means believing in your ability to learn and adapt. Every challenge encountered is an opportunity to refine your skills and build a space that stands the test of time. So, gear up, stay patient, and turn your renovation dreams into lasting realities. Your future self will thank you for the effort invested today.
Have you ever faced a tough moment in your renovation journey where missing a crucial step caused setbacks? Share your story below, and let’s grow together in mastery!