

I remember the first time I tried to tile my shower stall. I was all excited, thinking I’d nail the layout on my own. But as I laid out the tiles, I noticed something was off — the tiles near the center looked a little uneven, and I had to squint to see it. Turns out, I was *almost* there, but just slightly misaligned. That small mistake can turn a sleek, professional-looking shower into a DIY project that screams ‘homemade.’
That lightbulb moment led me to a simple but powerful technique — the tape-measure trick — which helps keep those pesky tiles perfectly centered without complicated calculations or tedious trial-and-error. If you’ve ever faced similar frustration, you’re in the right place. Today, we’re going to conquer this common challenge and get your shower tiles looking flawless, every single time.
Why Centering Tile Matters More Than You Think
Perfectly centered tiles aren’t just about aesthetics; they make a big difference in the overall look of your shower. Misaligned tiles can be glaringly obvious and may even cause uneven grout lines that are tough to correct later. Plus, a centered layout ensures your shower looks balanced and professional — no matter how amateur your skills may be.
The good news is, mastering this trick doesn’t require fancy tools or years of experience. It’s about understanding a simple principle and applying it with some clever tape and measurement strategies. This helps you avoid mistakes like uneven grout lines or tiles that drift off-center as you go, which can be a real pain to fix once grout has set.
But here’s a question I hear all the time: Is this tape-measure method really worth the effort? Believe me, I’ve made mistakes early on — like positioning tiles based on visual guesswork or relying solely on the edge of the shower wall — and paid the price. Those errors not only cost time but also added extra steps to correct. As I learned, precise measurement is the key to a smooth, worry-free installation. For a detailed look at common installation errors and how to dodge them, check out this article on installation mistakes.
Now, if you’re ready to take your shower tiling to the next level, let’s get into the practical steps that will help you position your tiles just right, every time. No more frustration, no more guesswork — just beautiful, perfectly centered tiling.
Set Up Your Reference Points
Start by measuring the width of the wall from the center point to each side, marking these on the surface with light pencil lines. Think of this as drawing the roadmap for your tiles — it keeps everything aligned. For example, measure from the center of the shower wall to the corners and mark these points clearly. This ensures your tiles are centered and balanced, avoiding that awkward half-tile near the edge. As I did on my first project, I used masking tape to mark these measurements, which I later removed without smudging the paint or leaving residue.
Apply the Tape-Measure Technique
Next, position a strip of painter’s tape along the wall, aligning it precisely with one of your marked reference points. Use a tape measure to double-check the distance, ensuring the tape runs exactly from the center to the edge, mimicking the layout of the tiles. I recall when I applied this in my bathroom, I adjusted the tape carefully and checked my measurements multiple times — the result was a perfectly centered tile pattern without any guesswork.
Create Visual Guides
Once the tape is in place, run a pencil or a chalk line along the tape to create a visual guide. This line acts as an extra reference for your tile layout, especially useful when working on larger surfaces. Imagine it like drawing the highway lanes before laying down roads — it keeps everything straight. I used a light pencil line and found it incredibly helpful for keeping my tiles aligned throughout the installation.
Lay Out the Tiles Before Applying Thinset
Before sticking tiles permanently, dry-lay a few rows following your reference lines to check the layout. This is similar to test-fitting furniture before committing to the placement — it saves time and avoids mistakes. When I tried this step, I noticed a slight misalignment early on, allowing me to adjust my measurements before it became a grout issue. This dry-run not only boosts confidence but also minimizes tile cuts and rework.
Adjust and Confirm as You Go
Throughout the process, use your tape measure to periodically verify that your tiles stay centered, especially when working around cuts or obstacles like fixtures. Think of it as steering a bicycle: constant minor corrections keep you on track. During my project, I found that checking measurements every few rows kept everything flush and aligned, preventing small deviations from turning into noticeable tiling errors.
Finish with Precision
Once the tiles are set and dried, remove your guide tapes and check your measurements one last time. If needed, make minor adjustments with grout or caulk to perfect the look. This final check is like tuning a musical instrument — it ensures everything plays harmoniously. My experience taught me that attention to these details makes the difference between a DIY attempt and professional-quality results.
Many homeowners assume that flooring, baseboards, and shower installations are straightforward tasks, but seasoned pros know there’s a lot more beneath the surface. A common myth is that perfect results depend solely on the right tools, but in reality, understanding the nuanced details—like proper moisture management, precise measurements, and even the quality of materials—can make or break your project. For instance, did you know that improper subfloor preparation often leads to tiles cracking or carpet wrinkles down the line? This detail is frequently overlooked by DIYers who focus only on the visible finish, leading to costly repairs later.
Why do so many still miss the mark with shower sealing?
Many believe that applying sealant once is enough, but expert installers stress that re-sealing and inspecting for gaps periodically can prevent leaks and water damage. A study by the Building Research Establishment Worldwide highlights that water intrusion is a leading cause of mold and structural issues, emphasizing the importance of meticulous sealing and maintenance. Implementing such advanced techniques saves you from ‘oops’ moments like soggy walls or hidden mold growth.
Furthermore, the misconception that baseboards are just decorative ignores their role in managing expansion gaps and hiding uneven walls. In my experience, neglecting this detail can result in cracked paint or gaps over time. To get a comprehensive look at elevating your interior with simple updates, check out this guide on baseboard upgrades.
Another trap to watch out for involves flooring transitions, which are often treated as minor details. However, mismatched heights or improper transition strips can lead to tripping hazards and aesthetic disconnects. Mastering the subtle art of seamless transitions, especially when combining different flooring types, requires a keen eye and understanding of expansion principles. Don’t forget that proper planning during the initial stages can save you from hefty rework later.
When it comes to showers, many underestimate the importance of slope and waterproofing layers. The mistake of skipping or poorly installing the pre-slope can cause water pooling and eventually, the dreaded mold problem. Installing a shower correctly involves more than just tiling; it’s about understanding how water flows and ensuring the base directs it safely out. For in-depth tips and tricks on these critical aspects, explore this comprehensive shower renovation guide.
So, the key takeaway here? Precision, attention to detail, and understanding the hidden nuances are what distinguish a professional finish from a do-it-yourself patchwork. These insights aren’t just for pros—by recognizing common pitfalls and advanced techniques, you can elevate your home projects from average to exceptional. Remember, the devil is in the details. Have you ever fallen into this trap? Let me know in the comments.
Maintaining your home improvement projects, from carpet installations to shower refurbishments, is key to ensuring their longevity and consistent appeal. Over years of hands-on experience, I’ve found that selecting the right tools and adopting effective maintenance routines can save you time, money, and frustration. Let’s dive into some specific equipment and methods that I personally rely on to keep everything working smoothly.
Invest in a Quality Wet Tile Saw for Precision Cuts
If you’re installing tiles in your bathroom or kitchen, a high-quality wet tile saw isn’t just a luxury—it’s a necessity. I personally prefer models with a durable diamond blade that offers clean, accurate cuts, reducing the need for rework. Brands like MK Diamond or Target Tile Saw provide reliable performance for years of projects. Regularly checking the blade for wear and keeping it properly lubricated ensures consistent results. As noted in this technical resource, maintaining your blade sharp prevents chipping and extends its lifespan.
Use an Oscillating Tool for Detail Maintenance
An oscillating multi-tool has become my go-to for tasks like grout removal, silicone resealing, or smoothing out uneven baseboard edges. Its versatility allows me to tackle repairs without damaging surrounding surfaces. Keeping blades sharp and replacing them periodically ensures efficiency. This tool helps catch minor issues early—like small cracks or gaps—in shower niches or around baseboards, preventing bigger problems down the line.
Implement a Regular Inspection Routine
Visually inspecting your flooring, baseboards, and showers every six months helps spot issues before they escalate. I recommend checking for signs of water intrusion, loose tiles, or gaps in caulking. For example, periodically re-sealing shower corners with high-grade silicone sealant can prevent leaks and mold growth. Remember, sealants like 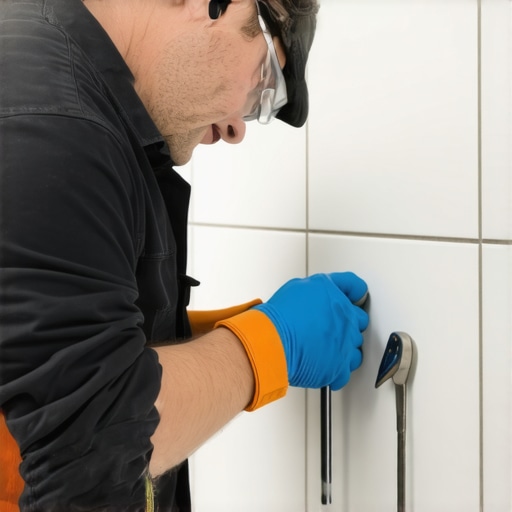 are best applied with a quality caulking gun, and tools like a plastic squeegee help achieve smooth, professional finishes. Reapplying sealant every 1-2 years based on visible wear is a simple way to prolong your shower’s lifespan. For detailed guidance on sealing and repairs, explore this comprehensive article.
The Future of Home Maintenance: Smart Technology
Looking ahead, integrated smart sensors and IoT devices are set to revolutionize home upkeep. Moisture sensors in showers or beneath flooring can alert you to leaks before visible damage occurs, aligning with the trend of proactive maintenance. While currently a premium option, these innovations promise to make long-term upkeep more manageable and less reactive.
How do I maintain my home’s flooring and showers over time?
The key is consistent care combined with quality tools. Regularly cleaning grout lines with specialized brushes, inspecting sealants, and addressing minor damages promptly preserves the integrity of your installations. Also, investing in a moisture meter can inform you when subflooring or behind-the-wall areas require attention, preventing expensive repairs in the future. Implementing these steps will help your home look great and function flawlessly for years to come. Want to make your maintenance routine even more effective? Try scheduling semi-annual inspections using a simple checklist and ensure you have the right tools, like a utility knife, caulk gun, and moisture meter, on hand. Your future self will thank you for it.
The Hardest Lesson I Learned About Tile and Floor Precision
One of the most valuable insights I gained was realizing that even the slightest mismeasurement can double your workload later. I once thought I could eyeball my tile placements, only to find out that those tiny errors compounded into uneven grout lines and an uneven finish. That experience hammered home the importance of meticulous measurement and patience, especially with critical aspects like shower slopes and tile layouts. It turns out that embracing precision at every step not only saves time but elevates your craftsmanship to a near-professional level.
What I Wish I Knew About Sealing and Long-Term Maintenance
Early in my projects, I underestimated how crucial proper sealing and regular inspections are to prevent leaks and mold. Skipping re-sealing or ignoring small cracks allowed water to seep behind tiles, causing damage that was costly and time-consuming to repair. Now, I see that investing in high-quality sealants and establishing routine inspection routines significantly prolongs your installations’ lifespan. Rethinking maintenance as an ongoing process, rather than a once-and-done task, truly makes a difference in the durability of your work.
My Top Tools That Make DIY Tiling and Flooring Easier
Over the years, I’ve come to rely heavily on specific tools that simplify complex tasks. A dependable wet tile saw ensures precise cuts, reducing waste and rework. An oscillating multi-tool is invaluable for detailed adjustments around fixtures and edges. Additionally, a moisture meter helps diagnose subfloor issues before they become disasters, and a quality caulking gun makes sealing seamless and professional-looking. These tools, paired with patience and careful planning, have transformed my approach from tentative to confident. For tips on selecting the right equipment, check out this resource on flooring installation.
Believe in the Power of Small Details for Big Results
One of the most inspiring lessons I learned is that paying attention to small details—like the direction of grout lines, the alignment of baseboards, or the slope of a shower pan—can make or break a project’s overall look and longevity. These nuances might seem insignificant during the initial install but become glaring issues if overlooked. Developing a habit of double-checking measurements and visual alignments fosters a sense of pride and results that truly stand out. Remember, masterful craftsmanship is often about the details you tend to when no one is watching.
Where to Go from Here
If you’re feeling motivated to elevate your home improvement skills, start by investing in quality tools and dedicating time to learning advanced techniques. Explore comprehensive guides on carpet and flooring installation to refine your foundation skills, or check out shower renovation tips for expert insights. Remember, every project is an opportunity to learn, improve, and create spaces you’ll be proud of. Don’t shy away from challenges—they’re the stepping stones to mastery.
Have you ever overlooked a small detail that caused big problems later? Share your stories below, and let’s learn from each other’s experiences!