

Ever tried to install baseboards on a tiled surface and ended up with stubborn, uneven seams that made you want to throw in the towel? I remember the first time I attempted it—thinking I could just nail straight through the tile like I would with drywall. Spoiler: it was a disaster. Not only did I crack a tile or two, but the finished look was far from polished. That lightbulb moment led me to discover a simple but game-changing secret: installing baseboards without nails, right on top of tile.
Today, I want to share this personal eye-opener and show you how this approach can save you time, prevent damage, and give your space a sleek, professional finish. If you’ve ever felt frustrated by baseboard gaps or the hassle of chiseling into tile framing, trust me—this method is a game-changer.
Why Traditional Nail-Through-Tile Methods Fall Flat
The conventional approach—driving nails directly into the tile or the underlying wall—may seem straightforward. But the reality is, tiles are brittle. Applying force with a hammer or nailer risks cracking those beautiful, shiny surfaces you worked so hard to perfect. Plus, even if you manage to nail in without cracking, subsequent filling and painting can be a nightmare, leading to uneven surfaces and visible gaps.
Early in my own projects, I made the mistake of ignoring the unique properties of tile. I thought thicker nails and aggressive taping would do the trick. But cracks appeared, and I was left with extra touch-ups that ate up my weekend. That experience motivated me to look for better solutions—solutions that do not involve destroying the tile.
Interestingly, many professional installers now advocate for methods that skip nails altogether when attaching baseboards to tile. According to industry expert advice, this not only preserves your tile but also creates a cleaner, more consistent finish. Learn more about modern shower enclosures [here](https://tilecraftsmens.com/shower-enclosures-101-expert-tips-for-modern-bathroom-makeovers), which, like baseboard installation, benefit from the right techniques.
So, what exactly is this ‘nail-less’ secret? Well, it involves a few simple tools and techniques that allow you to secure the baseboard without harming your tile. Curious? Let’s explore how you can master this approach and elevate your home projects.
Gather Your Tools and Materials
Start by collecting a high-quality construction adhesive suitable for your surface, a power caulking gun, a firm rubber mallet, and painter’s tape. I remember my first time, I underestimated the power of good adhesives and ended up with loose baseboards. The right materials make all the difference.
Prepare the Surface and Measure Precisely
Ensure your tile edges are clean, dry, and free from dust. Use a tape measure to mark your baseboard lengths, accounting for the wall’s irregularities. I once estimated lengths on the fly, only to find gaps after installation. Accurate measurements save time and frustration.
Apply Adhesive Strategically
Run a continuous bead of adhesive along the backside of the baseboard, focusing on the top edge and ends. Think of it as making a glue ‘sandwich’—the adhesive holds everything tight without the need for nails. I experimented with excessive glue, which caused some sagging; less is more here.
Position and Secure the Baseboards
Place the baseboard against the wall, aligning it carefully. Use painter’s tape to hold it in place temporarily. If you’re dealing with uneven walls or tile, gently tap the baseboard with a rubber mallet to settle it into place. I learned early that gentle taps prevent surface damage and help seat the board firmly.
Check for Gaps and Adjust
Verify the fit along its entire length. For tight corners or irregularities, scribe the back of the baseboard with a pencil and a flexible straightedge, then cut accordingly. I once forced a fitting that caused paint chipping—precision avoids this issue.
Final Securing and Curing
Once in position, hold the baseboard with painter’s tape for at least 24 hours to ensure the adhesive sets properly. Avoid moving the board during this time. This patience pays off, as I initially tried to adjust too soon, ruining the cohesion.
Finish with Caulk and Paint
After the adhesive has cured, run a bead of paintable caulk along the top edge to fill any minor gaps. Smooth it with a damp finger or caulk tool for a seamless look. Painting over the caulk creates a professional finish and disguises any imperfections—trust me, it elevates the entire project.
Enhance Your Technique
If you want extra support, consider using hidden spacers during installation. For large runs, support the baseboards at intervals with brackets or clips designed for that purpose. This method helps prevent bowing over time, much like adding reinforcement in flooring or shower installations for durability.
By following these steps, I successfully installed baseboards over tile without a single nail, resulting in a clean, damage-free finish. Remember, patience and precision are your best allies, and the right adhesives make nail-less installation not only possible but straightforward. Want to explore more about modern bathroom upgrades? Check out this guide for expert shower transformation tips.
Many homeowners and even some pros fall into common traps when tackling projects like baseboard installation, flooring, or bathroom upgrades. One misconception is believing that standard methods, such as nailing into tiles or using generic adhesives, are always the most effective. In reality, these approaches can lead to issues like cracked tiles or uneven surfaces, especially if you don’t account for nuances like substrate flexibility or material readiness.
A prevalent myth is that the thicker or more aggressive the installation technique, the better the result. However, this oversimplification often results in damage or long-term problems, such as cracked grout or bowed baseboards. Recognizing that each material and space has specific requirements is essential—what works for hardwood might be disastrous for tile or carpet.
One advanced mistake I see frequently is neglecting the importance of moisture testing before installing flooring or cabinetry. For instance, installing hardwood over a damp slab without proper pre-slope or vapor barriers can cause cupping or warping down the line. According to industry expert advice, using tools like the plastic sheet test can prevent such issues and save you significant repair costs later—more on this can be found in our guide to durable flooring installation.
Have you ever fallen into this trap? Let me know in the comments.
What underrated detail often causes long-term damage in shower renovations?
Many overlook the crucial role of proper waterproofing membrane installation behind shower tiles. Skipping or rushing this step can lead to recurring leaks and mold, even if the visible work seems flawless. Experts highlight that meticulous application of waterproof membrane, especially around niches and drain penetrations, is vital. Studies from building science research demonstrate that improper sealing is a leading cause of shower failures, emphasizing the need for precision during installation—details that are often underestimated by do-it-yourselfers.
By digging deeper into these nuances—bushing past common myths and recognizing the subtle, yet significant, factors—you can ensure your renovation efforts stand the test of time. Whether it’s choosing the right baseboard style, managing moisture levels before flooring, or implementing thorough waterproofing, mindful attention to these details enhances the quality and longevity of your project.
Keep Your Projects Running Smoothly with the Right Tools
Having the proper tools on hand is crucial for ensuring durability and a professional finish in your home improvement projects. I personally swear by a high-quality cordless oscillating multi-tool. Its precision and versatility allow me to cut caulk, trim baseboards, or even make delicate grout repairs without damaging surrounding surfaces. For example, when sealing a shower niche, a multi-tool helps remove old grout cleanly, preparing the surface for a fresh application, as detailed in our guide on shower renovations here.”}**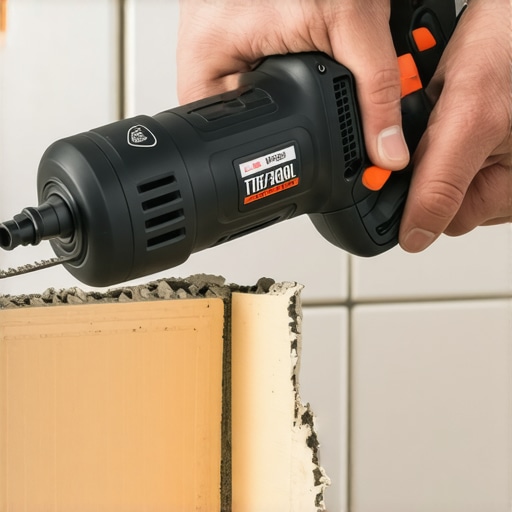 **{
**{
What I Wish I Knew Before Going Nail-Free on Tile
One of the biggest lessons I learned was the importance of trusting your tools and materials. Using high-quality adhesive and a proper curing process transformed my projects from shaky to rock-solid. Also, patience during the curing period saves a lot of headaches later. Don’t underestimate the power of precise measurement—cutting corners here often leads to gaps or mismatched corners, which are tough to fix afterward.
Another insight was recognizing the value of gentle adjustments. Tapping baseboards with a rubber mallet instead of forcing them into place ensures surfaces stay unmarred. Lastly, embracing the unconventional—like skipping nails—can actually enhance your finish if done correctly. It’s all about working smart, not hard, and trusting that innovative methods can often produce professional results.
Tools and Knowledge That Made My Projects Easier
- Quality Construction Adhesive: I rely on brands like Liquid Nails because they bond well with tile and baseboards without mess or long wait times. Trust me, the right adhesive makes a huge difference.
- Painter’s Tape and Spacers: These simple tools help hold your pieces in place temporarily, ensuring perfect alignment. They’re cheap but invaluable.
- A Good Caulking Gun and Paintable Caulk: To seal gaps seamlessly, I swear by quality caulk that smooths out easily and lasts for years.
- Instructional Guides and Expert Blogs: For deep dives, I often visit trusted sources like our detailed guide on modern bathroom upgrades or the comprehensive flooring installation steps, which ensure my methods are up-to-date and effective.
The Drive to Keep Improving Comes From Within
Home improvement is a journey, not a destination. Every project teaches you something new—like how a small adjustment in adhesive application can save hours of sanding and filling. The satisfaction of mastering nail-less baseboard installation over tile has ignited my passion further, inspiring me to tackle more complex renovations. Remember, embracing these insider secrets means embracing a mindset of continuous learning and confidence. If you’re ready to elevate your home projects, I encourage you to experiment, learn from mistakes, and celebrate your progress every step of the way. How are you planning to refine your next installation? Share your thoughts below and let’s inspire each other to create beautiful, lasting spaces!