

It happened to me during a seemingly innocent afternoon. I was installing new baseboards in my living room when I accidentally knocked over a Sharpie. Before I knew it, a stubborn black streak marred my beautiful hardwood floor. Frustration set in — I’ve been there, right? Those pesky Sharpie marks seem impossible to remove, especially when they sneak into your freshly finished wood.
But here’s the thing: I discovered a surprisingly simple solution that changed everything. Using rubbing alcohol, I managed to erase those unsightly marks without damaging my hardwood, and I knew I had to share this secret with fellow homeowners. If you’ve ever faced a similar mishap, stay tuned. Today, I’ll show you exactly how to keep your floors pristine and free from permanent marker stains.
Why Sharpie Marks Are the Hardwood’s Worst Enemy—and How to Tackle Them
Apply Rubbing Alcohol Carefully
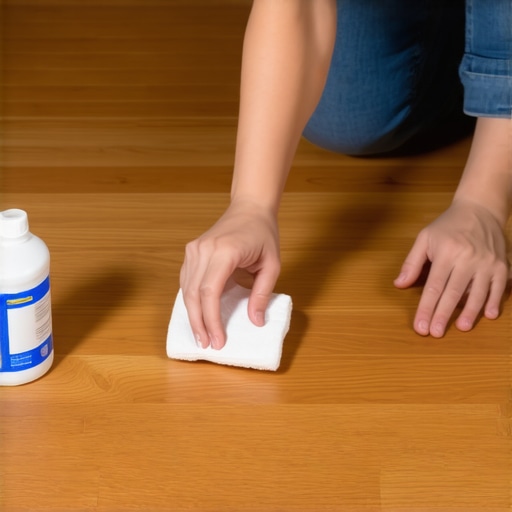
Start by dabbing a clean cloth with rubbing alcohol—do not soak it. Gently blot the Sharpie stain, working from the outside toward the center to avoid spreading. I once experienced this when my toddler’s marker accidentally landed on my oak floor. I used a soft cloth soaked lightly with alcohol, which effectively lifted the ink without damaging the finish. Be patient; this process may take a few minutes of gentle blotting.
Test in a Hidden Area First
Before attacking the visible stain, test the rubbing alcohol in a corner or less noticeable spot. This is similar to checking the pre-slope in shower renovation—preventing errors before they become obvious. For instance, I tested on the back of a bookshelf to confirm it wouldn’t strip my finish. If the finish remains intact, proceed to the stain.
Use Fine-Grit Sandpaper for Persistent Marks
If alcohol alone doesn’t remove the stain completely, lightly sand the area with 320-grit or finer sandpaper. Think of this as smoothing out imperfections after flooring installation. I did this in a small corner of my kitchen, gently sanding until the stain vanished. Always sand along the grain and avoid excessive pressure to prevent scratches.
Reapply Finish to Protect the Surface
After removing the stain, apply a thin layer of hardwood floor finish or a matching touch-up product. This seals the area and restores the protective coating. In my case, I used a mini brush to reapply finish, which seamlessly blended with the surrounding area. This extra step preserves your floors’ luster and prevents future damage.
Maintain Regular Cleaning to Prevent Ink Stains
Prevent future mishaps by cleaning spills immediately and keeping sharp objects out of reach. Just like meticulous sealing after shower renovation avoids leaks, regular cleaning protects hardwood surfaces. I’ve found that frequent gentle sweeping with a microfiber dust mop keeps floors looking pristine and avoids buildup that might trap stains.
When to Call a Professional
If the stain persists despite your efforts, consider consulting a flooring professional. Sometimes, deeper ink penetration requires advanced techniques or minor refinishing. Think of it as addressing a leaky shower niche that needs expert sealing—better to prevent long-term damage.
By following these concrete steps, you can effectively remove Sharpie stains from hardwood floors without causing harm. Remember, patience and gentle tactics are your best allies for retaining your floors’ beauty and integrity.
 While many homeowners believe they understand the basics of shower, flooring, and baseboard installation, the real nuances often trip up even seasoned DIY enthusiasts. One common misconception is that following standard procedures guarantees a perfect finish, but in reality, details like proper substrate preparation impact the longevity and aesthetic of your projects. For instance, a frequent mistake is neglecting adequate moisture testing before flooring installation, which can lead to warping or buckling over time. Experts recommend using a vapor barrier and conducting a calcium chloride test despite the extra effort, as highlighted in studies by industry specialists.
What complex factors influence the success of shower waterproofing beyond sealing the niche?
Understanding the physics of water migration is crucial. Improper slope grading, even by a few degrees, can cause pooling and leaks. Modern shower design emphasizes meticulous membrane installation, a step many overlook, risking long-term damage. For detailed insights, check out the comprehensive shower waterproofing ideas at this resource. Similarly, when installing baseboards, many think that a quick nail and paint job suffices. However, caulking gaps and scribing to uneven walls ensures a clean, professional look that withstands seasonal shifts. I’ve seen projects falter due to ignoring these subtle steps. To elevate your results, explore the latest baseboard styles for 2025. Flooring mistakes are another trap. Many believe that a standard adhesive or floating method is enough, but factors like subfloor flatness and moisture levels critically determine durability. Skipping these assessments can cause tiles to crack or laminate to lift. For an in-depth breakdown, visit this detailed guide. Remember, understanding these advanced nuances helps prevent costly repairs down the line. Have you ever fallen into this trap? Let me know in the comments.
Investing in the Right Equipment for Quality Results
Achieving professional-looking finishes in projects like flooring, shower upgrades, or baseboard installation hinges on selecting tools that provide precision and durability. I personally rely on a high-quality laser level, such as the Bosch GCL100-50G, which offers exceptional accuracy over long distances and ensures your tiles and fixtures align perfectly. For cutting materials, I favor a tungsten carbide-tipped wet saw blade that delivers clean, straight cuts on porcelain and stone, minimizing the need for rework. When installing carpets, a power stretcher equipped with a calibrated foot ensures uniform tension without tearing the backing or creating unsightly wrinkles.
Mastering Techniques that Stand the Test of Time
Consistent maintenance starts with adopting proven methods. Regularly inspecting grout lines and re-sealing every 1-2 years maintains waterproofing integrity, crucial for showers and wet areas. Using a siliconized acrylic sealant around edges prevents water infiltration that can cause long-term damage. Additionally, periodically checking baseboard adhesives and reapplying a high-quality wood glue with a simple caulking gun keeps moldings secure, especially in areas prone to humidity fluctuations. For flooring, I recommend the ‘reverse scribe’ method for fitting baseboards around uneven surfaces, which involves marking a custom profile on the back of the molding for a flawless fit.
The Future of DIY: Automated and Smart Tools
Emerging technologies are streamlining renovation workflows. Digital measuring devices that sync with your smartphone, like the Bosch GLM 50 C, enable quick and highly accurate measurements, reducing material wastage. Smart moisture meters, such as the Protimeter Surveymaster, provide instant readings of subfloor and wall moisture content, helping you decide the appropriate time for installation and avoiding costly failures. As these innovations become more affordable, I predict a future where DIY enthusiasts can perform even complex tasks with certified professional quality, provided they invest in reliable tools and stay informed through reputable sources.
How do I maintain my renovation tools over time to ensure long-lasting performance?
Proper care involves cleaning blades and bits after each use with mineral spirits, lubricating moving parts periodically, and storing tools in a dry environment to prevent corrosion. Sharpening blades when they show signs of dullness maintains cutting efficiency and reduces strain on the motor. Conducting routine calibrations of laser levels ensures ongoing accuracy—this simple step can make all the difference in finishing your project flawlessly. By dedicating a few minutes each month to maintenance, you’ll extend the life of your equipment and get consistent, high-quality results. For comprehensive advice, check out professionals’ recommendations on home repair sites, or consider booking a consultation with experts through this contact page to refine your tool care routine.
Lessons Few Dare to Share After a DIY Mishap
One of the most valuable lessons I learned involved patience. Rushing through a flooring cut or hurriedly sealing a shower niche often leads to costly mistakes. I once ignored my gut feeling about uneven subflooring, which caused tiles to crack months later. Trusting your instinct and doing thorough prep work can save enormous headaches down the line. Additionally, I realized that not all tools are created equal—investing in quality, like a laser level, drastically improves precision. Finally, embracing imperfections—we’re human after all—helps keep frustration at bay and allows creativity to flourish in home renovations.
My Top Picks for Tools and Resources That Elevate Renovation Projects
For accurate measurements, I rely on the Bosch GCL100-50G laser level; it offers unmatched accuracy, making tile alignment a breeze. When it comes to cutting tough materials, a tungsten carbide-tipped wet saw blade minimizes chipping and ensures clean edges. To stay informed, this resource provides modern shower upgrade ideas, inspiring innovative design. For understanding flooring mistakes and how to avoid them, this guide lays out actionable steps. And for seamless baseboard installation, I recommend checking the latest styles to keep your interiors on trend.
Ignite Your Passion for Home Makeovers Today
Remember, every project is a chance to learn and grow. With the right knowledge, tools, and patience, you’re well on your way to transforming your home into a masterpiece. Don’t hesitate—start that renovation you’ve been dreaming of, knowing you’re equipped with insights that truly make a difference. Ready to take the first step? Share your plans or questions below—I’m here to help you succeed in creating the home you love.
,