

Ever spent hours marveling at your newly installed tile, only to be greeted by an unsightly, cloudy haze that just won’t come off? I remember the moment I realized my beautiful bathroom looked more like a muddy pond than a sleek, modern space. It was frustrating, especially after months of planning and the expense involved. That lightbulb moment hit me when I learned that the white film lingering on my tiles was dried grout haze—a common issue that many homeowners face after tile installation.
Overcoming Grout Haze Without Using Toxic Chemicals
Here’s the good news: you don’t need to reach for harsh chemical cleaners or spend a fortune on specialized products to clean dried grout haze. With some simple, natural techniques and a little patience, you can restore your tiles to their original shine and clarity. Today, I’ll walk you through proven methods I’ve personally tested, so your grout haze will become just a distant memory. Plus, I’ll share tips on how to prevent this problem from sneaking up again, ensuring your future tile projects stay flawless from start to finish.
Why Most DIY Solutions Fail and What Actually Works
I made the mistake early on of using abrasive scrubbing pads and too much pressure, thinking I was saving time. Turns out, that only scratched my tiles and made the haze worse. Trust me, knowing what NOT to do is just as important as knowing the right techniques. We’ll cover those common pitfalls and how to avoid them, so you can save yourself from unnecessary frustration. For additional insights on tile maintenance and renovation tips, check out this guide on baseboard styles.
If you’re tired of looking at that dull film and want a safe, effective way to get your tiles shining again—without exposure to aggressive chemicals—then you’re in the right place. Let’s dive into the straightforward steps that will transform your tiles and boost your confidence in tackling future DIY projects.
Start with Gentle Scrubbing
Take a soft-bristled brush or sponge and apply warm water mixed with a few drops of natural dish soap. Gently scrub the affected tiles in a circular motion. I once used an old toothbrush to target stubborn haze around a shower niche, which effectively loosened the dried grout film without scratching the tile surface. Avoid harsh abrasives, as they can damage your tiles.
Use White Vinegar for Natural Cleaning
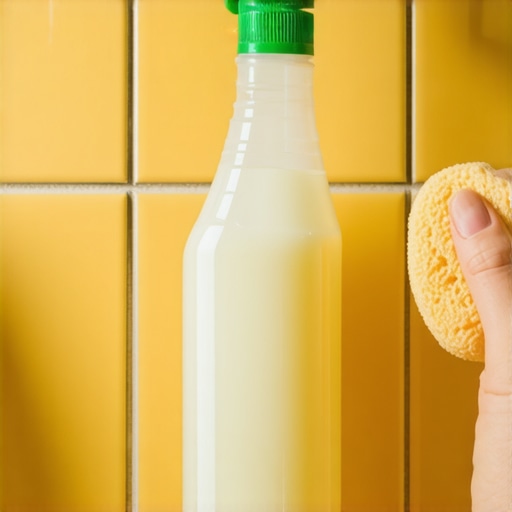
Mix equal parts white vinegar and warm water in a spray bottle. Spray generously over the haze and let it sit for 5-10 minutes. Vinegar’s acidity helps dissolve the dried grout residue. After soaking, scrub again with your brush or sponge. I tested this method on a set of kitchen tiles, and it restored their original shine without any chemical smell or damage.
Apply Baking Soda Paste for Tough Spots
Create a paste with baking soda and a small amount of water. Spread the paste over stubborn areas and let sit for 15 minutes. Use a soft brush to scrub the paste into the haze. The gentle abrasiveness of baking soda effectively breaks down mineral deposits and grout film. During a recent bathroom reno, this technique eliminated lingering haze, leaving the tiles spotless.
Rinse and Dry Thoroughly
After cleaning, rinse the tiles with clean water to remove any leftover residue. Use a microfiber cloth or squeegee to dry the surface completely. Proper drying prevents new haze from forming and keeps your tiles sparkling. I learned this tip after noticing water spots reappeared when surfaces were left wet for too long.
Prevent Future Grout Haze
Once you’ve achieved a spotless look, consider sealing your grout. A good grout sealant forms a protective barrier, making future cleaning easier and preventing haze buildup. For modern trends in tile design and how to incorporate them into your home, visit these trendy baseboard styles. Regular maintenance, such as quick wipe-downs after cleaning, also preserves your tiles’ appearance and longevity.
< >While many DIY enthusiasts and even seasoned contractors focus on getting the basics right during installation, there’s a lot more beneath the surface that can trip you up. One prevalent myth is that following standard procedures guarantees flawless results every time. However, each space presents unique challenges—like uneven subfloors or existing wall irregularities—that can undermine even meticulous work. For instance, insisting on a perfectly level subfloor without addressing underlying issues often leads to cracked tiles or warped flooring over time, as noted in a study by the National Tile Contractors Association.
Another overlooked point is the importance of proper moisture management, especially in shower conversions or bathrooms. Many assume sealants alone will prevent water intrusion, but neglecting pre-slope waterproofing layers can result in costly damage down the line. An advanced mistake I’ve seen is using incompatible materials—like certain adhesives with moisture-prone substrates—which can cause delamination or mold growth, emphasizing the need for expert material selection.
Have you ever fallen into this trap? Let me know in the comments.
Jumping to baseboards, a common slip-up is misaligning corners or ignoring expansion gaps. While it’s tempting to cut corners for a cleaner look, failure to incorporate appropriate gaps around edges allows for natural expansion, leading to cracks and separation. Notably, using a mitered joint without reinforcement can cause weak points, especially in high-traffic areas. For those aiming for higher-level craftsmanship, understanding the nuances of joint finishes and material expansion considerations is essential. To learn more about choosing baseboards that enhance your home’s style, visit this guide.
In flooring installation, many overlook the importance of acclimating materials before installation. Skipping this step can cause the floor to contract or expand after placement, leading to gaps or buckling. Additionally, improper handling of transitions between different flooring types—say, between wood and tile—can result in trip hazards or aesthetic inconsistencies. A common mistake is using straight cuts without considering the floor’s natural expansion, which can be mitigated with flexible transition strips or careful planning. For advanced strategies on achieving flawless flooring seams, check out these tips.
In all these scenarios, the key lies in understanding the hidden complexities specific to each project. Too often, unanticipated issues arise because practitioners relied solely on basic tutorials without considering underlying nuances. Let’s dig deeper—what hidden traps have you experienced during your projects? Share your stories! By paying close attention to these details, you can avoid costly mistakes and elevate your craftsmanship to a professional level.
How Do I Maintain My Flooring, Shower Enclosures, and Baseboards Over Time?
Ensuring your carefully installed flooring, showers, and baseboards stay pristine and functional requires the right tools and routine maintenance. First and foremost, investing in a high-quality microfiber mop is essential. Unlike traditional brooms or generic mops, a microfiber head efficiently traps dust and grime, preventing scratches and buildup that can degrade finishes over time. I personally prefer using a microfiber spray mop with a reusable pad, which makes regular cleaning quick and eco-friendly. Additionally, a handheld grout brush with soft bristles allows for targeted cleaning of grout lines without damaging tile surfaces, maintaining their appearance and preventing mold growth. For shower enclosures, a squeegee is invaluable—using it daily after showers reduces water spots and soap scum, extending the life of sealants and preventing water damage. When it comes to baseboards, a set of electric detail brushes can help remove dust from hard-to-reach corners, especially in homes with intricate molding. As trends evolve toward smarter homes, incorporating sensor-activated cleaning devices or robotic vacuums with mopping functions can streamline routine upkeep, saving time and effort. Looking ahead, I predict that automation and smart cleaning tools will become standard for home maintenance, making it simpler to keep installations looking their best without constant manual effort.
What Are the Best Long-Term Strategies to Keep Your Installations Looking New?
– Regular inspections are crucial. Check for signs of wear or damage, like cracking grout or loose baseboards, and address issues immediately to prevent worsening. – Seal grout annually, especially in moist environments like showers, to prevent staining and water infiltration. – Use protective mats or pads under furniture and high-traffic areas to reduce impact and wear on flooring and baseboards. – Avoid harsh chemicals; instead, opt for pH-neutral cleaners tailored to your materials to prevent deterioration. – Consider applying a protective coating or sealant to vulnerable surfaces periodically, which can significantly extend their lifespan and maintain aesthetic appeal. For more advanced maintenance techniques, I recommend following guidelines from experts like the National Tile Contractors Association, which emphasize the importance of proper cleaning and sealing practices to prevent costly repairs. Remember, consistency is key—regular upkeep, using the right tools, and timely interventions can save you significant time and money in the long run. Don’t hesitate to try upgrading your routine with a state-of-the-art microfiber system or a robotic mop—it might just be the game-changer your home needs.
Unspoken Lessons from My Flooring Journey
One of the biggest revelations I had was that even seasoned DIYers underestimate the importance of meticulous surface prep. I once rushed through subfloor inspections, only to face stubborn issues like squeaks and unevenness later, which could have been avoided with better initial assessment. Additionally, I learned that a small investment in quality tools—like a good laser level or a reliable grout float—can dramatically improve the finish of your project. These tools, though seemingly minor, become game-changers, turning a good result into a professional-looking masterpiece. Finally, embracing patience over speed during intricate steps such as grout sealing or baseboard scribing yields long-term satisfaction beyond temporary motivation—trust me, your future self will thank you for not rushing the details.