

Have you ever stepped into your shower, only to notice those tiny cracks creeping along the corners, making you wonder if your bathroom is falling apart? I remember the first time I saw my grout cracking in the corners; it felt like my clean, peaceful space was turning into a mini construction zone overnight. It’s a frustrating sight, especially when you’ve just finished renovating or trying to keep your bathroom stylish. But here’s the thing — those cracks are more than just an eyesore. Left unaddressed, they can lead to water damage, mold growth, and costly repairs down the line.
The Real Why Behind Cracking Grout in Shower Corners
As someone who’s been knee-deep in tile work, I can tell you: grout isn’t just decorative. It’s the unsung hero that keeps water where it belongs — outside your walls. When grout cracks, water can sneak behind tiles, causing damage you might not spot until it’s too late. The culprit is often movement—either from structural shifts, temperature changes, or poor installation. But don’t worry; understanding the root cause is the first step towards a long-lasting fix.
Is This Just A Cosmetic Issue or Sign of a Bigger Problem?
Early on, I made a mistake I see quite often: dismissing small cracks as purely cosmetic. That was my first mistake. Over time, those tiny fissures widened, and water began seeping behind the tiles. If you’re worried about whether your problem is superficial or indicative of a bigger issue, it’s worth investigating further. You might consider consulting a professional or referring to trusted resources like this guide on shower repairs to determine if your tile is salvageable or needs replacing.
In the next sections, I’ll walk you through the common reasons behind grout cracking and best practices for fixing it so your shower stays beautiful and waterproof for years to come. Have you noticed your grout cracking too? Stick with me — we’re about to turn that DIY nightmare into a success story.
Remove Old Grout and Prepare for Repair
Start by carefully chipping out the cracked grout using a grout removal tool or a utility knife, making sure not to damage surrounding tiles. Once removed, clean the joints thoroughly with a vacuum or brush to eliminate debris and dust. Wipe the area with a damp cloth to remove residual dust and let it dry completely. This step ensures the new grout adheres properly and prevents future cracking.
Apply Flexible, Water-Resistant Grout
Select the Right Material
Use a high-quality, flexible epoxy or silicone-based grout designed for wet environments. Such products accommodate slight movements in the substrate, reducing the risk of cracks reappearing. I once used a polymer-modified grout on a bathroom remodel, which significantly improved its durability over traditional cement grout.
Mix and Apply Correctly
Follow the manufacturer’s instructions precisely when mixing the grout. Apply it using a rubber float, pressing firmly into the joints to ensure full coverage. Work diagonally to avoid pulling out excess grout. Cover the entire joint evenly, filling all gaps to prevent water seepage. Clean excess grout from the tile surface with a damp sponge before it hardens. Proper application is crucial for a long-lasting finish.
Seal the Grout Properly and Regularly
Once the grout has cured (usually after 24-48 hours), apply a high-quality grout sealer to create a waterproof barrier. Use a small brush or applicator to ensure the sealer penetrates deeply into the joint. Regular resealing, typically every 6-12 months, maintains water resistance and prevents discoloration. I learned this the hard way when my initial grout cracked due to water infiltration because I skipped sealing afterward.
Reinforce and Prevent Future Cracks
For ongoing protection, consider installing a membrane behind the tiles or using a crack-isolation membrane, especially if your home experiences structural shifts or temperature fluctuations. This layer absorbs movement, preventing cracks in the grout. I installed a membrane during a bathroom renovation, which saved me future headaches and kept the grout intact for years.
Maintain with Regular Cleaning and Inspection
Keep your grout lines clean by wiping them down weekly with a gentle cleaner. Regular inspections help identify early cracks or damage that can be repaired before they worsen. Addressing small issues promptly can extend the lifespan of your shower’s tiling and prevent costly repairs. Accurate and consistent maintenance makes a noticeable difference in your bathroom’s longevity.
Adopting these concrete steps ensures your shower stays waterproof, stylish, and crack-free. Proper preparation, product selection, application, sealing, reinforcement, and maintenance form the foundation of a durable grout that can withstand daily use and environmental stresses.
,When tackling home improvement projects like showers, carpets, or flooring, many homeowners rely on popular beliefs that might not hold up under professional scrutiny. For instance, a widespread misconception is that installing a shower pan is a straightforward task—many believe sealing the drain is enough to prevent leaks, but experts warn that overlooking proper slope and waterproofing layers can lead to long-term water damage. This nuance is often missed in DIY guides, leading to costly repairs down the line. Additionally, in carpet installation, there’s a false assumption that all high-pile carpets are suitable for heavy traffic, but in reality, the backing quality and carpet density play more vital roles in durability. Failing to recognize these details can result in prematurely worn-out carpets, despite choosing a trendy style.
What are advanced mistakes homeowners make that compromise their flooring’s longevity?How Do I Keep My Shower, Floors, and Baseboards Working for Years?
Maintaining your home’s upgraded features requires precision tools and proactive routines. For shower repairs, I personally rely on a high-powered grout saw, like the QEP 6-inch Grout Saw. Its sharp blades make removing old grout easier and safer, allowing for thorough cleaning before applying new, flexible grout that handles movement effectively. Regular sealing with a quality penetrating sealer, such as Aqua Mix Sealer’s Choice Gold, is critical—once applied, it preserves the integrity of grout joints against water infiltration. I’ve found that resealing every 6 to 12 months significantly prolongs the lifespan of my shower and prevents costly repairs.
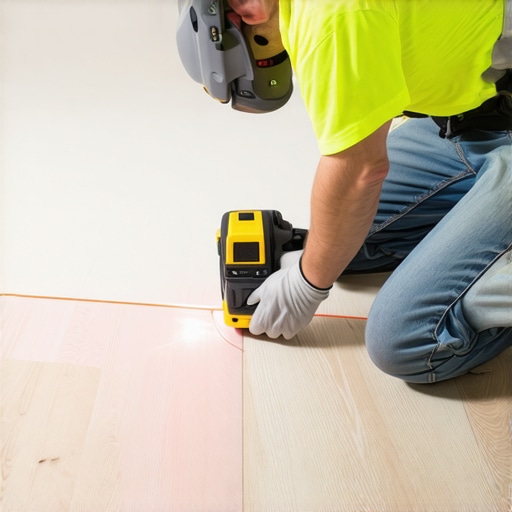
When installing or maintaining flooring, I swear by a laser level. Its ability to project perfectly straight lines ensures that your tiles or floorboards are aligned flawlessly across large surfaces. For example, during my last flooring project, using a laser level reduced installation errors and saved me hours of correction work. Coupling this with a high-quality trowel, like the Marshalltown notched trowel, makes the adhesive spread consistent for a durable bond. Additionally, an industrial vacuum cleaner proves invaluable in keeping the workspace dust-free, which is essential for proper adhesion and a professional finish.
Baseboard installations benefit from a pin nailer or finish nailer. I prefer a cordless model from Ryobi because of its convenience and power. This tool allows me to drive nails precisely without damaging the trim or wall, especially when working with delicate materials like new MDF or natural woods. Also, a good miter saw with adjustable angles ensures perfect cuts for corners, giving your trim a seamless look. Maintaining these tools with regular blade sharpening and lubrication extends their lifespan, ensuring they remain reliable for future projects.
What Future Trends Will Change Home Repair? Tackle Maintenance with Smart Tools
As technology evolves, I predict a surge in smart tools integrated with IoT capabilities. Imagine laser levels or sealing devices that sync with your smartphone, providing real-time feedback and alerts for optimal results. These innovations will make DIY projects more foolproof and help homeowners catch issues early—like detecting moisture buildup behind tiles before water damage occurs.
How Do I Maintain My Renovations Over Time?
Adopting a regular maintenance schedule is key. For showers, inspect grout lines and sealers monthly, reapplying sealant as needed. Floors benefit from periodic cleaning with appropriate products that don’t damage sealants or finishes; avoid harsh chemicals that can degrade adhesives and coatings. Baseboards and trim should be checked for nails or screws pulling loose, which can be fixed promptly with your finish nailer. Also, keep tools in top condition—clean blades and lubricate moving parts—to ensure they’re ready for the next project. Incorporating these practices will help your investments stay pristine and functional for years to come.
For a comprehensive guide on durable flooring installation, check out this detailed resource. Remember, investing in the right tools and routine maintenance can turn a one-time upgrade into a lasting home improvement. So, why not try out that laser level on your next project? It’s a game changer.
What I Didn’t Know About Cracks That Cost Me
- Twice, I underestimated the importance of proper grout sealing, which led to water seepage and mold. Now I see sealing isn’t just a quick step—it’s the shield that protects your investment.
- Choosing the wrong type of grout was a rookie mistake. Flexible, water-resistant grout seemed optional at first, but I realized it’s the only way to handle the inevitable movement in shower corners.
- Ignoring small cracks early on made them snowball into expensive repairs. Detecting issues early and addressing them with simple tools like a grout saw can save a lot of headache.
- Using professional tools like a laser level and a high-quality trowel transformed my DIY results from amateurish to durable. Small investments in tools pay off in long-term results.
- I’ve learned that proactive maintenance, like resealing every year, keeps showers and floors looking great and prevents surprises that could ruin the aesthetic—and the budget.
Tools and Resources That Changed My Approach
My essential toolkit includes a laser level for perfect alignment, a quality trowel for applying adhesive evenly, and a grout removal tool to prep for repairs. These tools elevate my work from guesswork to precision. For ongoing learning, I recommend checking out this comprehensive flooring guide which covers everything from planning to finishing with longevity in mind.
The Heartfelt Push to Make It Happen
Every project I complete, whether fixing cracks or installing new flooring, is a step toward transforming my home into a space I cherish. Don’t let fear hold you back from trying these improvements—embrace the learning curve, invest in good tools, and take pride in your progress. Your home’s future depends on the care you put in today. Ready to turn those cracked grout lines and uneven tiles into a showcase of your craftsmanship? Let’s do it together!
Have you ever faced a DIY challenge that taught you a crucial lesson? Share your story below—I’d love to hear how you overcame it!
,