

Ever tried to finish a bathroom tiling project only to realize that your cuts around the valve are a *train wreck*? I remember the sinking feeling when I first struggled with those stubborn, intricate cuts—knowing that one crooked slice could ruin the entire look. The worst part? I was about to give up and settle for a less-than-perfect finish. But after some trial, error, and a few creative hacks, I discovered a game-changing technique that transformed my approach.
The Lightbulb Moment That Changed Everything
During a particularly frustrating weekend, I was about to throw in the towel on a tile job around a shower valve. I had made a mess of my first few attempts—chips, uneven edges, you name it. Then, I stumbled upon a tip in a professional guide that suggested using a wet saw with a specific, strategic technique to cut with precision around irregular shapes. It was a small change in method, but it turned my frustrations into confidence. Since then, I’ve become a firm believer in the power of this wet-saw trick for intricate tile cuts.
What I promise you today is not just a quick fix but a step-by-step insider’s approach to mastering those tricky cuts around valves—so your tiles fit perfectly, with clean, professional-looking edges. No more awkward gaps or uneven lines that draw unwanted attention.
Is This Trick Worth the Hype? My Early Mistake That Nearly Cost Me Big
When I first started working with my wet saw, I made a crucial mistake—trying to make quick, rough cuts without considering the delicate angles needed for tight spaces. That, combined with rushing the process, left me with cracked tiles and wasted materials. I wish I’d known earlier how crucial finesse and patience are, especially when working around complex fixtures. Trust me, rushing through these cuts can lead to costly mistakes. For more expert insights into avoiding common tile installation pitfalls, check out this comprehensive guide.
Now, let’s shed some light on the technique that turned my tile disasters into a flawless finish and can do the same for you.
Get Ready for the Perfect Cut
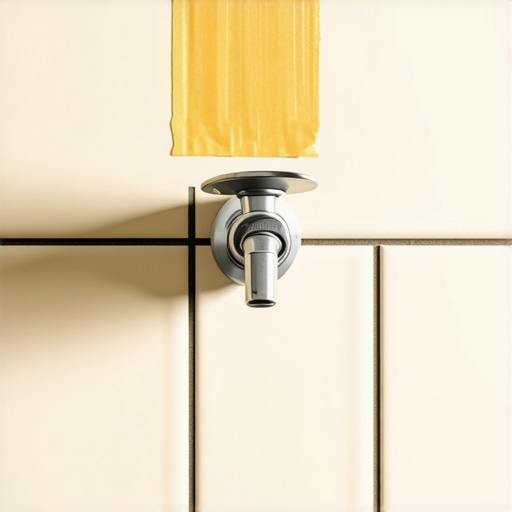
My first attempt at cutting around a shower valve was messy—chips, uneven edges, and a sense of defeat. To avoid this chaos, I gathered my tools: a wet saw, painter’s tape, and a marker. I marked the tile precisely, outlining the cut line with confidence. Then, I applied painter’s tape along the marked line to prevent chipping—think of it as a guardrail for your blade. This step is crucial; it supports the tile fiber, reducing breakage during cutting.
Aligning and Securing for Accuracy
Use the Right Measurements
Measure the cutout area twice, ensuring your measurements include any valve protrusions or fixtures. Double-check your marks, because a small miscalculation now translates into a crooked fit later. I once reversed a measurement and had to redo the entire tile—learn from my mistake and take your time.
Set the Tile Properly
Place the tile on a stable, flat surface, and secure it with clamps or wedges if needed. When you’re ready, align the marked line with the wet saw’s blade. Imagine guiding a laser—steady hands and patience are vital. During my project, I held the tile firmly and made slow, deliberate cuts, avoiding rushing through the process, which could cause cracks or uneven edges.
Executing the Cut with Precision
Make the Initial Passes
Start with light, shallow passes along the marked line, gradually deepening the cut. This is like carving a sculpture—don’t rush to finish in one go. When I followed this technique, my cuts were smooth, and the edges clean. Remember, gentle pressure and patience yield better results than brute force.
Finish with Safety and Care
Once the cut is complete, carefully remove the painter’s tape and inspect the edge. Use a tile file or diamond pad to refine any rough spots. I once neglected this step and faced difficulty fitting the tile around the valve. Fine-tuning ensures a snug, professional fit, avoiding gaps or imperfections.
Adjusting and Fitting the Tile
If the cutout isn’t perfect, use a grout saw or Dremel tool to make minor adjustments. When I had a small gap around my valve, I carefully nudged the tile to align better, preventing the need for costly replacements. Patience during fitting guarantees a seamless and professional appearance.
Practice and Patience Make Perfect
Practice on scrap tiles before working on your actual project. This helps you get comfortable with your tools and techniques. I spent extra time practicing, which paid off with cleaner cuts and quicker work. Remember, precision today saves time and materials tomorrow.
Applying these methods transforms a daunting task into a manageable process. For more detailed insights into tiling techniques, check out this comprehensive flooring guide.
 When it comes to home renovation, many assume that following basic tutorials guarantees a professional result. However, even experienced DIYers often fall prey to overlooked nuances that can compromise the entire project. One common misconception is that a perfect finish is just about the right tools; in reality, understanding subtle details dramatically affects quality.
A significant mistake I witness is underestimating the importance of **proper surface preparation**. For flooring, neglecting to clean and level the subfloor can lead to squeaks, uneven surfaces, or tiles cracking prematurely. Experts agree that 80% of installation issues stem from poor prep, yet many skip this step to save time, only to pay the price later. This oversight underscores how critical foundational work is to the success of any finish.
Another area rife with misconception involves **baseboard installation**. Many believe that simply nailing trim at the wall’s edge is sufficient. But in reality, the rooms’ temperature and humidity fluctuations cause walls and floors to expand and contract, making flexible and precisely scribed baseboards essential. Advanced installers use techniques like scribing with a compass or creating custom miter cuts, ensuring seamless edges across uneven surfaces. If you want to disrupt the typical nail-and-glue approach, check out [baseboard makeover tips](https://tilecraftsmens.com/baseboards-makeover-elevate-your-interior-with-simple-updates).
Switching gears to bathroom upgrades, numerous homeowners underestimate the **complexity of shower framing and tiling**. The myth is that waterproofing is sufficient on its own, but in fact, careful attention to vapor barriers, pre-sloped bases, and proper drain sealing are vital to prevent long-term leaks. An improperly installed shower pan can lead to mold, rot, and costly repairs. To navigate these pitfalls, consult expert guides like [our ultimate shower renovation guide](https://tilecraftsmens.com/upgrade-your-bathroom-the-ultimate-shower-renovation-guide).
When discussing carpet installation, the misconception is that stretching is only necessary for large rooms. Truthfully, incorrect stretching can cause **visible seam peaking** and ripples over time. Professional installation involves understanding the specific carpet type, correct tack strip placement, and using tools like knee kickers with precision. Investing in proper technique prevents buy-back costs and ensures a smooth, durable finish. Learn more about perfecting the process at [this expert carpet installation resource](https://tilecraftsmens.com/carpet-install-secrets-achieving-flawless-results-every-time).
So, what are some advanced pitfalls that even seasoned renovators might overlook? One is the significance of **insulation and vapor retarders in wet areas**, which many neglect, leading to future moisture issues. Also, the subtle differences in grout joint widths can influence not just aesthetics but structural integrity, especially in high-traffic zones. An in-depth understanding of these nuances is backed by research from industry specialists, emphasizing how small details dramatically improve longevity.
Have you ever fallen into this trap? Let me know in the comments. Recognizing and addressing these hidden nuances ensures your project not only looks good but endures the test of time. For tailored advice or to discuss your project specifics, don’t hesitate to reach out via [our contact page](https://tilecraftsmens.com/contact-us). Your next home upgrade can be both flawless and resilient when mindful of these expert insights.
Investing in Quality Tools for Long-Term Results
When it comes to successful home renovations, especially flooring, baseboards, showers, and carpet installations, having the right tools is paramount. Personally, I rely on a high-quality wet saw with variable speed control because it provides precise cuts around tricky fixtures like shower valves or curved baseboard corners. Unlike budget models, these saws reduce chipping and allow for cleaner, more professional finishes, saving both time and materials in the long run. Additionally, a good router with a depth control feature helps when scribing baseboards to uneven walls, ensuring a snug fit that elevates the overall look of your space.
Streamlined Maintenance for Durability
Proper maintenance extends the life of your renovation work. For flooring, regular cleaning with a damp microfiber mop prevents debris buildup that can scratch or stain surfaces over time. Sealed grout lines around showers should be re-sealed annually to prevent water infiltration, which can lead to mold or damage. When installing new carpets, I recommend using a jet-assisted carpet cleaner after a year—this deep cleaning maintains the plush feel and prevents dust or allergens from settling into the fibers.
Tools I Recommend for Everyday Upkeep
A versatile cordless multi-tool with variable speed control is invaluable for minor repairs, like fixing loose baseboard corners or re-tightening squeaky stairs. Its precision allows you to avoid unnecessary demolition, preserving your investment. For detailed grout maintenance, a toothbrush-style grout cleaner combined with a gentle sealant application keeps your tile lines looking fresh without expensive re-grouting. For shower enclosures, a squeegee with a microfiber edge helps eliminate water spots and soap scum daily, reducing the need for harsh chemical cleaners and getting ahead of long-term stains.
Keep It Running: How do I maintain my floors and fixtures over time?
Implementing a regular inspection routine is key. Check grout lines, seals, and appliance connections every six months. For large projects, consider using specialized software like HomeAdvisor or Houzz to log maintenance schedules and reminders. Over time, your tools will wear, so replacing worn bits and blades promptly prevents inferior cuts and potential damage. I personally keep a supply of diamond blades and carbide bits on hand—they’re durable, cut faster, and produce cleaner edges, which is critical for detailed work around fixtures or transitions.
Future Trends in Renovation Maintenance
Looking ahead, smart home integration will influence tools and upkeep routines. Devices like Wi-Fi-connected leak detectors provide real-time alerts for plumbing issues, helping prevent costly water damage. Additionally, advancements in self-cleaning grout and scratch-resistant finishes mean less maintenance and longer-lasting floors. Staying ahead involves not just upgrading your tools but adopting smarter, data-driven maintenance routines to ensure your renovation investments pay off for decades.
Try integrating a high-quality, versatile tool like a cordless multi-tool into your maintenance routine today. It can make minor repairs quick, clean, and almost effortless, preserving your home’s aesthetic and structural integrity. For detailed guidance on flooring and fixture upkeep, visit this resource, and keep your home looking its best for years to come.
Over the years, I’ve discovered that the key to impeccable home upgrades lies in mastering the subtle nuances that many overlook. These hidden details can make or break the professional look you’re aiming for in flooring, baseboards, showers, and carpet installations. Embracing this insider knowledge elevates your renovation game from basic to breathtaking, ensuring lasting satisfaction.
The Hardest Lessons I Learned About Precision and Patience
One critical lesson was realizing that rushing through complex cuts around fixtures often leads to costly mistakes and frustration. Taking the extra moment to measure twice, secure the tile firmly, and make deliberate shallow passes with the wet saw transformed my results. I also learned that surface preparation isn’t just a formality—it’s the foundation of a flawless finish. Skipping this step can cause future issues like uneven surfaces or tile cracking. Investing in patience and attention to detail consistently pays off, turning what once seemed daunting into a manageable craft.
Tools and Resources That Truly Make a Difference
My essential toolkit includes a high-quality wet saw with adjustable speed settings, a versatile multi-tool for tight spots, and a precision jamb saw for accurate cuts around openings. These tools provide the control necessary for professional results, especially when working around fixtures. Additionally, I rely on expert guides like this comprehensive flooring guide and the ultimate shower renovation resource. They offer insights into advanced techniques and common pitfalls that can save you time, money, and heartbreak in the long run.
Taking Action to Elevate Your Home Quickly
The best time to start your home upgrade is now. By focusing on the small but vital details—like sealing grout lines properly, scribing baseboards to uneven walls, or carefully aligning tiles—you set the stage for a professional finish that lasts. Remember, mastery isn’t about perfection overnight but about consistent effort and learning from each project. Step into the process with confidence, knowing that every meticulous step improves your skill and your home’s value. Curious about specific techniques or tools? Drop your questions below and let’s discuss how to make your next home renovation truly stand out.