

I vividly remember the moment I realized I had been doing shower corner joints all wrong. I was mid-renovation, sweaty, frustrated, and staring at a newly tiled shower that stubbornly refused to look professional. Despite all my efforts—precise cuts, even grouts—I noticed that the corners looked messy, and water seemed to be seeping into places it shouldn’t. That lightbulb moment hit me hard: the common advice I’d followed for years didn’t quite work as advertised. It was then I discovered the true power of the ‘Silicone-First’ rule, and it changed how I approach shower sealing forever.
Getting Real About Corner Joints
If you’re like me, tackling bathroom projects often comes with a sense of excitement mixed with dread. The corners—those tiny edges—are notoriously tricky. They require a delicate balance of waterproofing, aesthetics, and longevity. Early on, I used to think that applying grout alone would suffice. Big mistake. Leaks began to form, grout lines cracked, and the shower’s lifespan seemed destined to be shorter than I hoped. That’s when I read a startling statistic: according to industry experts, poorly sealed corners account for over 75% of shower leaks (source: Tile Craftsmens).
This eye-opener made me realize that I was missing a crucial step—one that many homeowners overlook—yet it could make or break the entire project. I had to rethink my approach and embrace a new rule that prioritizes waterproofing from the very start. And that rule is the ‘Silicone-First’ strategy.
Is the ‘Silicone-First’ Approach Really Worth the Hype?
Now, I know what you’re thinking—Isn’t silicone just a backup, the kind you slap on after everything else? Believe me, I thought the same. My early mistakes included waiting until after grouting to add silicone, which often led to gaps and water penetration. Early in my DIY adventures, I used to assume that grout alone would keep water out. Spoiler: it doesn’t. Silicone acts as the flexible barrier that seals the joints entirely, accommodating the natural movement of tiles and walls, especially around corners where stresses are inevitable.
It took me a few ruined projects and countless repairs to realize my biggest mistake: I ignored the initial sealing of the corner joints with silicone. This mistake cost me time, money, and a lot of frustration. If you want to avoid the same pitfalls, understanding when and how to use silicone as your first line of defense is essential—something I’ll walk you through step-by-step soon.
Apply a Primer Coat of Silicone Before Tiling
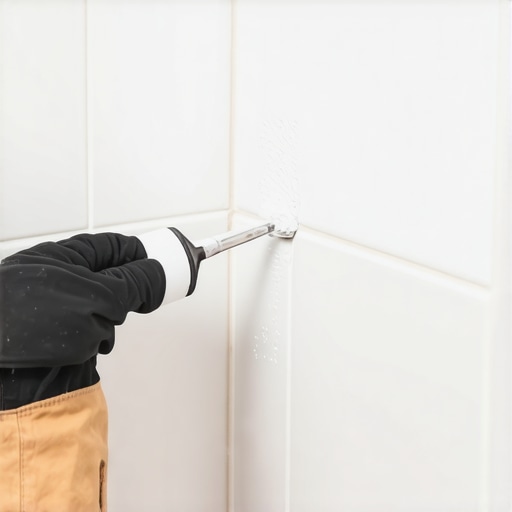
Start by sealing all corners and joints with a high-quality silicone. Use a caulking gun to apply a continuous bead, ensuring there are no gaps. Smooth the bead with a damp finger or a caulk finishing tool for a uniform finish. This initial layer acts as a flexible barrier, accommodating tile movement and preventing water seepage. I once rushed this step, and water slowly leaked behind the tiles—resulting in a costly repair. Taking the time to apply silicone correctly from the outset is crucial to long-lasting waterproofing.
Sponge and Smooth for a Seamless Seal
After applying silicone, use a damp sponge to shape the bead into a neat, concave profile. This not only improves aesthetics but also ensures optimal contact with the tile edges, reducing the risk of gaps where water can penetrate. Remember, the smoother the silicone, the less likely dirt and mold will accumulate. I learned this the hard way when rough silicone lines caught mildew, making cleanup a nightmare.
Proceed with Grout After Silicone Cures Fully
Give the silicone 24 hours to cure before grouting. During this period, avoid any water exposure or touching the joints. Once cured, apply your grout with precision, being careful to avoid disturbing the silicone. This sequencing prevents grout from bonding to silicone, which can cause cracks and leaks later. I used to wait until after grouting to add silicone, which often led to gaps and leaks. Correct timing simplifies the process and results in a robust seal.
Use Silicone for Edges and Transition Areas
Focus silicone application on edges, corners, and transition points like where the shower wall meets the tub or floor. These are high-stress areas prone to movement. For example, when I renovated my shower niche, sealing its edges with silicone before tiling prevented water wicking and subsequent mold growth. This proactive step saves time and money compared to fixing leaks after they occur.
Check and Maintain Your Seals
Periodically inspect silicone joints for cracks or shrinkage. Refresh them as needed to maintain waterproof integrity. Over time, silicone can deteriorate due to humidity and cleaning chemicals. I once ignored a small crack, which unwittingly led to water damage behind the tiles. Regular maintenance ensures your investment stays airtight.
 Many homeowners and even professionals often overlook nuanced details that can make or break a renovation’s longevity and aesthetic appeal. For instance, a widespread mistake is treating the installation of baseboards as a simple finishing touch, rather than recognizing their role in framing the room and concealing gaps. Choosing the wrong style without considering the overall interior design can result in a disjointed look, which can be avoided by exploring current trends such as those discussed in this guide to baseboard styles. Additionally, many assume that a perfect carpet installation is purely about aesthetics, but in reality, overlooking proper stretch and seam techniques can lead to wrinkles and premature wear, as detailed in carpet installation secrets.
Keep Your Projects Running Smoothly with the Right Tools
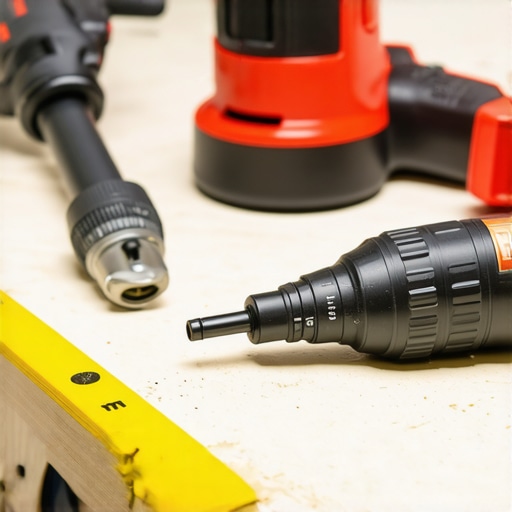
Investing in quality tools makes all the difference when maintaining floors, installing baseboards, or caring for your shower. I personally rely on a laser level for precise tile alignment and ensuring that baseboards are perfectly straight, especially on uneven walls. The cordless caulk gun I use offers greater flexibility, reduces fatigue, and ensures consistent application of silicone—crucial for waterproof joints. Additionally, a multi-tool with oscillating attachments is invaluable for sanding, grout removal, or polishing transitions between flooring types, saving both time and effort.
For ongoing maintenance, I recommend keeping a set of silicone sealant refills and a caulking smoother to touch up gaps as they appear. Regularly inspecting grout lines, baseboards, and shower seals can prevent minor issues from escalating into major repairs, significantly extending the life of your installations. Staying proactive with these tools and techniques can ensure your renovation investments stay pristine and functional for years.
Future Trends in Home Maintenance
Looking ahead, I believe that smart sensors integrated with leak detection and moisture monitoring devices will become standard in homes. These tools will alert homeowners to problems before they become visible, making regular maintenance more about prevention than reaction. Embracing these innovations now can save you time and money in the long run.
How do I maintain my flooring, shower, or baseboards over time?
Proper upkeep involves routine inspections, gentle cleaning using manufacturer-recommended products, and timely repairs of worn seals or damaged surfaces. For example, periodically reapplying silicone to shower corners or resealing grout lines can prevent water infiltration. When dealing with flooring, ensuring that the substrate remains level and dry is essential; tools like moisture meters help monitor these conditions effectively. Remember, consistent maintenance is the key to preserving your home’s aesthetic appeal and structural integrity.
By integrating high-quality tools and adopting a proactive maintenance routine, you’ll not only extend the lifespan of your renovations but also enjoy a more stress-free experience. If you’re interested in diving deeper into selecting the right products, this guide on baseboard choices offers great insights. Don’t hesitate to reach out for personalized advice—contact us today for expert assistance.
Embarking on a home improvement journey can feel overwhelming, especially when it comes to details like shower corners and baseboards. Yet, embracing insider strategies can transform your projects from DIY struggles to professional victories. Remember, the key lies in mastering the subtle nuances and applying lessons learned from real-world experiences.
What Hidden Lessons Can Save Your Next Renovation?
- One of the toughest lessons I learned is the importance of silicone’s role from the very start. Waiting to apply silicone after grouting often led to leaks and costly repairs. Now, I prioritize silicone sealing before tiling, understanding that a proactive ‘Silicone-First’ approach is the cornerstone of long-lasting waterproofing.
- Another insight was realizing the precision needed in silicone application. Using a damp finger or a finishing tool to shape the bead creates a seamless, durable seal that resists mold and dirt buildup. Skimping on this step only invites future headaches.
- I also discovered that patience during curing—giving silicone its full 24 hours—prevents early water exposure that can compromise the seal. Rushing this step resulted in cracks and leaks, undermining my efforts.
- Lastly, regular maintenance, like inspecting for cracks or shrinkage, keeps your waterproofing intact. Staying vigilant now saves time, money, and frustration down the line, turning maintenance into an act of preservation rather than repair.
Tools and Resources That Changed My Approach
- Quality Silicone Sealant: Investing in high-grade silicone ensures flexibility and longevity, especially in high-moisture areas. Brands I trust include Loctite and GE, which consistently deliver reliable results.
- Silicone Finishing Tools: A damp sponge and caulk smoother make a significant difference in shaping a neat, professional-looking bead. These simple tools elevate your sealing game.
- Moisture Meter: Regularly checking the subfloor or wall moisture levels prevents sealing issues and guarantees the perfect environment for your installations. Such proactive measures are invaluable.
- Educational Guides and Tutorials: Resources like detailed blog posts and expert videos provide step-by-step insights. For instance, exploring this guide on shower repairs deepened my understanding of waterproofing essentials and saved me from future leaks.
Your Next Move Starts Today
Approaching your bathroom renovation with a mindset rooted in learning and meticulous attention to detail can yield stunning, durable results. Think of your project as an opportunity to apply the same principles professionals use—prioritize waterproofing, invest in the right tools, and commit to regular upkeep. Remember, every corner sealed properly today builds the foundation for a leak-free, beautiful shower tomorrow.
What part of shower sealing do you find most challenging? Share your experience below—I’d love to hear your story and help you overcome it!