

Have you ever rolled out a new carpet only to find it sagging in the middle after just a few weeks? I remember the frustration vividly—spots where the fibers seemed to droop, giving my living room a tired, unkempt look. It was a moment of lightbulb realization: I had overlooked the importance of proper stretching during installation. That familiar sag became a daily eyesore, and I knew I wasn’t alone in this struggle.
Why Over-Stretching Your Carpet Is Something You Can’t Ignore
As a DIY enthusiast and someone who’s tackled my fair share of flooring projects, I’ve learned the hard way that the secret to a flawless, long-lasting carpet lies in more than just lay-it-and-forget-it; it’s about understanding proper tension. Over-stretching isn’t just a myth or an old wives’ tale—it’s a real, tangible solution to prevent those annoying sags and wrinkles that pop up over time.
Does the Over-Stretch Rule Really Matter That Much?
Early in my career, I made a costly mistake by underestimating the significance of this rule, thinking a little slack wouldn’t hurt. Spoiler: it did. The carpet loosened, and I had to redo the entire room. According to flooring experts, properly tensioned carpets reduce movement and prevent wrinkles, saving time and money in the long run. For more insights on flawless installation, check out this detailed guide. That’s why I now swear by the over-stretch technique—it’s my best friend in maintaining a pristine living space.
So, if you’ve faced similar issues or want to dodge the pitfalls I once fell into, stay tuned. I’m about to walk you through the practical steps of mastering the over-stretch rule—your secret weapon against sagging carpets and a step toward a more beautiful, durable floor. Ready for a transformation that even your neighbors will notice? Let’s dive in.
Prep the Room and Surface
Begin by clearing the space and ensuring the subfloor is clean, dry, and flat. Use a level to check for any uneven spots that could cause your carpet to sag later. If you find high spots or depressions, address them with a patching compound or leveling underlayment. This foundation is crucial; a wobbly or uneven surface will compromise tension and lead to wrinkles.
Gather the Right Tools and Materials
Equip yourself with a power stretcher, knee kicker, tension or pull bar, and a utility knife. Rigging with quality tools makes a notable difference. For example, when I first attempted stretching without a power stretcher, I spent twice as long and ended up with uneven results. After acquiring the proper tools, my installations became quicker and more consistent.
Stretch Carpet Correctly
Attach the carpet to the tack strips around the room edges. Use the knee kicker to center the carpet and create initial tension. Place the kicker towards the middle and strike firmly to stretch the carpet towards the wall. Don’t overdo it—aim for a taut appearance without distorting the pile or creating new wrinkles. Think of it like tuning a guitar string; you need just enough tension for clarity without snapping the string.
Applying the Over-Stretch Technique
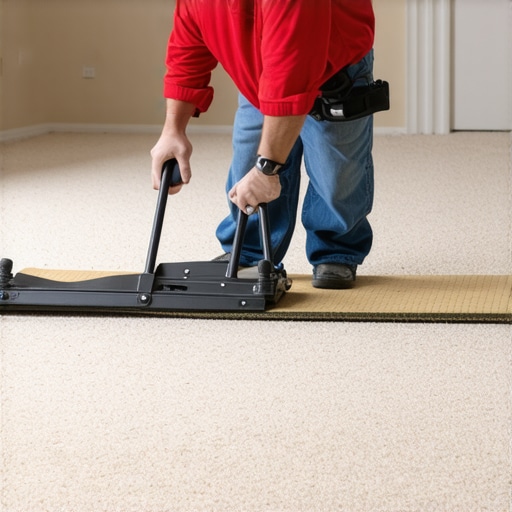
Secure the initial stretch, then use a power stretcher for the main tension. Hook the stretcher’s head onto the opposite wall and gradually increase tension as you press the handle. When I first used this method during a renovation, I faced some initial resistance, but the result was a flawlessly tight carpet that held up over time. It’s important to check for wrinkles as you go, adjusting tension accordingly.
Finish with Proper Securing
Once adequately stretched, reattach the edges to the tack strips, trimming excess carpet as needed. Use a carpet stapler to reinforce edges if necessary. The goal is a smooth, tight surface that resists movement, preventing future sagging. Proper tensioning now will save you headaches down the line, as loose carpets tend to develop wrinkles quickly.
Assess and Adjust
Walk over the carpet to feel for loose spots. If tension feels uneven, release and re-stretch those areas. It’s better to spend extra time during installation than to redo the whole room later. Remember, each room has unique features—doors, furniture, and even irregular walls can influence tensioning. Don’t hesitate to consult detailed guides like this expert source for nuanced tips.
 Many homeowners believe that choosing the right materials is the most critical factor in flooring and shower projects, but in reality, the meticulous execution often makes or breaks the final look and durability. A top misconception is that a perfect initial installation guarantees longevity; however, overlooking subtle nuances like proper acclimation of flooring materials or precise baseboard scribing can lead to issues down the line. For example, failing to account for seasonal expansion and contraction in hardwood can cause gaps or buckling, despite correct installation practices. According to industry experts, understanding these advanced details is crucial for achieving professional-grade results, which can be explored further in guides like this comprehensive resource. A common trap is rushing the sealing process in showers, neglecting proper curing times that prevent water infiltration. When it comes to baseboards, a mistake often made is selecting styles that clash with existing decor, without considering how new trends, such as those highlighted in 2025’s top designs, can elevate your interior. Advanced installers pay attention to details like the accuracy of miters and the use of shims, which are vital for a seamless finish. An intriguing question for seasoned DIYers is whether to opt for glue or nail installation for different scenarios—each has its nuanced applications, as discussed in this detailed guide. Remember, mastering these hidden nuances reduces costly rework and results in a polished, durable space. Have you ever fallen into this trap? Let me know in the comments.
Keep Things Running Smoothly with the Right Equipment
Maintaining your flooring, showers, and baseboards over time is essential for ensuring durability and visual appeal. One of my favorite tools for this purpose is the cordless oscillating multi-tool. Its versatility allows me to perform tasks like sanding out minor scratches on hardwood or trimming caulk in tight corners without setting up bulky equipment. I personally prefer models equipped with variable speed settings because they give me control based on the material and task at hand. For detailed grout cleaning, I rely on a handheld rotary tool fitted with a nylon brush attachment—it’s surprisingly effective at removing stubborn stains without damaging the tile surface.
Quality Cleaning and Inspection Tools
Using a moisture meter is invaluable when inspecting basement or bathroom floors, especially after renovations. I use a small, non-invasive pinless moisture sensor to quickly identify damp spots that could lead to mold or wood warping. Keep in mind that consistent moisture levels are vital for long-term flooring health, and early detection can save you hundreds of dollars in repairs. When cleaning shower enclosures, I swear by a squeegee with a microfiber blade—it cuts down on soap scum buildup and prevents mildew growth. Regularly inspecting baseboards with a bright LED flashlight helps me spot cracks or gaps that need sealing before they worsen.
Software and Planning Tools for Better Results
For larger projects, like redoing an entire room or bathroom, I turn to project management and design software such as Homestyler or SketchUp. These programs let me visualize how new baseboard styles, like those trending in 2025, will look before I buy materials. Planning upfront reduces waste and ensures that alignment and cuts are precise. Additionally, for complex layering or transition projects, I rely on digital measurement tools that help me record exact dimensions, minimizing costly mistakes.
Future Trends and Staying Ahead
The future of maintenance involves smart technology. I predict that in the coming years, we’ll see more smart sensors integrated into flooring and shower systems. These devices could notify you via smartphone about leaks, humidity spikes, or structural shifts before they become major problems. It’s an exciting prospect that makes regular inspections more proactive rather than reactive.
How do I keep my floors and showers in top shape over time?
Adopting a routine maintenance regimen with high-quality tools is my secret. Regularly cleaning grout with a toothbrush-shaped brush attachment, reapplying sealant in showers every 1-2 years, and checking for loose or cracked baseboards are simple steps that pay off significantly. For example, the comprehensive guide to durable installation emphasizes the importance of annual inspections. I highly recommend trying out a power caulk remover tool for resealing shower edges—it makes maintenance easier and prolongs the life of your waterproofing. Ultimately, staying vigilant and using the right tools will ensure your investments stay beautiful and functional for years to come.
Looking back, the one lesson that truly transformed my approach to flooring and finishing projects was realizing that precision and patience outweigh brute force and rushed timelines. The most overlooked detail—consistent tension when installing carpets or carefully scribing baseboards—can make all the difference between a professional finish and a botched job. Embracing this meticulous mindset has not only saved me from costly reworks but also elevated my craftsmanship to a new level.
What I Wish I Knew Before Starting My First Floor or Shower Project
- Don’t Skimp on Tools: Investing in quality stretchers, scribing tools, and inspection gadgets makes flawless installation achievable. My success skyrocketed once I stopped using makeshift equipment and embraced professional-grade gear.
- Measure Multiple Times before cutting or nailing; small miscalculations compound quickly, leading to gaps or misaligned joints. Precision here avoids future headaches.
- Patience Is Key: Rushing through tensioning or sealing leads to imperfections. Taking the extra minutes to check and double-check can save hours troubleshooting later.
- Anticipate Seasonal Changes: Materials expand and contract, especially in showers and hardwood floors. Incorporate allowances during installation to maintain perfect gaps and avoid buckling over time.
- Master the Nuance of Over-Stretching: Proper tensioning prevents wrinkles and sagging, a technique I refined after initial failures. A well-stretched carpet or alignment-oriented baseboard remains pristine for years.
Tools and Resources That Changed My Game
- This comprehensive guide on carpet installation revealed the importance of tensioning and how proper stretching techniques impact longevity.
- A trusted resource for understanding how seasonal shifts affect flooring materials and how to adapt during installation to prevent future damage.
- This guide helped me select baseboard styles that complement my interior while ensuring a perfect fit through accurate scribing and shimming.
- Keeping up with trends keeps my work fresh and aligned with modern aesthetics, boosting my confidence and client satisfaction.
Take Action and Elevate Your Space Today
Your next project is more than just a task—it’s an opportunity to showcase your dedication to quality and precision. Remember, every detail, from tensioning carpets to scribing baseboards, contributes to a space that feels polished and professional. Equip yourself with the right tools, embrace patience, and pay attention to seasonal nuances. You have all the resources and knowledge to make your flooring and finishing touches stand out. Don’t wait—start transforming your home into a masterpiece today!
Have you ever struggled with getting the tension just right during installation? Share your experiences or questions below—I’d love to hear your stories and help you achieve that perfect finish.