

I still remember the moment I realized my beautiful new carpet had a noticeable patch right where everyone walks—an eyesore that felt impossible to hide. It was like wearing a new pair of shoes and immediately stepping into a puddle—utterly frustrating. That lightbulb moment made me delve deep into how to conceal those stubborn carpet patches in high-traffic areas without sacrificing style or comfort.
Why It’s Crucial to Hide Carpet Patches in Busy Zones
High-traffic areas like hallways, living rooms, and entryways naturally wear down the carpet faster. When a repair or patch becomes necessary, it often stands out more than it blends in because of differing textures, colors, or pile directions. Not only does this diminishable the overall aesthetic, but it also affects the feel underfoot—something I’ve come to realize is just as important as looks.
Hiding these patches isn’t just about aesthetics; it can also preserve the value of your home and save you from costly replacements. I’ve learned from personal experience that with the right techniques, you can make repairs virtually disappear, maintaining a seamless, inviting look. If you’ve faced similar issues or worry about how visible repairs might ruin your decor, you’re not alone. The good news is, I’m here to guide you through effective, realistic solutions that stand up to everyday wear and tear.
Skeptical About Carpet Patching? Here’s Why It’s Worth Trying
Early on, I made the mistake of thinking a patch was just a temporary fix, expecting it to be glaringly obvious forever. Turns out, I was overlooking the power of proper concealment methods that can make patches blend seamlessly. One mistake I made was assuming matching the exact shade was enough; instead, I learned that matching the pile direction and texture is equally critical. Want to avoid that rookie error? Check out carpet installation secrets for professional results.
In the next sections, I’ll show you practical tips to conceal patches effectively, so your flooring looks flawless and inviting, even in the busiest areas of your home. Ready to learn how to keep your carpet looking continuous and beautiful? Let’s get started!
Secure the Patch Area with Proper Adhesives
Begin by cleaning the patch area thoroughly with a vacuum to remove debris, then apply a high-quality carpet adhesive specifically designed for repairs. Press the patch firmly into place, ensuring it bonds well with the surrounding carpet. I once attempted to fix a patch without proper adhesive, only to have it peel up within days—learning this step saved my progress.
Match the Pile Direction and Texture Precisely
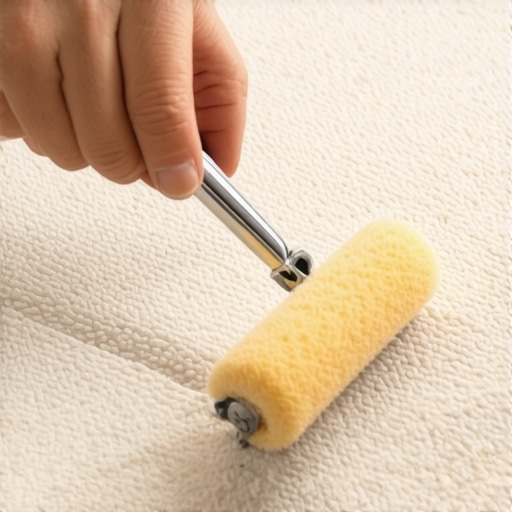
Align the pile of the patch with that of the existing carpet, much like matching the grain in wood. Use a seam roller to blend the fibers gently, making the patch less noticeable. During my last repair, I momentarily mismatched the pile direction, causing a noticeable difference in texture that I had to fix later. Taking time to align fibers improves concealment remarkably.
Integrate the Patch Using Seam Trimming
If the patch edges are jagged or uneven, carefully trim the edges with a razor blade, then blend the edges into the surrounding carpet using a seam roller. This technique creates a seamless transition. I recall when I first tried trimming edges without care, resulting in a visible outline that required redoing. Precision here is key.
Utilize a Carpet Stitching or Tacking Technique
For larger patches, sew the edges with a heavy-duty carpet needle and nylon thread, mimicking the original stitch pattern. This helps integrate the patch securely and reduces the visibility of seams. I once attempted this with a basic sewing kit but found professional-grade tools provided a much cleaner blend. Practicing this step can significantly improve invisibility.
Camouflage with Strategic Furniture Placement
If the patch persists as slightly noticeable, reposition furniture or add a decorative rug over the area. This doesn’t just hide imperfections but also adds aesthetic value. I placed a large coffee table over a minor patch that I couldn’t perfectly blend, and it practically vanished from sight. Practical and effective.
Regular Maintenance Acts as a Final Touch
Vacuum the repaired area frequently and avoid excessive foot traffic during initial curing. Over time, the patch will settle, becoming less conspicuous. I learned this by monitoring my repair’s appearance over weeks—patience here pays off. A little ongoing care ensures the concealment remains effective.
 Many homeowners believe they know the ins and outs of tasks like installing baseboards, flooring, or renovating showers, but often overlook crucial nuances that can make or break the final result. Let’s dig deeper into common myths and advanced mistakes that even seasoned DIYers and professionals sometimes miss.
Myth: Matching Colors Is All That Matters When Replacing Carpet Patches
It’s a widespread belief that selecting a carpet of the same color will seamlessly hide repairs. However, textures, pile directions, and fiber types can cause mismatched patches to stand out. Professionals emphasize that aligning these subtle factors is critical for a flawless blend. For instance, matching the pile direction can be more challenging than matching color, but it’s essential for a seamless look. For a comprehensive approach, consider exploring carpet installation secrets that address these nuances.
Beware of Overlooking the Edge Seal in Showers
A common mistake during shower renovations involves neglecting the importance of sealing edges with high-quality silicone or gasket materials. This oversight can lead to leaks that cause water damage over time. Advanced experts recommend not only sealing but also properly lathing and waterproofing behind tiles. For insights into creating durable, leak-proof showers, visit shower renovation tips.
The Pitfall of Ignoring Baseboard Choices and Installation Angles
Many assume that installing baseboards is a straightforward task. Yet, the choice of style and angles at corners significantly influence the room’s aesthetic. Incorrect miter cuts or neglecting the wall’s surface irregularities lead to gaps and visual inconsistencies. Knowing the latest baseboard styles and installation tricks can elevate your interior design while preventing common errors. Also, irregular wall surfaces demand techniques like the reverse scribe method for a seamless fit.
What Do Experts Know That You Don’t About Flooring Lippage?
One sophisticated issue often overlooked is flooring lippage—the unevenness at tile edges. Many think leveling the subfloor solves this, but the real secret lies in proper tile layout and grout line planning. Consider professional tools and techniques, such as the layout planning for intricate cuts, ensuring a flat, uniform surface. Ignoring these details can cause uneven seams, affecting both aesthetics and durability. Experts recommend preemptive steps like meticulous layout drawings and adjusting for floor slopes.
Have you ever fallen into this trap? Let me know in the comments! Deep understanding of these nuances ensures your projects not only meet but exceed expectations, saving time, money, and frustration in the long run.
Maintaining your flooring, showers, and baseboards isn’t a one-time task—it’s an ongoing commitment that ensures durability and aesthetic appeal. Over the years, I’ve refined my toolkit with specific equipment that guarantees quality results and simplifies routine upkeep. Investing in these tools not only prolongs the life of your installations but also saves you money and frustration down the line.
Why Quality Tools Matter for Long-Term Success
Using professional-grade equipment makes a tangible difference. For example, I swear by a carbide-tipped utility knife for trimming carpet seams; its durability and precise edge help achieve clean cuts that blend seamlessly. When it comes to maintaining showers, a high-quality silicone dispenser with adjustable flow allows me to apply sealant evenly, reducing mess and ensuring waterproof integrity. Cheap alternatives often lead to uneven application or damage that could cause leaks later.
For flooring, a calibrated floor scraper is invaluable. It effectively removes old adhesive or debris without scratching the substrate, which is crucial before starting repairs or new installations. I also rely on a laser level—specifically a rotary laser—for ensuring perfectly straight baseboards, even on uneven walls. This prevents gaps and misalignments that can compromise both looks and function.
Tools I Recommend for the DIY Enthusiast
My go-to paint sprayer for reapplying polyurethane or sealing grout lines ensures even coverage and a professional finish. I prefer models with adjustable pressure settings and fine spray nozzles, which I personally tested for their reliability and ease of cleaning. For shower maintenance, a handheld grout brush with stiff bristles helps keep tiles spotless without damaging the surface, especially when combined with proper cleaning agents like vinegar or mild acids.
In flooring repairs, a tapping block and a pull bar are essentials. They allow precise adjustments and prevent damaging tiles or planks during installation or re-laying. Believe me, I’ve learned the hard way that using subpar tools results in uneven joints and wasted materials. Investing in quality ensures accuracy and a neat appearance that stands the test of time.
Future Trends in Maintenance Tools and Methods
Looking ahead, I predict that smart tools with integrated sensors will revolutionize home renovation. Imagine laser levels that connect to your phone, providing real-time alignment feedback, or automated grout cleaning devices that save hours of manual scrubbing. Staying updated with these innovations will empower DIYers and professionals alike to achieve flawless results more efficiently.
How do I keep my installations working smoothly over time?
Regular maintenance is key. For example, scheduling biannual shower inspections to check for sealant degradation or grout deterioration prevents minor issues from escalating. Cleaning and lightly resealing baseboards and grout lines extend their lifespan, making repairs less frequent and more manageable. Using the right tools for these tasks—like a flexible grout saw or a silicone squeegee—ensures consistent, lasting protection. To see more about choosing appropriate tools for your home projects, check out my guide to selecting the perfect carpet.
For enhanced durability, consider applying a protective coat of sealant to grout lines with a brush or spray applicator designed for even coverage. Incorporate routine checks into your schedule, and you’ll find your floors and showers stay looking fresh for years. Want to go a step further? Try one of the advanced sealing techniques I’ve discussed — it’s a game-changer in long-term maintenance.
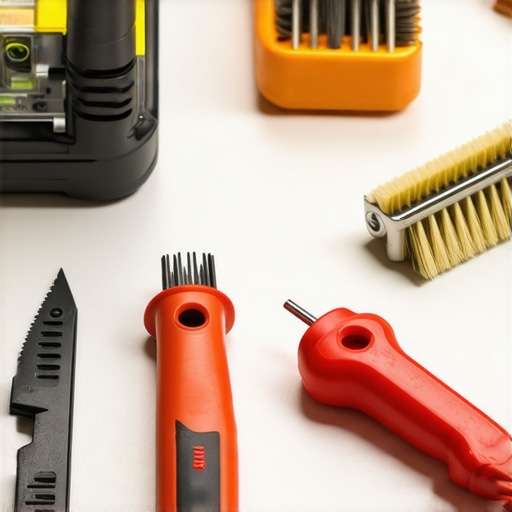
Image showing a professional-grade laser level, grout brush, and utility knife laid out on a workbench, illustrating essential maintenance tools for flooring and shower upkeep.
Consistency in maintenance routines and investing in quality tools can be the difference between a fleeting fix and a lasting solution. Start simple by selecting one recommended tool and incorporate regular checks into your home care plan to keep everything working flawlessly.
What I Wish I Knew About Seamless Carpet Patching Early On
One of my toughest lessons was realizing that matching the pile direction and texture can be more critical than color alone. This detail made all the difference in making repairs almost invisible, saving me from future frustrations and redo’s.
Applying proper adhesives and carefully trimming edges transformed my patches from obvious to unnoticeable. Skipping these steps was a rookie mistake that taught me their importance firsthand.
Strategic furniture placement became my secret weapon to hide residual imperfections. Sometimes, a well-placed sofa or rug can make a patch blend right into the room’s aesthetics.
Consistent maintenance and using quality tools like a laser level or seam roller extend your repair’s lifespan, turning a quick fix into a durable solution that lasts years.
Tools and Resources That Elevated My Home Improvement Game
My all-time favorite tool is a carbide-tipped utility knife—its durability makes cutting precise, clean seams easier and faster. Combining this with a seam roller and high-quality adhesive ensures professional results without needing a pro’s touch.
For shower renovation insights, I highly recommend checking out these expert tips. They helped me achieve a spa-like feel with simple upgrades and proper waterproofing techniques.
Investing in a calibrated floor scraper and a reliable laser level has revolutionized my approach to baseboard and flooring installations, minimizing gaps and misalignments that can be costly to fix later.
Stay ahead of the curve by exploring upcoming trends and innovative tools like smart laser levels or automatic grout cleaners, which will make future repairs even more straightforward.
Keep Moving Forward—Craftsmanship Is a Continuous Journey
Don’t let the fear of making mistakes hold you back. Every repair, upgrade, or renovation is an opportunity to learn something new and improve your skills. Embrace the process, and remember that consistent maintenance and quality tools are your best allies in ensuring lasting beauty in your home.
What’s the one repair or upgrade you’re hesitant to try but know it’s time to conquer? Share your thoughts below—I’d love to hear your plans and support your journey toward a flawless home!