

I vividly remember the moment I realized I had been doing my tile backsplashes all wrong for years. There I was, elbow-deep in adhesive, trying to align a beautifully patterned tile, only to find the patterns didn’t match up as seamlessly as I envisioned. It was frustrating—and a little embarrassing. That lightbulb moment led me down a rabbit hole of research and trial-and-error, but one rule changed everything: the infamous ‘Dry-Lay’ rule.
Preparing Your Space Correctly
Before laying any flooring or tiles, ensure the subfloor or surface is clean, level, and dry. Use a level to identify high or low spots; these must be addressed to prevent issues down the line. For example, I once skipped this step in a bathroom renovation, which led to tiles cracking over time. Shimming uneven areas with a leveling compound creates a perfectly flat surface, akin to smoothing out a wrinkled sheet before laying the new fabric.
Planning Your Layout Effectively
Start by measuring your space meticulously. Use a chalk line to establish the main reference point—often the longest wall or the center of the room. This guides tile or carpet placement, ensuring symmetry. For flooring, plan your pattern to avoid small cuts at the edges, which look unprofessional. An effective trick I learned was to lay out a dry run of tiles or planks without adhesive or glue, adjusting until the pattern looks balanced—comparable to sketching a blueprint before construction.
Accurate Measurement and Cutting
Precision is key here. Measure each section multiple times before cutting. Use a wet saw for tiles, ensuring clean, straight cuts. When adapting baseboards, I found that coping with a jigsaw provides a more seamless fit around irregular walls than miter cuts. For carpet, the double-cut method helps achieve perfect seams, reducing visible joins. Remember, cutting slightly larger than needed allows for adjustments, preventing tight fits or gaps that can spoil the finish.
Laying the Material Steadily
Apply adhesive or mortar evenly using the appropriate trowel, working in manageable sections. For vinyl plank installation, the secret is to avoid over-stretching, which can cause sagging. Use a dead-blow mallet to gently tap planks into place, ensuring tight locking without damaging the material. In my experience, working systematically and checking your progress frequently reduces mistakes, like uneven tile rows or loose carpet edges.
Securing and Finishing Touches
Once laid, give the material time to set. For tiles, cure time is critical; resist the temptation to walk on them prematurely. For carpets, use power stretchers for high-traffic areas, ensuring a taut surface. When installing baseboards, nailing at an angle and filling nail holes with wood filler ensures a clean look. Additionally, sealing grout lines prevents water penetration and discoloration. I once neglected this step and faced mold issues, highlighting its importance. Visiting the detailed guide on creating a spa-like shower experience can provide additional finishing insights.
While many homeowners believe that following basic instructions guarantees a flawless finish, the reality is that the intricacies of proper installation often elude even seasoned DIYers. One prevalent misconception is that simple adhesion suffices for shower waterproofing—however, neglecting proper sealing techniques can lead to leaks and mold issues, as emphasized in expert guides like shower enclosure tips. Another common mistake involves flooring expansion gaps; many installers dismiss these, causing buckling or gaps during seasonal humidity changes. Understanding the importance of these hidden nuances ensures longevity and professional appearance. But what about the pitfalls that can derail your entire project? One trap that often catches even experienced installers is the misalignment of baseboards. While it seems trivial, improper scribing and nailing techniques quickly become apparent once walls settle or shift, leading to gaps or crooked lines. Advanced homeowners should consider complex solutions like the baseboard alterations to avoid these issues. Additionally, applying adhesive directly to the subfloor without securing it properly or neglecting moisture barriers can cause premature failure of flooring materials. According to industry standards, meticulous surface preparation and correct material selection are essential for lasting results.
Ever wonder why some installations look perfect in photos but falter in real life? The secret often lies in the details—like the timing of grout sealing or the choice of transition strips. For instance, many underestimate the impact of properly cured adhesives, which can lead to shifting tiles or uneven surfaces. It’s worth noting that advanced techniques, such as the mud bed method, provide superior stability for shower pans and floors, but require patience and experience to execute correctly.
In conclusion, mastering the finer points of installation is less about DIY shortcuts and more about understanding the hidden intricacies that ensure durability and visual harmony. Recognizing these subtle details prevents costly mistakes and elevates your craftsmanship. If you’ve ever fallen into these traps, share your experience in the comments! For more insights into professional techniques, check out our comprehensive guides and stay ahead in your home improvement journey.Maintaining your flooring, shower enclosures, and baseboards after installation is key to prolonging their lifespan and ensuring your home stays beautiful. Using the right tools and adopting a routine maintenance schedule can save you time and money, preventing small issues from becoming costly repairs.
Invest in Quality Tools for Routine Care
When it comes to cleaning and minor repairs, having the right equipment is crucial. A high-quality grout brush and a damp microfiber cloth are indispensable for keeping grout lines clean and preventing mold buildup—especially if you have tile showers or backsplashes. I highly recommend a handheld steam cleaner; it effortlessly removes grime without harsh chemicals, which is gentler on your surfaces and safer for your family. For baseboards, a soft brush attachment on your vacuum can gently lift dust, while a caulking removal tool makes resealing joints straightforward, preserving the waterproof barrier in showers.
Establish a Consistent Maintenance Routine
Regular inspections can detect early signs of wear, such as loose grout, gaps in baseboards, or tiny cracks in flooring. Addressing issues promptly prevents water intrusion or structural problems. For example, reapplying grout sealant every couple of years helps maintain its water-resistant properties—[according to industry standards](https://tilecraftsmens.com/your-guide-to-durable-flooring-installation-for-a-stylish-home),] and keeps your shower looking pristine. Similarly, sweeping and mopping high-traffic flooring weekly prevents dirt buildup that can scratch or degrade the surface over time.
Use Protective Measures to Extend Longevity
Applying protective pads under furniture legs minimizes scratches on hardwood or laminate flooring. For shower doors, consider installing a squeegee and wiping down surfaces daily; this simple routine keeps soap scum, water spots, and mold at bay. When installing baseboards, sealing the joints with a silicone caulk prevents water seepage behind the trim—[a technique emphasized in our guide on creating a spa-like shower](https://tilecraftsmens.com/creating-a-spa-like-shower-experience-tips-tricks). An investment in these small tools and habits pays off by maintaining your surfaces’ integrity over the long term.
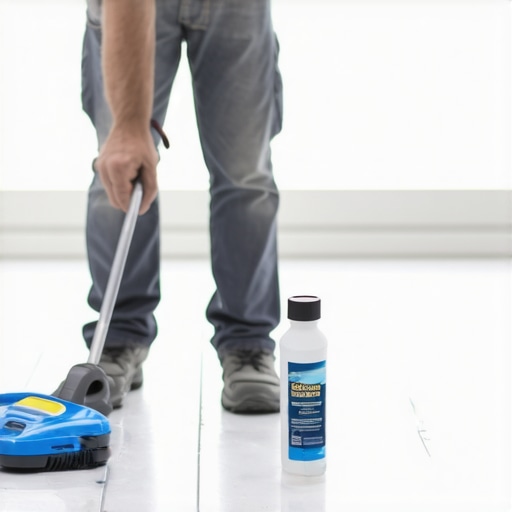
Image shows a homeowner using a steam cleaner to clean tile grout and applying silicone sealant around a shower niche, illustrating proper maintenance techniques for tile and shower care.
How do I maintain my installations over time?
Beyond routine cleaning, periodically inspect for signs of damage or wear, like cracked grout, loose tiles, or gaps in baseboards. Re-seal grout lines and caulk joints every 2-3 years, especially in wet areas. Replace worn-out transition strips to prevent tripping hazards and ensure a seamless look. For flooring and shower elements, consulting detailed guides like our expert tips on shower enclosures helps you stay ahead. Interestingly, industry experts recommend using a detailed moisture meter to detect hidden leaks behind tiles or under flooring—preventing costly structural damage.
Encourage yourself to try a professional trick: regularly applying a spray-on grout sealant can vastly improve longevity and prevent discoloration. Making this a routine every two years ensures your investment stays protected and your spaces look fresh for years to come.
What I Wish I Knew When I Started
The biggest lesson I learned was that not every seemingly small detail is trivial. For instance, overlooking the importance of moisture barriers during flooring installation can lead to long-term damage, a mistake I made early on. I also realized that patience in sealing grout and waiting for adhesives to cure might seem tedious but pays dividends in durability and appearance. Additionally, I discovered that embracing precision measurement—double-checking before cuts—avoids costly rework. Lastly, understanding that home upgrades are an investment in your comfort and peace of mind, not just aesthetics, dramatically changed my approach to every project.
Tools and Resources That Make All the Difference
My go-to toolkit includes a quality wet saw for clean cuts, a flexible caulking gun for sealing tricky corners, and a moisture meter to prevent hidden leaks—these are non-negotiables in my projects. I trust this detailed shower renovation guide to ensure long-lasting, professional results. For baseboard installations, I rely on a reputable miter saw paired with these tips on choosing the right style. Books like “The Complete Guide to Home Renovation” have expanded my understanding of fundamental techniques. These tools and resources have become my secret weapons in creating spaces that stand the test of time.
Brightening Your Future with Home Improvement Confidence
Remember, every project is an opportunity to enhance your home’s functionality and your enjoyment of it. Don’t hesitate to take that first step—start small, stay consistent, and celebrate each success. Mastering the nuances of proper installation and maintenance transforms a house into a true home. Your dedication now will pay dividends for years, saving you time, money, and stress down the line. Embrace the process, learn from missteps, and envision the beautiful, durable space you’re building. You’ve got this—your dream home is within reach! Keep pushing forward, and let your improvements speak volumes about your commitment and care.