

It’s late at night, I step into my shower, eager to unwind after a long day. But instead of the soothing scent of lavender or fresh air, I’m met with an unmistakable foul odor—like rotten eggs—wafting from the drain. It’s enough to make me want to skip the shower altogether. Sound familiar? That sudden, nose-wrinkling surprise can turn a relaxing routine into a frustrating ordeal. And trust me, I’ve been there too.
Don’t Ignore the Smell: It’s More Than Just Nasty Odor
When your shower drain begins to emit that sulfuric, rotten egg smell, it’s more than a minor annoyance. It’s often a sign that something’s off in your plumbing system—something that could lead to bigger problems if left unchecked. Usually, it’s caused by hydrogen sulfide gas, which forms when organic material in the drain decomposes in the presence of moisture. Left untreated, this odor can become persistent, invading your bathroom and affecting your entire home’s air quality. Early on, I made the mistake of thinking it was just a temporary issue, but ignoring it only made things worse. I eventually learned that a simple cleaning or checkup could prevent more extensive—and expensive—repairs later.
Is the Smell Just a Minor Fix Or Signals a Plumbing Disaster?
I used to assume that pouring a bit of bleach down the drain would solve the problem. Turns out, that’s not always the case. If you’re like me and want to get to the bottom of this odor, knowing when it’s a quick fix or a sign of something serious matters. The good news? Often, it’s a straightforward fix—like cleaning out the P-trap or eliminating organic buildup. But sometimes, it points to more significant issues such as sewer line backups or venting problems. Recognizing which is which can save you time and money. For reliable tips, I reference expert advice from plumbers who identify that proper maintenance can prevent these odors from ever becoming a problem, keeping your bathroom fresh and safe (source: shower repair guide).
So, have you faced that noxious smell coming from your drain unexpectedly? If so, don’t worry—there’s a systematic way to troubleshoot and resolve this issue. Stay with me, because I’ll walk you through the key steps to banish that rotten egg smell once and for all and restore your shower to a fresh, inviting space.
.
Start with a Thorough Drain Cleaning
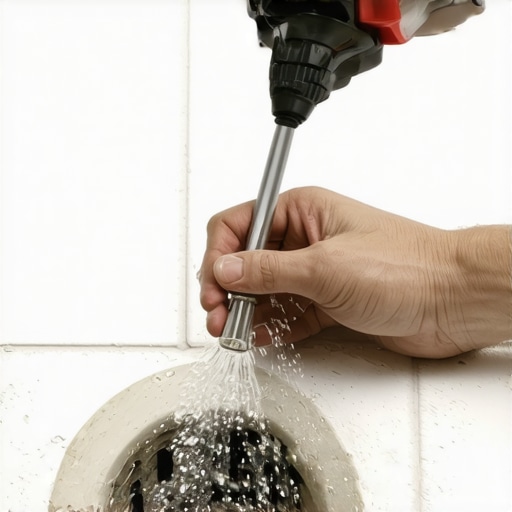
Remove the drain cover carefully using a screwdriver, then clear out any visible debris or hair caught inside. Use a drain snake or a wire hanger to dislodge stubborn buildup deep in the pipe. Pour a mix of hot water and baking soda down the drain, followed by vinegar, to neutralize organic matter. This simple cleaning often eliminates hydrogen sulfide gas sources, halting the smell at its origin. I once tackled this by gripping my drain cover and pulling out a tangled mess of soap scum and hair, which immediately reduced the odor and restored my confidence in home maintenance.
Inspect and Pump the P-Trap
Locate the P-trap under your shower—it’s the U-shaped pipe that holds water to block sewer gases. Place a bucket underneath, then loosen the slip nuts carefully with adjustable pliers. Remove the trap and clean out any sludge or organic buildup inside. Rinse it thoroughly and reassemble, making sure all connections are tight. Filling the trap with water ensures a proper seal. I once forgot to refill the trap, which kept the smell lingering—once I refilled it, the odor vanished instantly. This step is critical because a dry or clogged P-trap allows gases to escape, so don’t skip it.
Examine Venting Systems
Vents allow sewer gases to escape above the roof, preventing odors in your bathroom. Head outside and locate your roof vent stack—usually a pipe protruding near the roof peak. Check for blockages like leaves, bird nests, or debris that might obstruct airflow. Use a broom or garden tool to clear any obstructions from ground level or safely from the roof. If venting is blocked, gases will backflow into your bathroom, causing odors. I once cleared a clogged vent using a garden hoe, which immediately stopped the smell and improved drainage. Ensuring proper venting can prevent this issue from reoccurring.
Identify and Address Organic Buildup
Organic matter often accumulates in the drain pipes, especially in areas with hard water. Use a commercial enzymatic cleaner designed to digest organic waste, applied according to package instructions. Pour it down the drain and let it sit overnight. Repeat weekly to prevent buildup. For stubborn cases, consider removing the P-trap and inspecting it for sludge. Regular cleaning prevents decomposing organic material that produces hydrogen sulfide. I’ve seen even small clogs with visible slime cause persistent odors, so routine maintenance is vital for long-term freshness. Consistent cleaning keeps organic buildup at bay and your shower smelling clean.
Prevent Future Odors with Routine Maintenance
Implement a weekly cleaning schedule using baking soda and vinegar or enzymatic cleaners. Keep the drain cover clean and free of hair. Trim tree branches near vent stacks to avoid blockages from leaves or nests. Regularly inspect for leaks or damage in pipes that could cause organic detritus accumulation. Proper drainage and venting practices ensure odors are vented properly, maintaining a fresh shower environment. I now set a calendar reminder for weekly drain upkeep, which has saved me from surprises and costly repairs down the line. Staying proactive sustains a healthy and odor-free bathroom every day.
 Many homeowners assume that these projects are straightforward, but the reality is far more nuanced. For instance, a widespread myth in shower renovation is that sealing all the joints with generic caulk guarantees waterproofing. In reality, advanced waterproofing methods—like installing proper membrane systems—are essential to prevent leaks that can cause extensive damage. Similarly, with carpet installation, many think that laying the carpet directly onto the subfloor suffices, but ignoring the importance of proper padding and subfloor preparation can lead to early wear and seam unraveling. On flooring, a common mistake is neglecting the importance of acclimation—allowing materials like hardwood to adjust to the home’s humidity—before installation. Skipping this step can cause gaps or buckling later. When it comes to baseboards, people often use inexpensive materials expecting a quick cosmetic fix, unaware that choosing the right type and precise miters significantly impacts long-term durability and aesthetic appeal. An advanced consideration for baseboard installation is ensuring proper expansion gaps, especially in environments with fluctuating temperatures, to avoid warping or cracking over time. Moreover, many overlook the significance of correct nail or adhesive placement, which can lead to joints opening up or the baseboards detaching. Recognizing these nuances and avoiding common traps can elevate your renovation results. For example, professional installations often include meticulous framing for even surfaces, proper sealing against moisture, and strategic placement of fasteners—details that make a noticeable difference. Reviewing expert insights can help you avoid costly mistakes and achieve a cohesive, durable finish in your home projects. A study from the National Association of Home Builders highlights that proper planning and material selection are crucial for lasting results in remodeling projects. So, have you ever fallen into this trap? Let me know in the comments.
Keep It Working: Essential Tools and Expert Tips for Longevity
Maintaining your home improvements, whether it’s your shower, flooring, or baseboards, requires not only knowledge but also the right tools. Investing in quality equipment ensures that repairs and upkeep are effective and less time-consuming. One must-have is a versatile cordless drill with adjustable torque settings—perfect for installing or removing fasteners without damaging materials. I personally rely on a model with lithium-ion batteries because it offers consistent power and long life, making small repairs and adjustments a breeze. Additionally, a high-quality pneumatic nail gun is invaluable for securing baseboards or flooring planks quickly and securely, especially in large projects. This tool reduces manual effort and ensures a clean, professional finish, which is critical for long-term durability.
For detailed flooring work, I recommend a calibrated laser level—a small investment that dramatically improves alignment accuracy during installation. Precise leveling prevents future issues like squeaking or gaps, and I use a laser level from a reputable brand for its reliability and ease of use. When it comes to cleaning and preventive maintenance of drains, a good enzyme-based cleaner, such as BioCleaning’s bio-enzymatic formulas, keeps organic buildup at bay, reducing foul odors and potential blockages. Regular use of these cleaners, especially after installation, extends the lifespan of your plumbing and maintains a fresh bathroom environment.
Long-term results also depend on consistent inspection and proactive repairs. For example, installing a moisture barrier beneath flooring or baseboards helps prevent mold and water damage over time. A vapor barrier like 6-mil polyethylene sheeting is essential in moisture-prone areas. I emphasize this because neglecting such detail can lead to costly repairs down the line. Moreover, embracing smart home technology, like moisture sensors linked to your smartphone, can alert you early to leaks or humidity issues, enabling prompt response before significant damage occurs. These sensors are becoming more affordable and easy to install, making them an excellent addition for future-proofing your home.
Looking ahead, the trend is moving towards more integrated maintenance systems—combining traditional tools with digital monitoring. Embracing these innovations helps homeowners stay ahead of problems and maintain their investments effectively. For example, automation in venting systems to control humidity levels in bathrooms can drastically reduce mold growth and odors, a trend I believe will grow as smart technology becomes more accessible.
How do I maintain my home projects over time?
Consistency is key. Establish a routine schedule for inspecting your flooring, plumbing, and baseboards. Use precise tools like laser levels and moisture sensors to catch issues early, and always keep a stock of quality repair materials and tools to address minor problems before they escalate. For detailed advice on flooring upkeep, I recommend reading this guide on durable flooring. Setting aside time and investing in the right equipment now will save you time and money in the long run, making your home not just beautiful but resilient and easy to maintain.
Every renovation journey uncovers hidden truths that transform our approach to home improvement. Over time, I’ve realized that small details—like proper venting or choosing the right materials—can make or break a project’s longevity. Mistakes such as neglecting moisture barriers or rushing a flooring job taught me the importance of patience and thorough planning. Embracing continuous learning and listening to expert advice has empowered me to create spaces that are both beautiful and resilient. Remember, the real mastery in home renovation lies in constantly refining your technique and knowledge, ensuring each project stands the test of time and daily life.
Tools and Resources That Changed My Game
Investing in quality tools truly makes a difference. My cordless drill with adjustable torque has saved me countless hours on baseboard miters, while a reliable laser level has kept my tile layouts perfectly straight. For plumbing, I trust enzymatic cleaners like BioCleaning’s formulas—they’ve drastically reduced foul odors and organic buildup. Books such as this guide on durable flooring have deepened my understanding of installation nuances. Additionally, expert blogs from reputable sources help me stay updated on best practices. These resources have become my go-to companions for ensuring quality and durability in every home project.
Your Next Step in Home Transformation
Don’t wait for the perfect moment—start applying what you’ve learned today. Whether it’s fixing that lingering shower odor or upgrading your baseboards with the latest styles, taking action now leads to rewarding results. Embrace the journey of continuous improvement, knowing that each upgrade adds value and comfort to your home. The possibilities are endless—so pick one project, gather your tools, and get going. Your future self will thank you for the effort and care you invest today.