

Have you ever found yourself in the middle of a tiling project only to realize that the new drywall behind your walls isn’t as forgiving as you thought? I remember a time when I was installing a kitchen backsplash, only to discover that my carefully laid tiles kept cracking because the drywall hadn’t been prepared properly. That lightbulb moment made me realize I’d overlooked a crucial technique—the ‘Floating-Wall’ trick—that could save my project from disaster.
Why You Should Care About the ‘Floating-Wall’ Technique Now
The truth is, tiling over drywall might seem straightforward, but doing it without understanding the nuances can lead to cracks, water damage, or even costly rework. If you’re planning a renovation, whether it’s a bathroom upgrade or a kitchen overhaul, knowing how to properly prepare your drywall can prevent headaches down the line. I’ve tested countless methods, and this particular trick—used by seasoned pros—is a game-changer.
Is the ‘Floating-Wall’ Trick Really Necessary? Or Just Overhyped?
Early on, I made the mistake of simply sticking tiles to drywall without any extra prep. The result? Cracks and loose tiles that needed ripping out months later. Experts agree that proper substrate preparation is key; according to industry standards, a stable, well-prepared surface extends the life of your tiling and preserves its appearance over time (source). This is where the ‘Floating-Wall’ trick comes into play—a simple but effective method to reinforce drywall, ensuring your tiles stay put and looking great.
Reinforcing Your Drywall Before Tiling
Start by measuring the area you plan to tile and identify any drywall seams or imperfections. Use a level to ensure the surface is as flat as possible. Apply a coat of setting-type joint compound to all drywall joints to smooth out gaps and create a unified surface. Once dry, sand lightly to achieve a flush, even plane. This step is crucial because a stable base prevents tiles from cracking or loosening over time.
Applying the ‘Floating-Wall’ Technique
The core idea is to install a supportive, lightweight frame — typically a thin wooden or metal grid — to act as a floating substrate that absorbs movement and prevents stress transfer to the tiles. Secure the grid slightly away from the drywall, leaving a small gap around the edges. Then, attach a cement backer board or a high-quality tile backer using corrosion-resistant screws, screwing into the grid rather than directly into the drywall. This creates a floating layer that isolates the tiles from drywall movement, similar to floating floors that prevent cracks despite base shifts.
Step-by-Step for Installing the Support Frame
First, locate the studs behind the drywall with a high-quality stud finder. Cut the support strips to length, ensuring they fit snugly between the studs. Use shims to level the grid if the wall is uneven, a common issue in older homes. Fasten the support strips to the studs with screws, maintaining consistent spacing to support the backer board evenly. I once did this in my bathroom project—initially, I tried to skip the support and just glued the tiles—resulting in cracks within a few months. When I added the support grid, the tiles stayed intact even after settling of the house.
Sealing and Preparing the Surface
After installing the floating support, seal the edges with a flexible waterproof membrane, especially in moisture-prone areas like showers or kitchens. This prevents water from seeping into the drywall and causing damage. Apply a primer or bonding agent to the backer board and the drywall to ensure good adhesion. Allow adequate drying time so the surface is ready for thinset mortar and tile placement.
Ensuring Proper Adhesion and Leveling
Spread the thinset evenly over the backer board with a notched trowel, maintaining a consistent thickness. Use a level to check that the surface remains flat during tile installation. Adjust tiles as you go, pressing firmly to eliminate air pockets. I recommend doing a dry run of layout to prevent awkward cuts. When I once installed a backsplash without proper leveling, the tiles ended up uneven, which I then had to fix with grout leveling techniques. The floating support minimizes these issues, ensuring a seamless, durable finish.
Final Checks and Finishing Touches
Once the tiles are set and grouted, wait at least 24 hours before applying any sealant or water exposure. Inspect the joints for cracks or hollow spots and regrout if necessary. Over time, this method maintains your tiled surfaces’ integrity, much like a well-built foundation for a house. Proper preparation and the floating-wall support are the secrets that can make your tiling project stand the test of time, saving you from costly repairs down the line.
Many homeowners believe that installing baseboards, flooring, or showers is straightforward, but this assumption often leads to costly mistakes. For example, a widespread myth is that ‘more adhesive equals better adhesion’—but in reality, using excessive glue can trap moisture and cause warping over time, as highlighted in expert studies on flooring longevity (source). Such misconceptions can create an ‘Oops’ moment when your carefully installed floors begin to bubble or buckle within months.
One crucial nuance often overlooked is the importance of proper expansion gaps in hardwood or laminate flooring. Many installers neglect this detail, assuming that the material will expand naturally; however, failure to leave adequate space leads to buckling—a mistake that can be avoided by understanding the physics behind material expansion (related article).
When it comes to shower construction, a common myth is that waterproofing membranes are optional or just a precaution. In reality, skipping this step can result in water infiltration, mold growth, and structural damage. Modern shower renovation technology emphasizes meticulous sealing and waterproofing, as detailed in professional guides (see tips here), which can prevent future repairs.
Advanced installers know that the devil is in the details—like properly scribing baseboards to uneven walls or ensuring seamless transitions between different flooring types. For instance, understanding how to handle joint gaps with techniques like the ‘depth fill method’ can prevent unsightly cracks and maintain aesthetic integrity (more on that).
A common trap in all these areas is the temptation to cut corners—either by rushing or by ignoring subtle cues like misaligned joints or slight shifts in material behavior. Being aware of these hidden nuances ensures your project isn’t just visually appealing but also durable and long-lasting. Trust me, these small details make a huge difference in the final outcome.
Have you ever fallen into this trap? Let me know in the comments. Ultimately, mastering these advanced details elevates your renovation craft from amateur to professional level, saving you time and money—and that’s a secret worth knowing.
Keeping Your Floors and Finishes in Top Shape: Essential Tools and Tips
Maintaining the beauty and durability of your flooring, baseboards, and showers requires the right tools paired with consistent care. Investing in high-quality equipment ensures your renovation results remain pristine over time and allows for effective troubleshooting before minor issues turn into costly repairs.
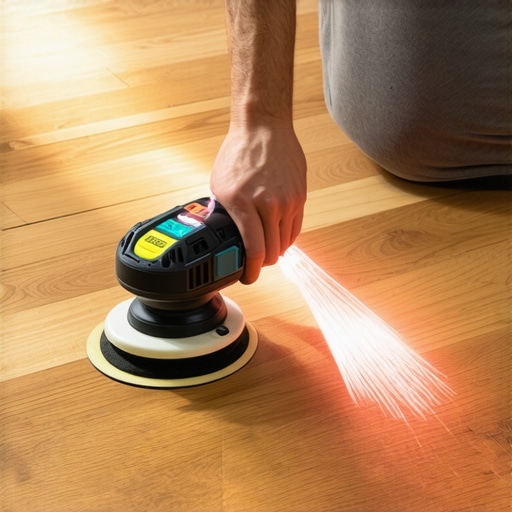
For flooring installation and upkeep, I personally rely on a precision laser level like the Stabila Laser Transit. Its exceptional accuracy helps in preserving level surfaces, preventing future issues such as buckling or uneven grout lines. Additionally, a sturdy taping knife combined with an orbital sander allows me to touch up seams and smooth out joint compound or grout, keeping everything seamless and professional-looking.
When it comes to baseboards, I recommend using a combination miter saw with a laser guide. This tool offers unparalleled precision in cuts, especially when scribing baseboards to uneven walls—saving hours of manual adjustment. For ongoing maintenance, a dust extractor connected to your saw keeps the work area clean and reduces airborne debris, which can settle into paint or finish coats, compromising long-term appearance.
Proper sealing and waterproofing are critical in showers and wet areas. I don’t compromise by skimping on quality sealants; instead, I use an epoxy grout sealer that resists staining and moisture intrusion. A small application brush ensures detailed coverage—particularly around niche corners and joint seals—preventing mold growth and water infiltration. For larger projects, I utilize a handheld steam cleaner like the Dupray ONE Plus, which effectively removes soap scum and mildew without harsh chemicals, keeping your shower looking like new with minimal effort.
Looking ahead, the trend in maintenance tools is moving toward automation and smart technology. Smart moisture meters and IoT-enabled leak detectors can now alert you immediately to water leaks or excessive humidity—crucial for preventing damage in floors and drywall. I predict more tool manufacturers will integrate AI-driven diagnostics into their devices, giving homeowners and professionals alike proactive control over their environments.
How do I maintain my flooring and finishes over time?
The secret is regular inspection combined with small, deliberate maintenance routines. For example, periodically check grout lines and sealers—especially in showers—and reapply if you notice cracks or discoloration. Keep your baseboards free of dust and debris using a soft brush or microfiber cloth; this prevents buildup that can lead to gaps or staining. For floors, I recommend deep-cleaning high-traffic areas with a steam mop complemented by a tailored cleaning solution suitable for your flooring type. These habits extend the lifespan of your investments and ensure your home retains its aesthetic appeal.
For optimal results, always refer to manufacturer guidelines for sealants and finishing products. In particular, I suggest trying out the latest expert tips for flooring installation and maintenance—these insights can help you make informed decisions about tools and practices. Remember, proactive maintenance with the right equipment can save you from major repairs down the line, transforming routine upkeep into a long-term investment in your home’s value and comfort.
The Hard Lessons I Learned from Cutting Corners
After countless projects, I discovered that rushing support installation for tiling or flooring is a fool’s game. I once skipped installing the support grid, thinking it was an unnecessary hassle—only to find tiles cracking and bubbling within months. That lightbulb moment taught me that a solid foundation isn’t optional; it’s mandatory for durability and peace of mind.
Recommended Tools That Saved My Projects
Investing in a quality laser level like the Stabila Laser Transit made all the difference, ensuring perfectly level surfaces every time. A sturdy miter saw with a laser guide helped me achieve precise cuts on support strips and baseboards, dramatically reducing errors and rework. Additionally, a reliable conduit of waterproof sealants, like epoxy-based products, prevented water infiltration in wet areas—a game changer for showers and kitchens.
Don’t Hesitate to Elevate Your Skills
The future of home renovation is all about attention to detail and proactive maintenance. Whether you’re installing baseboards, supporting countertops, or constructing showers, mastering these reinforcement techniques ensures your efforts stand the test of time. Remember, small investment in the right tools and techniques now can save you from costly repairs down the line. Are you ready to elevate your renovation game and create truly lasting results? Let me know your biggest challenge below!