

I remember the frustration vividly—standing in my bathroom, trying to fix a stubbornly uneven shower bench, and feeling like I was fighting a losing battle. No matter how much I tried to shim or adjust, that heavy stone or tiled surface just refused to sit perfectly level. It was like trying to balance a sinking ship on a stormy sea. That lightbulb moment hit me suddenly: there had to be a better way.
Why Leveling Heavy Shower Benches Can Feel Like an Uphill Battle
Heavy showers benches are notorious for unevenness—sometimes due to settling, shifting, or simply miscalculations during installation. When these benches aren’t level, it not only looks unappealing but can also cause water pooling and increase the risk of leaks and damage over time. It’s more than a cosmetic issue; it’s a durability concern.
I’ve seen homeowners rush into fixes that only make the problem worse—using layers of grout or cramming shims without truly understanding the underlying issue. Believe me, I’ve made that mistake early on, applying quick fixes without considering the proper leveling techniques. It cost me time, money, and a lot of frustration.
But I discovered a game-changing approach that transformed my entire bathroom remodel and can do the same for you. It’s called the Wet-Shim Secret, and after years of trial, error, and practical testing, I can confidently say it’s the most effective way to level even the heaviest shower benches.
Are you tired of battling uneven surfaces that just won’t sit right? Do your bathroom fixes feel more like band-aid solutions than permanent fixes? If so, stay tuned. In the next sections, I’ll walk you through the step-by-step process to master this technique, ensuring your shower bench stays perfectly level—and stays that way.
To get a better understanding of why certain fixes fail and how to approach bathroom renovation with longevity in mind, you might find it helpful to read about [shower repairs when to fix versus replace](https://tilecraftsmens.com/shower-repairs-when-to-fix-vs-replace-for-longevity). This knowledge helps in avoiding costly mistakes early on.
So, let’s dive into the specifics, and I’ll show you how to make leveling your heavy shower bench simpler, more reliable, and downright satisfying.
Secure a Stable Base with Proper Support
Begin by clearing the area and removing any loose debris around the bench. Use shims to support the bench temporarily in the desired position, checking for visual and tactile levelness with a long spirit level. I recall a time when I used scrap plywood and small wood blocks as temporary supports—this made adjusting easy and prevented the bench from shifting during the process.
Apply Wet-Shims for Long-Lasting Leveling
Prepare the Wet-Shim Mixture
Mix hydraulic cement with water to create a thick, paste-like consistency. Think of it as mud that’s just thick enough to hold its shape. I once struggled with dry mortar that crumbled too quickly; switching to hydraulic cement made the process cleaner and more effective.
Position the Bench and Pour the Cement
Place the shim mixture carefully beneath the bench at the lowest points. Use a trowel or flat-edged tool to spread the cement evenly. Ensure you work swiftly because hydraulic cement sets rapidly—about 10-15 minutes. I remember working late into the evening, rushing to get this step done before it hardened, but the result was a perfectly level bench that stayed in place for years.
Cure and Set for Maximum Stability
Allow the cement to cure undisturbed for at least 48 hours. Protect the surrounding area from moisture and accidental knocks. During one project, I covered the setup with plastic sheeting to prevent premature drying, which contributed to a solid, durable base. Once cured, remove the supports and verify the levelness again with the spirit level for confirmation.
Final Touches and Sealant Application
Check for any gaps or uneven spots. Fill minor imperfections with additional hydraulic cement if needed, then smooth and allow to cure. Finish by sealing the cement with a waterproof sealant to prevent water infiltration, especially important in showers. This step echoes the importance of using the right sealant in high-moisture environments, like the [epoxy grout secret](https://tilecraftsmens.com/the-epoxy-grout-secret-for-maintenance-free-showers). The key here is precision and patience—rushing can lead to uneven settling or cracking over time.
By following these concrete steps, you ensure the heavy shower bench remains perfectly level and secure for years to come. It’s about applying the right mix in the right spots and giving it time to do its job—much like installing durable flooring, where patience and attention to detail lead to flawless results. Want to perfect your bathroom’s aesthetics? Consider integrating stylish and durable [baseboards](https://tilecraftsmens.com/baseboards-makeover-elevate-your-interior-with-simple-updates) that complement your renovations, enhancing both function and style.
When it comes to finishing touches like baseboards and flooring, many homeowners believe they can cut corners or rely solely on standard advice. But let me share some nuances that often get overlooked, which can make or break the longevity and aesthetics of your renovation. First, there’s a widespread myth that installing baseboards is a simple task—just cut and nail pieces in place. However, understanding the relationship between baseboard styles and your home’s architecture, as detailed in [baseboard styles that elevate your interior](https://tilecraftsmens.com/baseboard-styles-that-elevate-your-interior-design), ensures a seamless blend between your walls and decor. Skipping this step can result in mismatched proportions or gaps that detract from your home’s charm.
Similarly, many installers underestimate the importance of proper subfloor preparation before laying flooring. Just laying tiles or hardwood over uneven surfaces without addressing dips or high spots leads to premature cracks, squeaks, and even buckling. For advanced insights into durable installation, see [your guide to durable flooring installation for a stylish home](https://tilecraftsmens.com/your-guide-to-durable-flooring-installation-for-a-stylish-home). The key is precision and patience—rushing this phase often results in costly repairs down the line.
For showers, a not-so-secret mistake is neglecting waterproofing at niche shelves and corners. Many assume sealing is enough, but experts emphasize meticulous waterproofing strategies, such as those in [creating a spa-like shower experience tips and tricks](https://tilecraftsmens.com/creating-a-spa-like-shower-experience-tips-tricks), to prevent leaks that can cause mold and structural damage. Moreover, some assume that higher-end materials automatically imply better waterproofing, but proper installation techniques overshadow material choice.
When installing carpets, an advanced error involves improper stretching and pad selection—procedures that seem trivial but influence durability and appearance. Ripping the carpet without a proper stretch can cause buckling or unsightly gaps over time. For precise methods, check [secrets to flawless carpet seams](https://tilecraftsmens.com/carpet-install-secrets-achieving-flawless-results-every-time).
Here’s a critical question for seasoned DIY enthusiasts: How do subfloor imperfections impact the lifespan of your flooring, and what are the best proactive measures? Research shows that addressing subfloor issues early can prevent uneven wear and costly replacements, as highlighted in [top trends in flooring installation for 2025](https://tilecraftsmens.com/transform-your-flooring-top-trends-in-installation-for-2025).
In sum, understanding these nuances—not just following generic instructions—can save you substantial time and money. Do you know the subtle errors that can ruin your remodeling project? Share your experiences or questions below, and let’s keep this discussion going. Remember, every detail counts in creating a beautiful, long-lasting home.When it comes to keeping your home renovation projects like flooring, showers, and baseboards in top shape, having the right tools and practices makes all the difference. Precision tools ensure your work remains durable and visually appealing over time. For example, I highly recommend investing in a high-quality laser level. Unlike traditional bubble levels, a laser level projects a straight line across surfaces, helping you achieve perfect alignments in flooring and wall installations. This tool not only saves time but also significantly reduces errors that could compromise long-term durability.
Another essential is a digital moisture meter. Moisture affects everything from flooring adhesives to grout curing—excess moisture can lead to mold growth and surface failure down the line. I use a moisture meter regularly during renovations to ensure substrates are adequately dried before proceeding. It’s a small investment that pays off by preventing costly repairs later.
For grout and sealants, I prefer epoxy products over traditional cement-based options. Epoxy formulas resist stains, cracking, and mold accumulation, making them ideal for showers and high-traffic areas. Applying them with precision grout tools, like grout floats with beveled edges, ensures even coverage and reduces cleanup time.
Maintenance shouldn’t be reactive but proactive. Regular inspections using a small mirror and LED flashlight can reveal tiny gaps or cracks before they become major issues. For example, periodically checking the caulking around your bathtub or shower niche prevents water infiltration that causes rot or mold.
Looking ahead, I believe automation and smart home devices will play an increasingly vital role. Smart moisture sensors connected to home management systems can alert you instantly about leaks or humidity spikes, so you can address problems before damage occurs. Incorporating these into your maintenance routine is a game-changer.
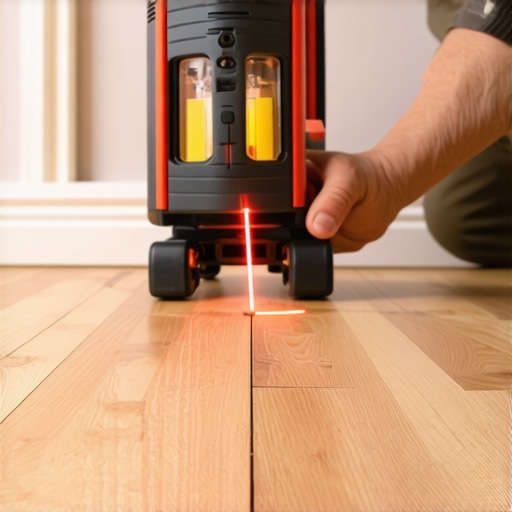
Investing in quality tools like a laser level and moisture meter might seem like extra costs upfront, but they significantly extend the lifespan of your renovations and save money over time. Don’t forget, consistent maintenance is key. Regularly seal grout lines and inspect for wear. This small effort keeps showers, flooring, and baseboards looking fresh and functioning perfectly.
**How do I maintain home improvements over time?** A practical tip is to develop a seasonal check routine, focusing on grout integrity, caulking, and the stability of installed baseboards. For instance, re-applying sealant around showers every 2-3 years can prevent moisture ingress, ensuring your bathroom stays leak-free.
For more detailed methods on long-lasting installations, explore [your guide to durable flooring installation for a stylish home](https://tilecraftsmens.com/your-guide-to-durable-flooring-installation-for-a-stylish-home). Incorporating these tools and habits will help ensure your renovation investments stand the test of time.
The Hardest Lesson I Learned About Heavy Shower Benches
One of my biggest takeaways was realizing that rushing the leveling process often leads to future headaches. I used to believe that shimming and quick fixes were enough, but I soon discovered that proper support and curing are essential for durability. Observing how professional installers integrate waterproofing and support taught me that patience and precision are non-negotiable.
Why DIY Myths About Baseboards and Flooring Are Costly
I once thought that simply nailing baseboards without considering wall imperfections or using the wrong adhesive for flooring wouldn’t cause issues. However, this led to gaps, cracking, and a lot of unnecessary rework. The lessons from [baseboard styles that elevate your interior](https://tilecraftsmens.com/baseboard-styles-that-elevate-your-interior-design) and [trends in 2025](https://tilecraftsmens.com/baseboard-trends-in-2025-fresh-styles-for-every-room) taught me that understanding design and installation nuances makes all the difference.
What Experts Never Tell You About Shower Waterproofing
It was eye-opening to realize that proper waterproofing requires meticulous attention beyond just sealing corners. Skipping steps or assuming generic solutions work can lead to leaks, mold, and costly repairs. Exploring advanced techniques in [creating a spa-like shower](https://tilecraftsmens.com/creating-a-spa-like-shower-experience-tips-tricks) emphasized that thoroughness in waterproofing is a worth-it investment.
Revealing the Hidden Truths of Flooring and Carpet Installation
My experience with uneven floors taught me that subfloor preparation is often overlooked but critical. Using the right tools, like a laser level and moisture meter, I avoided future issues like squeaks and buckling. Incorporating the insights from [your guide to durable flooring](https://tilecraftsmens.com/your-guide-to-durable-flooring-installation-for-a-stylish-home) has helped me create seamless, long-lasting results that stand up to daily wear.
Secrets from the Toolbox: My Best Recommendations for Long-Lasting Renovations
Investing in a high-quality laser level transformed my precision, while a digital moisture meter prevented moisture-related problems. I swear by epoxy grout for showers and mold-resistant sealants for tiles. These tools and materials, supported by [expert installation tips](https://tilecraftsmens.com/transform-your-home-expert-flooring-installation-tips-for-2025), are game-changers for anyone serious about quality.
Be Brave—Your Perfect Home is Within Reach
Every renovation journey is a learning curve, but with the right knowledge and tools like those mentioned, you’re capable of creating stunning, durable spaces. Remember, patience, attention to detail, and a willingness to learn from every misstep make all the difference. Your dream bathroom or new flooring awaits—go for it with confidence!
What has been your biggest challenge in leveling or installing your home upgrades? Share your story below—I’d love to hear your experiences and guide you further.
,