

Have you ever scrubbed your tiled bathroom floor with the fervor of cleaning a stubborn stain, only to find your tiles looking dull and scratched afterward? I know I have. One particular weekend, I decided to tackle my shower’s grout, thinking a good deep clean would make my bathroom sparkle. Instead, I ended up with scuffed tile surfaces and a frustrating sense of wasted effort. It was a real lightbulb moment for me—realizing that my cleaning techniques were causing more harm than good.
The Struggle with Sanded Grout and Tile Damage
Deep cleaning sanded grout is essential for maintaining a fresh and hygienic bathroom, but the process is tricky. Many folks don’t realize that aggressive scrubbing or harsh cleaning agents can scratch or scuff their beloved tiles, compromising both the appearance and longevity of the surface. I’ve come to learn that the key lies in gentle, targeted techniques that lift dirt without damaging the tile glaze. Today, I want to share proven methods that can help you achieve a spotless grout line without leaving your tiles looking worse for wear.
Is Deep Cleaning Sanded Grout Really Worth the Effort
Early in my DIY journey, I made the mistake of using abrasive scrubbers and strong chemical cleaners, thinking that the harder I scrubbed, the cleaner my grout would be. Unfortunately, this only resulted in scratched tiles and uneven surfaces. I discovered that patience and the right tools—not brute force—are what truly make a difference. According to professional tile installers, improper cleaning can lead to irreversible damage and discoloration. Proper technique saves time, money, and the hassle of repairs down the road. If you’re tired of battling stubborn grime and worried about scuffing your tiles, keep reading. I’ll guide you through simple, effective steps, backed by expert advice, to restore your grout and keep your tiles pristine. Want more tips? Check out [this comprehensive guide](https://tilecraftsmens.com/shower-enclosures-101-expert-tips-for-modern-bathroom-makeovers) for bathroom upgrades that won’t damage your surfaces.
Choose Gentle Cleaning Agents
Start by selecting mild, pH-neutral cleaners designed for tiles. Avoid acids or abrasives that can scratch surfaces. I recall a time when I used a generic bathroom cleaner that contained harsh chemicals, which left visible etch marks on my glossy tiles. Switching to a pH-neutral solution made a noticeable difference in preventing damage and preserving the shine.
Use Soft Upgrades for Scrubbing
Opt for soft-bristled brushes or microfiber cloths instead of steel wool or coarse scrub pads. These tools lift dirt effectively without scratching. Once, I attempted to clean tough grout stains with steel wool, and it resulted in micro-scratches on my tile surface. Replacing it with a soft brush saved my tiles from further damage and made the cleaning process gentler.
Apply Proper Technique in Small Sections
Pre-wet the Area
Before applying cleaner, wet the tiles and grout with water. This prevents the cleaner from drying out too quickly and reduces the need for excessive scrubbing. I learned this lesson when I tried to deep clean a stubborn grout line—pre-wetting kept the cleaner active longer and eased the scrubbing effort.
Target the Grout, Not the Tiles
Use a toothbrush or small brush to focus on the grout lines, avoiding direct contact with the tile surface. I once used a big scrub brush on the entire tile surface, which led to scratching. Targeted brushing preserves the glaze and keeps your tiles pristine.
Use Correct Pressure and Motion
Apply light, circular motions rather than aggressive scrubbing. Think of polishing a car—gentle, consistent pressure yields better results without abrasions. During my last grout cleaning, I used a light hand and small circular motions, which cleaned effectively without any scratches.
Rinse and Dry Thoroughly
After cleaning, rinse the surface with clean water to remove residue. Dry with a soft cloth or squeegee to prevent water spots. Skipping this step left residues that marred the shine on my tiles, so now I always make sure to rinse and dry thoroughly.
Address Tough Stains Carefully
For stubborn stains or mold, apply a paste of baking soda and water directly to the grout. Let it sit for 10-15 minutes, then scrub gently. I once used this method on moldy grout, and it lifted the stain without any abrasive damage, restoring the surface perfectly. If you encounter persistent issues, consider consulting professionals or visiting this guide for further insights.
Prevent Future Damage
Seal your grout lines annually with a high-quality grout sealer to guard against stains and moisture. I learned the importance of sealing when I neglected it, leading to discoloration and mold growth. Proper sealing keeps your tiles looking new longer and reduces the need for aggressive cleaning.
Applying these techniques with patience and care will keep your tiles and grout in top condition, avoiding damage and preserving their beauty for years to come.
When it comes to home upgrades like carpet, showers, or flooring, there’s more than meets the eye. Many homeowners believe that following standard procedures guarantees perfect results, but in my experience, overlooking nuanced details often leads to costly mistakes. For example, a common myth is that installing new carpet is just about stretching it tight; however, improper tack strip placement or ignoring subfloor leveling can cause wrinkles and premature wear. Similarly, many think showers are straightforward, but neglecting proper slope and waterproofing details can result in leaks and mold.
Are Builders Overlooking Critical Installation Traps That Cost You?
One trap I see often involves baseboards. People assume that filling gaps with caulk is enough, but without understanding expansion gaps and proper trimming techniques, your baseboards can crack or separate over time. Experts recommend precise measuring and allowance for seasonal movement. A study published by the National Association of Home Builders emphasizes that failure to accommodate temperature changes accelerates material failure. Take flooring—many rush through subfloor preparation, thinking surface-level fixes suffice. This oversight causes uneven seams, cracked tiles, or squeaky floors. Proper subfloor prep, including moisture testing and leveling, is crucial. For comprehensive insights, I suggest visiting detailed guides on flooring installation pitfalls. Never underestimate the importance of detailed planning and nuanced execution; these can make or break your project’s longevity. Making small adjustments—like pre-priming surfaces or choosing the right underlayment—yields long-term benefits. A mistake I often see is homeowners rushing to finish without verifying material compatibility, leading to warping or adhesion issues. This is especially true for showers, where sealant application and wall tiling require precision. For those considering a shower remodel, I recommend consulting expert tips to avoid common sealant mistakes and ensure waterproof integrity, which you can explore here. Stay aware of these subtle nuances—skipping them can cost you dearly later. Have you ever fallen into this trap? Let me know in the comments.
Keeping It Working: Essential Tools for Longevity
Maintaining your floors, shower enclosures, and baseboards isn’t just about the initial installation; it’s an ongoing process that requires the right tools and techniques. One of my go-to tools is a high-quality rotary scraper. I personally prefer the DEWALT DL2360 for its durability and precision, especially when scrubbing stubborn grout lines without risking tile damage. The key is to use a tool that provides controlled pressure, reducing accidental scratches and ensuring thorough cleaning. Additionally, a handheld steam cleaner like the McCulloch MC1275 allows for deep sanitization of shower surfaces and grout, making maintenance both easier and more effective. Using steam not only lifts dirt but also kills mold spores, extending the life of your shower seals and grout.
Software and Automation Aiding Maintenance
For those managing multiple renovation projects or long-term upkeep, digital tools such as project management apps like Trello or Asana help organize maintenance schedules and reminders. Setting routine check-ins for grout sealing or baseboard inspections ensures issues are caught early, preventing costly repairs later. I’ve integrated these apps into my workflow, which keeps me on top of seasonal maintenance, especially for areas prone to moisture or temperature fluctuations—think bathrooms, kitchens, and basements.
Advancing Long-Term Results with Expert Methods
One technique that’s saved me significant time and money is the pre-sanding process for high-traffic or worn-out surfaces. As outlined by industry experts, pre-sanding with a fine-grit disc before sealing hardwood or laminate flooring creates a smooth, sealed surface that resists future scratches and stains. This extra step enhances durability and simplifies ongoing cleaning, making your investment last decades longer. I recommend trying the pre-sanding trick on your next flooring project for a visibly better finish.
What About Scaling? Growth and Adaptation
As your home evolves, so should your maintenance routines. Installing smart sensors that monitor humidity and moisture levels can alert you to potential problems like leaks or mold growth. These IoT devices link to your phone, prompting timely action—saving your flooring and fixtures from long-term damage. In future, I foresee more homeowners adopting such tech, along with AI-driven maintenance schedules, ensuring their spaces stay pristine with minimal effort.
How do I Maintain my Floor and Fixtures Over Time?
Consistency is the secret to lasting results. Regular inspections for cracks, sealant wear, and grout discoloration help catch issues early. Keep an eye on high-moisture areas, and don’t delay resealing grout or reapplying sealant—timing can double your flooring’s lifespan. For more detailed tips, consult resources like this expert guide which offers comprehensive maintenance schedules for various fixtures and materials. Incorporate these practices into your routine, and you’ll enjoy beautiful, durable surfaces season after season.
Remember, the right tools and proactive maintenance strategies are your best allies for keeping your home impeccable for years to come. For personalized advice, feel free to reach out through our contact page—I’m here to help you achieve flawless results.
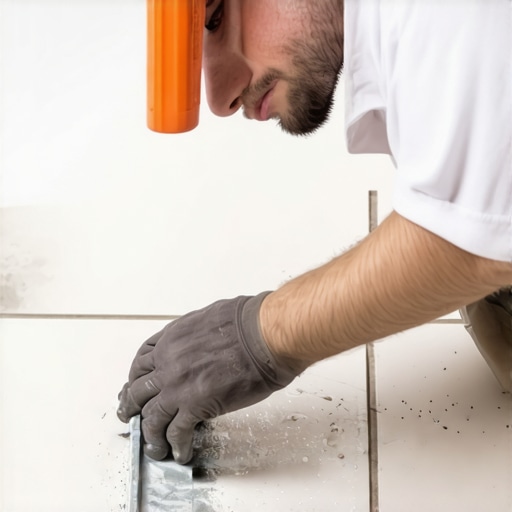
What I Wish I Knew Before Scrubbing Away
- Sometimes, the biggest mistake is using too much force. I once spent hours trying to remove stubborn grout stains with a stiff brush, only to realize I was micro-scratching my tiles. Gentle, targeted cleaning proved more effective and preserving.
- Avoiding harsh chemicals saved my tiles from discoloration and wear. Switching to pH-neutral cleaners was a game-changer, maintaining the natural shine and integrity of my surfaces.
- Patience beats grit every time. Rushing to finish a cleaning job often led to avoidable damage. Taking small, consistent steps yielded much better results in the long run.
- Pre-wetting surfaces makes a real difference. It kept cleaning agents active longer, reducing the need for aggressive scrubbing and protecting the finish.
- Focus on grout lines, not the tiles. Using a small, soft brush on the grout prevented unnecessary scratching of the glazed surface, ensuring longevity and aesthetics.
Tools That Changed My Approach
- The DEWALT DL2360 rotary scraper: It provides controlled pressure and is gentle on tiles, making grout cleaning easier and safer.
- McCulloch MC1275 steam cleaner: This tool deep cleans and sanitizes without chemicals, lifting dirt and killing mold spores—great for ongoing maintenance.
- Digital moisture meters: They help monitor moisture levels before sealing or remodeling, preventing future problems and costly repairs.
- Project management apps like Trello: Organizing routine maintenance helps me stay proactive, avoiding last-minute surprises.
Don’t Wait to Make a Change
Your home’s surfaces are an investment—treat them with care and patience for lasting beauty. Small, informed adjustments in your cleaning routine or tool choices can make a significant difference in preserving your tile and grout’s condition. If you’re considering larger upgrades or tackling complex repairs, remember that expert guidance can save you time and money—check out this comprehensive shower renovation guide for insights. Your next successful project is just a moment of mindful action away—start today and enjoy the results for years to come. What’s the toughest stain or damage you’ve managed to restore? Share your story below!