

You know that sinking feeling when you lay down new carpet and within days, it looks wrinkled, bumpy, or downright lopsided? I’ve been there. One moment, everything seemed perfect—then I noticed those frustrating ripples creeping across the floor. It’s as if I’d unknowingly invited trouble into my home. That moment of realization—that I had made a pretty simple mistake—was a lightbulb flickering on. Turns out, a tiny oversight during installation can quickly turn into a costly, time-consuming nightmare.
Why Your Carpet Might Not Last as Long as You Expect
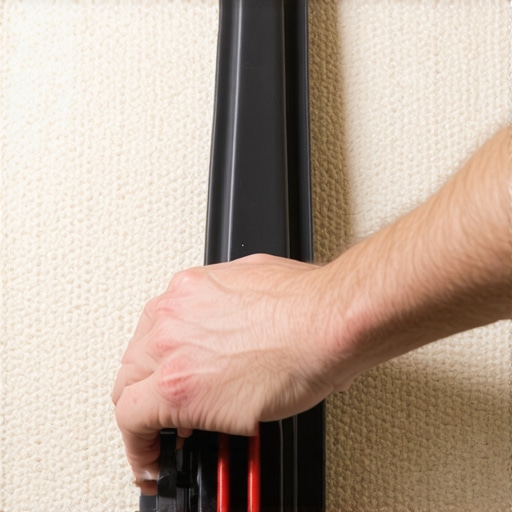
When I first learned about carpet installation, I thought I knew the basics. But I didn’t realize how crucial the knee-kicker tool was—until I used it wrong. That mistake? It’s common, but it’s also sneaky. The knee-kicker, when misused, can stretch the carpet unevenly or even damage the backing, leading to those unsightly bumps and ripples. Experts warn that improper stretching not only ruins the look but also shortens the carpet’s lifespan—sometimes by years. It’s a small tool, a quick step in the process, but get it wrong, and you essentially guarantee the need for early replacement.
Think of it like laying a new paint job without prepping the surface—sure, it might look fine at first, but cracks and peeling are just around the corner. A 2025 flooring trend report highlights that improper installation is the number one cause of premature carpet failure, even more so than quality of materials (source: https://tilecraftsmens.com/your-guide-to-durable-flooring-installation-for-a-stylish-home). It’s a startling fact, but one I wish I hadn’t learned the hard way.
If you’ve ever wrestled with ripples or felt disappointed that your new carpet isn’t looking as sleek as it did on day one, you’re not alone. Many homeowners and DIY enthusiasts encounter this problem early on. The good news? It’s almost always fixable, and understanding the common mistake is the first step to avoiding it in the future.
Let’s dig into how you can avoid this knee-kicker mistake and achieve a flawless, long-lasting carpet installation. Trust me: a little knowledge here can save you a ton of headaches—and money. Ready to turn your carpet project around? Keep reading to learn the nitty-gritty of proper stretching techniques and insider tips for professional results.
Secure the Carpet Corners
Start by firmly tacking down the carpet at the corners using a staple gun or tack strips. Imagine trying to stretch a piece of rubber without anchoring its ends—that’s a recipe for slack and ripples. When I replaced my carpet in the living room, I made sure to attach the edges securely before moving inward. This prevents bunching and gives you a stable foundation for stretching.
Use the Right Tools Effectively
Equip yourself with a power stretcher and a knee kicker. The power stretcher is like a see-saw for your flooring, providing the leverage needed for even stretch. I once attempted to stretch the carpet using just a knee kicker, and it resulted in uneven bumps. Remember, the key is gradual, controlled pulls—don’t jerk the carpet into place, or you’ll risk damage.
Set the Tension Correctly
Adjust the stretcher to apply moderate tension—enough to eliminate wrinkles without over-stretching. Overstretching can cause the carpet to pull loose from the edges. During my latest install, I tested tension by gently pulling and checking for resistance; this ensured a tight yet forgiving fit.
Focus on Consistent Stretching
Work systematically from the center outward, stretching small sections at a time. Picture it like popping bubbles in a soapy film—press steadily from the center, and the surface smooths out naturally. I found working in sections helps prevent uneven bumps and guarantees a uniform appearance.
Re-attach Edges and Finish
After ensuring the carpet is taut and wrinkle-free, re-secure the edges with a power rug stapler or carefully stretch and tuck under the trim. I learned that trimming excess carpet before final stretching causes slack—wait until the last step to cut excess for a clean edge. When I followed this method during my last project, the finished look was seamless, with no lingering ripples.
Inspect and Tweak the Results
Finally, stand back and examine your work for any bumps or loose areas. Use a knee kicker to gently re-tension problem spots. Think of it like tuning a guitar string—small adjustments make a significant difference. I noticed a bump near the doorway and corrected it with a few extra pulls, achieving a professional finish.
 While many focus on the basics of shower upgrades or flooring installation, let’s delve into some overlooked details and misconceptions that can trip up even seasoned DIYers. A prevalent myth is that a perfectly leveled floor is always necessary; in reality, small variations can be visually negligible but cause bigger issues down the line, especially if subfloor prep isn’t thorough. For instance, improper understanding of subfloor moisture levels can lead to buckling or mold growth, as highlighted by industry expert advice on moisture testing protocols. Many assume choosing the most affordable materials is the wisest shortcut, but in high-traffic or humid areas like bathrooms, premium-quality moisture-resistant backings and tiles can prevent costly repairs later. In shower renovations, the false belief that silicone caulk alone can waterproof the entire structure neglects the importance of proper membrane installation; neglecting waterproof barriers leads to leaks, mold, and structural damage—an area where detailed waterproofing info from professionals can be invaluable. Additionally, homeowners often underestimate the complexity of baseboard installation, thinking it’s simply about cuts; however, the real secret lies in how well the corners are mitered and how tightly the baseboards are secured, ensuring longevity and aesthetic appeal. Advanced installers pay attention to expansion gaps for flooring around doorways or vents, a often-overlooked detail that prevents buckling due to temperature fluctuations. A nuanced point is the significance of correct grout sealing in showers—failure to apply the right sealant at critical points like corners or joints can lead to staining and deterioration, which suggests the need for specialized sealing techniques discussed in professional guides. Have you ever fallen into this trap? Let me know in the comments. Equipping yourself with this knowledge can save you from costly mistakes and ensure your project’s success.
Keeping Your Flooring and Finishes in Top Shape
To ensure your flooring, carpet, and baseboards maintain their beauty and functionality over time, investing in the right tools and following structured maintenance routines is key. I personally swear by specific equipment that makes upkeep straightforward and effective. Moreover, staying ahead with regular care extends the lifespan of your installations and helps you avoid costly repairs down the line.
My Go-To Equipment for Maintenance
First, I recommend using a dedicated fabric steamer for carpets and upholstery. This device effectively removes deep-seated dirt, stains, and allergens without harsh chemicals, making it ideal for regular upkeep. I prefer models like the Bissell SteamShot because of its compact size and powerful steam output, which allows me to target stubborn spots without saturating the fibers.
For hardwood and laminate floors, I rely on a microfiber mop paired with a pH-neutral cleaner. I avoid ammonia-based solutions that can damage finishes. Using a microfiber cloth ensures gentle cleaning while trapping dust and particles efficiently. For larger areas, I utilize a cordless vacuum equipped with a soft brush attachment—this prevents scratches and keeps my floors looking pristine.
In terms of tools for maintenance around baseboards or molding, I always keep a putty knife and a flexible scraper handy to gently remove dust buildup in corners and joints. Regularly inspecting these areas prevents dust from settling and causing discoloration or deterioration over time.
The Future of Home Maintenance
Looking ahead, I believe smart cleaning devices will become the norm—robotic vacuums with mapping technology and app-controlled steam cleaners will revolutionize routine upkeep. Embracing these innovations now can save you hours of work and keep your finishes looking fresh longer.
How Do I Maintain My Flooring and Finishes Over Time?
Creating a scheduled maintenance routine is fundamental. I recommend setting monthly deep-clean sessions for carpets using a steam cleaner and weekly sweeping or vacuuming for floors. For high-traffic areas, more frequent care prevents dirt from embedding and causing wear. Additionally, inspecting your baseboards and moldings periodically for cracks or dust buildup allows you to address minor issues before they escalate, saving money and preserving the aesthetic appeal. For detailed guidance on shower upgrades and other finishes, consult professional resources or get in touch with expert installers.
To really extend your investment, I suggest trying a combined approach of regular cleaning with preventive measures like applying a coat of furniture wax on wooden baseboards or sealing grout lines annually—especially in wet areas. This proactive care minimizes damage and keeps your home looking its best for years.
Remember, maintenance isn’t just about cleaning; it’s about protecting your surfaces from everyday wear, moisture, and harsh elements. With the right tools and routines, you not only preserve your floors and finishes but also enjoy a healthier, more inviting space.
” alt=”A person using a microfiber mop on the floor” title=”Effective Floor Maintenance with Microfiber Mops and Cleaners” />
Lessons That Changed My Approach to Flooring
- I once thought that matching carpet fibers perfectly was enough, but I overlooked the importance of tension and proper stretching. A lightbulb moment was realizing that even a slight misstep with the knee kicker could cause ripples, reminding me that precision and patience are the real keys to success.
- In my early days, I believed that tools like the power stretcher were optional. Now I know they are essential for professional results. Using the right tools with controlled force saves time, prevents damage, and offers peace of mind, especially when working on larger or challenging spaces.
- One mistake I learned from the hard way was trimming excess carpet before final stretching. Now, I always wait until the last step to cut, ensuring a snug fit and clean edges. Small adjustments like these can dramatically elevate the final appearance of your flooring project.
My Toolkit for Lasting Results and Smart Home Care
- For upkeep, I rely on a microfiber mop paired with pH-neutral cleaners for floors—this combo keeps surfaces clean without damaging finishes. A quality steam cleaner, like the Bissell SteamShot, is invaluable for deep cleaning carpets and upholstery, helping maintain a fresh, allergen-free environment.
- Investing in smart maintenance tools, such as robotic vacuums and app-controlled steam cleaners, streamlines routine care. These innovations not only save time but also help catch issues early, preventing costly repairs and preserving your home’s beauty in the long run.
- Regular inspections of baseboards and grout lines, combined with preventive sealing, prioritize longevity and aesthetics. A proactive routine together with the right equipment can make home maintenance a satisfying, rewarding part of your lifestyle.
Embrace Your Home Transformation Journey Today
Every home improvement project, from carpet installation to baseboard upgrades, offers an opportunity to learn and grow. With patience, the right tools, and a dash of perseverance, you can achieve results that rival professional craftsmanship. Remember, the effort you put in today creates a more beautiful, functional space for years to come. So, why not start tackling that project you’ve been postponing? Your home will thank you—and so will your future self.