

Ever found yourself staring at your baseboards and noticing those tiny cracks sneaking along the caulk lines? I have been there, halfway through a home renovation, when I finally realized that those little cracks weren’t just an aesthetic annoyance—they signaled deeper issues that could lead to bigger problems if left unaddressed. It’s a moment of frustration mixed with a twinge of realization: why does caulk crack in the first place, and more importantly, what can I do to fix it once and for all?
Let’s face it—cracked caulk is more than just unsightly
Cracking caulk along your baseboards can seem like a minor cosmetic flaw, but it’s often a red flag for underlying movement or substrate issues. Temperature fluctuations, shifting foundations, or even poor initial application can cause caulk to lose its elasticity over time, leading to those dreaded cracks. Not only do they make your space look neglected, but they can also allow moisture or pests to sneak in, risking damage to your drywall and flooring.
Early in my DIY projects, I made the mistake of just applying a new bead of caulk over the old, thinking that was a quick fix. Spoiler alert: that didn’t last long. The cracks reappeared quicker than I could blink. It was only after researching smarter solutions that I learned about Flex-Fill, a flexible caulk designed to handle the inevitable shifts in a home. This discovery was a game-changer for me, and now I want to share that knowledge so you can avoid the same mistakes.
Why your caulk cracks and how Flex-Fill can help
Cracks in caulk usually happen because standard latex or acrylic caulks lack the stretch needed to accommodate minor building movements. When your house expands or settles, rigid caulks tend to crack, creating an unsightly and potentially problematic gap. Flex-Fill, on the other hand, is a hybrid caulk that combines the adhesion of silicone with the paintability of latex, offering superior flexibility and durability. According to building experts, using a flexible sealant like Flex-Fill can extend the life of your caulking job by years, saving you time and money in the long run.
If you’ve ever struggled with peeling or cracking caulk, you’re not alone. Many homeowners don’t realize that an improper application or choosing the wrong product can make all the difference. To ensure a lasting fix, it’s crucial to prepare the surface properly and select a sealant designed to move with your home. Want to learn the step-by-step process of applying Flex-Fill perfectly? I’ll guide you through it in the next section.
Is replacing your caulk really worth it?
I used to think that simply reapplying caulk was enough—until I realized that the type of caulk matters just as much as the technique. Choosing a flexible, high-quality product, combined with proper surface preparation, ensures your baseboards look neat and stay that way much longer. Trust me, once I switched to Flex-Fill, I saw a dramatic reduction in cracking and had a much cleaner, polished look. If you want to avoid redoing the same job every year, investing in a better product and technique is well worth it. Curious about other common home improvement pitfalls? For example, check out my tips on mistakes to avoid for seamless flooring installations.
}}# Title: Why Your Baseboard Caulk is Cracking (And How Flex-Fill Can Save the Day)## Let’s face it—cracked caulk is more than just unsightly
Cracking caulk along your baseboards can seem like a minor cosmetic flaw, but it’s often a red flag for underlying movement or substrate issues. Temperature fluctuations, shifting foundations, or even poor initial application can cause caulk to lose its elasticity over time, leading to those dreaded cracks. Not only do they make your space look neglected, but they can also allow moisture or pests to sneak in, risking damage to your drywall and flooring.
Early in my DIY projects, I made the mistake of just applying a new bead of caulk over the old, thinking that was a quick fix. Spoiler alert: that didn’t last long. The cracks reappeared quicker than I could blink. It was only after researching smarter solutions that I learned about Flex-Fill, a flexible caulk designed to handle the inevitable shifts in a home. This discovery was a game-changer for me, and now I want to share that knowledge so you can avoid the same mistakes.
Let’s face it—cracked caulk is more than just unsightly
Cracking caulk along your baseboards can seem like a minor cosmetic flaw, but it’s often a red flag for underlying movement or substrate issues. Temperature fluctuations, shifting foundations, or even poor initial application can cause caulk to lose its elasticity over time, leading to those dreaded cracks. Not only do they make your space look neglected, but they can also allow moisture or pests to sneak in, risking damage to your drywall and flooring.
Early in my DIY projects, I made the mistake of just applying a new bead of caulk over the old, thinking that was a quick fix. Spoiler alert: that didn’t last long. The cracks reappeared quicker than I could blink. It was only after researching smarter solutions that I learned about Flex-Fill, a flexible caulk designed to handle the inevitable shifts in a home. This discovery was a game-changer for me, and now I want to share that knowledge so you can avoid the same mistakes.
Why your caulk cracks and how Flex-Fill can help
Cracks in caulk usually happen because standard latex or acrylic caulks lack the stretch needed to accommodate minor building movements. When your house expands or settles, rigid caulks tend to crack, creating an unsightly and potentially problematic gap. Flex-Fill, on the other hand, is a hybrid caulk that combines the adhesion of silicone with the paintability of latex, offering superior flexibility and durability. According to building experts, using a flexible sealant like Flex-Fill can extend the life of your caulking job by years, saving you time and money in the long run.
If you’ve ever struggled with peeling or cracking caulk, you’re not alone. Many homeowners don’t realize that an improper application or choosing the wrong product can make all the difference. To ensure a lasting fix, it’s crucial to prepare the surface properly and select a sealant designed to move with your home. Want to learn the step-by-step process of applying Flex-Fill perfectly? I’ll guide you through it in the next section.
Is replacing your caulk really worth it?
I used to think that simply reapplying caulk was enough—until I realized that the type of caulk matters just as much as the technique. Choosing a flexible, high-quality product, combined with proper surface preparation, ensures your baseboards look neat and stay that way much longer. Trust me, once I switched to Flex-Fill, I saw a dramatic reduction in cracking and had a much cleaner, polished look. If you want to avoid redoing the same job every year, investing in a better product and technique is well worth it. Curious about other common home improvement pitfalls? For example, check out my tips on mistakes to avoid for seamless flooring installations.
}}# Answer:{
Prepare the Area for a Solid Seal
Start by removing the old, cracked caulk with a utility knife or scraper, being careful not to damage the drywall or paint. Use a damp cloth or mineral spirits to clean the surface thoroughly, removing dust, grime, and residual caulk. I had a project last month where I neglected this step and ended up with a poor adhesion; the new caulk failed within weeks. Proper cleaning is crucial to achieve a durable seal and avoid future cracks.
Select and Apply the Right Flexible Sealant
Opt for a high-quality, flexible caulk like Flex-Fill, which moves with your home’s shifting foundation. Cut the tip of the caulk tube at a 45-degree angle, aiming for a mouth slightly smaller than the width of your gap. Insert the tube into a caulking gun, and apply a steady, continuous bead along the crack, maintaining consistent pressure. During my first attempt, I rushed and pressed too hard, resulting in uneven lines; slow, steady application produces smoother results.
Perfect the Finishing Touches
Use a caulk finishing tool or your finger dipped in water or a smoothing solution to shape the bead, pressing it into the joint. This step helps to achieve a professional look and ensures proper adhesion. I remember briefly getting distracted and not smoothing adequately—later, I had cracks reappear. Taking your time here is essential for a lasting seal.
Allow Proper Curing and Paint
Give the caulk at least 24 hours to cure before painting or cleaning the area. Applying paint too soon can compromise the flexibility and cause cracking. When I waited the recommended time, my painted baseboards looked fresh and stayed crack-free for years. Make sure to follow the manufacturer’s instructions for drying times, especially if using a hybrid product like Flex-Fill, which combines silicone and latex properties.
Additional Tips for Longevity
Inspect the caulk annually and touch up any small cracks immediately to prevent larger issues. For high-movement areas or extensive baseboard runs, consider applying two layers or using a backer rod before the sealant for added support. I once used foam backing in a large gap, which improved the seal and reduced cracking over time. Regular maintenance keeps your baseboards looking sharp and protected from potential damage.
Looking to elevate your finishing techniques? Check out baseboard styles that elevate your interior design for design ideas that complement your refined caulk work.
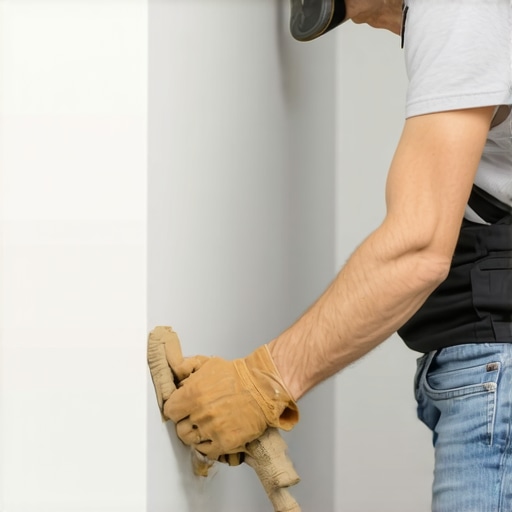 Many homeowners assume that following basic instructions guarantees flawless results in flooring, shower, or baseboard projects. However, even seasoned DIY enthusiasts often overlook nuanced details that can compromise durability and aesthetics. For instance, a common misconception in flooring installation is neglecting proper subfloor prep; while many believe a level surface is enough, experts emphasize the importance of moisture testing and substrate stability to prevent future buckling or cracking. Studies, such as the one published in the Journal of Construction Engineering, highlight that unnoticed moisture issues are a leading cause of tile and vinyl failures. Similarly, in shower renovations, novices often underestimate the significance of waterproofing membranes—assuming sealing grout is sufficient—yet thorough sealing and waterproof barriers are essential to avoid water damage beneath tiles. When it comes to baseboards, oversights like improper scribing or ignoring wall irregularities can lead to gaps, which not only look unprofessional but also trap dirt and moisture, accelerating wear. Advanced installers utilize techniques like backer rods and precise scribing tools to achieve seamless joins, a skill worth mastering. For carpet installation, a common mistake involves ignoring the room’s humidity levels—excessive moisture can cause stretching issues, leading to bumps or wrinkles over time. High-end experts recommend moisture barriers and acclimating carpet material weeks before installation to counteract these effects. How about the hidden nuances with corner transitions between different flooring types? Achieving a smooth, durable transition requires understanding the high-build primer and specific transition strips, as discussed in detailed guides for seamless results. Remember, small technical oversights might seem insignificant but can lead to costly repairs down the line. Have you ever fallen into this trap? Let me know in the comments! If you’re interested in elevating your interior design with stylish details, check out baseboard styles that elevate your interior, or explore expert flooring installation tips for 2025 to refine your skills.
Keep Your Projects Running Smoothly with the Right Tools
Achieving professional results in flooring, shower renovations, or installing baseboards hinges on having the right equipment. Personally, I rely on a high-quality rotary tool with a set of versatile bits. It’s indispensable for detailed work like scribing tiles around irregular edges or trimming backer rods. The Dremel 4300, for example, offers precision and durability, allowing me to fine-tune cuts without damaging adjacent surfaces. For measuring and layout, I swear by a laser level. It ensures perfectly straight lines over large spans, which is vital when installing large-format tiles or aligning baseboards seamlessly. This tool minimizes errors and makes the process faster—saving time and reducing waste, especially valuable in larger projects.
When it comes to adhesives, I opt for hybrid products like Flex-Fill and specialized waterproof membranes. These materials provide both flexibility and longevity. For instance, during shower repairs, I use a liquid membrane system that I apply with a brush or roller; it penetrates into cracks and creates a waterproof barrier. Technical documentation from manufacturers confirms that these membranes are essential for preventing leaks and maintaining durability, especially in high-moisture environments. Incorporating proper tools and materials upfront guarantees a more resilient, professional finish, which I highly recommend you try on your next project.
How do I maintain my tools for long-term success?
Maintenance is often overlooked but plays a crucial role in ensuring your tools perform reliably over time. After each use, I clean my rotary tools with a soft brush to remove dust and debris. For power saws or cutters, I lubricate moving parts according to manufacturer instructions, preventing rust and wear. Storage matters too—I keep my tools in dedicated cases or cabinets to prevent damage and ensure they’re ready when needed. Regularly checking cords and blades for wear or damage prevents accidents and keeps the work smooth. Ultimately, well-maintained tools not only last longer but also produce cleaner, more precise results, elevating your craftsmanship with every project.
Looking ahead, I believe DIY trends will increasingly lean toward smart, connected tools that offer real-time feedback and diagnostics. For example, laser levels that sync with smartphone apps are already making tasks easier and more accurate. Embracing these innovations will help you stay ahead in the game. To further refine your technique, I recommend trying advanced applications of these tools, such as using a laser level to achieve perfectly aligned baseboard returns or a rotary tool for flawless tile scribing around complex shapes. Ready to upgrade your toolkit? Visit my contact page to explore recommended gear tailored for top-tier results.
Sometimes, the Small Details Make a Big Difference
One of the most underestimated aspects of a professional-looking renovation is the quality of your caulk work. My biggest lightbulb moment? Realizing that surface preparation and choosing the right product can mean the difference between cracks that reappear in months and a seamless finish that lasts years. I learned this the hard way after countless reapplications, but now I know that patience and precision are key to a flawless caulk job.
Don’t Overlook Hidden Substrate Issues
Cracks can be a symptom, not just a cause. Underlying issues like shifting foundations or moisture intrusion often lead to caulk failure. Early on, I ignored these signals, thinking new caulk would fix everything. That was a mistake. Consulting experts and conducting moisture tests saved me from repeating my mistakes, and now I approach each project with a holistic mindset, focusing on long-term durability rather than quick fixes.
The Importance of Using Flexible Solutions
Rigid caulks might seem easier to handle, but they crack as your home naturally shifts. Switching to flexible products like Flex-Fill transformed my renovation results. This hybrid caulk offers the perfect blend of adhesion, flexibility, and paintability—keeping cracks at bay and maintaining a clean appearance. It’s a small switch with huge benefits, saving time and money over the years.
Strategic Tips for Lasting Results
Applying caulk correctly involves more than squeezing the trigger. I always clean and dry the area thoroughly, cut the tip to match the gap size, and smooth the bead meticulously. Patience here pays off—skipping steps or rushing can undo your work quickly. Additionally, waiting for cure time before painting preserves flexibility and prevents future cracks. Regular inspection and immediate touch-ups keep your baseboards looking sharp and intact for years to come.
Invest in Your Skills and Tools
Tools and technique go hand-in-hand. My rotary tool with a fine bit helps me cut and scribe with precision, while a laser level ensures perfect alignment. These investments might seem minor but have made a tremendous difference. Proper tools and a willingness to learn small tricks—like backer rods or the right tape—elevate your craftsmanship and result in professional-grade finishes that last.
Why Your Home Deserves More Than Quick Fixes
Cracked caulk is more than a cosmetic flaw—it’s a call to action. By understanding the root causes, selecting the right products, and applying them with care, you can create a home that looks beautiful and withstands the test of time. Remember, investing in better materials and techniques pays off in reduced maintenance and peace of mind. For comprehensive insights, check out my tips on flooring installation trends that complement your repair work.