

I remember the morning I stepped into my living room and saw it: a section of my vinyl plank floor had somehow separated, curling up like a stubborn sticker. The culprit? Blazing sunlight pouring through the windows, warming the room and seemingly cooking my flooring from beneath. That lightbulb moment hit me hard—why was this happening, and how could I fix it without ripping out the entire floor? If you’ve ever experienced similar frustration with vinyl planks buckling or separating in high-sun areas, you’re not alone. Today, I’ll share my firsthand experience and reveal the effective glue-down fix that finally brought peace to my space.
Dealing with Sun-Induced Vinyl Floor Separation
Facing the Heat: Why Do Vinyl Planks Separate?
For years, I thought vinyl planks were almost indestructible—until I saw a section lift in my sunlit corner. The heat caused the adhesive to soften, making the planks susceptible to expansion and contraction. When this movement isn’t accommodated properly, it leads to separation, buckling, or even warping. Interestingly, according to flooring experts, high temperatures accelerate the natural expansion of vinyl, especially if the subfloor isn’t perfectly level or if the adhesive isn’t suitable for wide temperature variations. This realization made me reconsider how I managed my home’s environment and installation choices.
Have you faced this problem in your own home, or are you worried about it happening? Understanding the causes is the first step toward preventing future damage. It’s essential to recognize that, although vinyl planks are durable, they still require a controlled environment and correct installation practices to perform their best.
In my case, early on, I made the mistake of assuming that a strong adhesive was enough to hold everything together regardless of sunlight or temperature fluctuations. Thatwas a rookie error that I paid for dearly—trust me. The good news is, there’s a way to repair and safeguard your flooring without a complete overhaul. Next, I’ll walk you through the specific steps I took to fix my floor, ensuring it stayed glued and looked flawless again. Plus, I’ll share some tips on how to avoid these issues in the future, like proper acclimation and choosing the right adhesive for sun-prone areas. Now, let’s dive into the practical solution I used to get my vinyl planks back in place and keep them adhering for good.
Prepare Your Workspace and Materials
Start by clearing the affected area and gathering all necessary tools, including a heavy-duty adhesive suitable for vinyl planks, a putty knife, a clean cloth, and a roller. Wearing gloves helps prevent skin irritation from adhesives.
Clean and Dry the Separated Area
Use a damp cloth to remove any dust, debris, or old residue from the separation surface. Ensure the area is completely dry; moisture will weaken the bond of the new adhesive and compromise the repair.
Apply the Adhesive Correctly
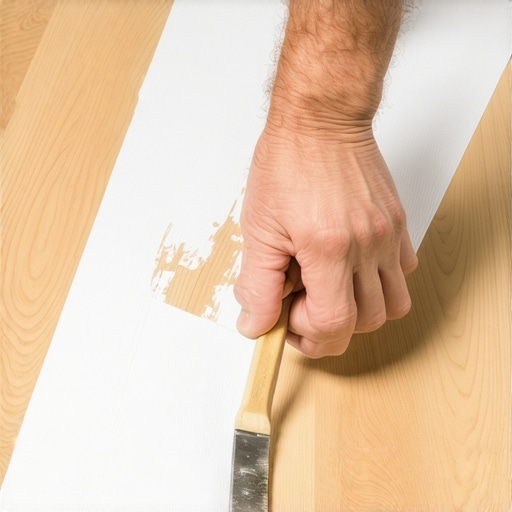
Squeeze a generous amount of the adhesive into the gap underneath the lifted planks. Use a putty knife to spread the glue evenly, making sure to reach all contact points for a strong bond. Imagine it as pressing the glue into a dent to ensure tight adhesion.
Press and Secure the Plank in Place
Carefully press the plank down, aligning it properly with adjacent planks. Use a roller or your hand to apply firm pressure across the entire surface, ensuring the adhesive spreads evenly and removes air pockets. Think of it like sealing a stamp onto an envelope—firm, even pressure ensures a lasting bond.
Allow Adequate Curing Time
Follow the adhesive manufacturer’s instructions for curing time, typically at least 24 hours. Avoid walking on or placing heavy furniture on the freshly glued area until fully cured, much like setting concrete keeps it from cracking.
Monitor and Maintain the Repaired Floor
Once cured, regularly check the repair for signs of lifting or gaps. To prevent future issues, control indoor temperature and humidity, especially in sun-exposed areas. Consider tinting windows or using blinds to limit heat build-up, reducing the risk of re-separation. For further insights on maintaining your flooring or upgrading your space, visit flooring installation tips.
 Many homeowners assume that installing showers, flooring, or baseboards is straightforward, but this often leads to costly mistakes due to misconceptions about these projects. One common myth is that all adhesives or grout are universal solutions; in reality, choosing the right product tailored to your materials significantly impacts durability. For instance, using standard grout in a high-moisture shower without proper sealing can result in pink or slimy grout, as highlighted in expert guidelines on shower repairs. Additionally, a prevalent mistake is neglecting the nuances of expansion gaps in flooring—failing to leave the recommended space under doors or walls can cause buckling or cracking later on.
Superficially, many believe that simply nailing baseboards directly into drywall suffices, but this can lead to gaps or cracks over time, especially if walls are uneven or shifting. Instead, understanding the importance of flexible fillers and proper shimming can save you headaches. For advanced homeowners, considering the trend towards minimalistic and floating baseboards requires knowledge of precise measurement and scribing techniques, which can be confusing without proper tools or experience. For example, installing baseboards over uneven drywall without intentional scribing can produce noticeable gaps, undermining aesthetic appeal.
What most people overlook is how environmental conditions influence long-term performance. Excessive humidity or direct sunlight can accelerate issues like adhesive failure or warping—so controlling room temperature, moisture, and light exposure is crucial. A study by the National Association of Home Builders emphasizes that environmental control surpasses material quality in preventing long-term damage.
In the case of showers, many DIY enthusiasts underestimate the importance of waterproofing membranes beneath tiles. Skipping or improperly installing these layers can lead to leaks and mold, which is a costly mistake. Similarly, in flooring installation, ignoring the need for acclimation of materials to ambient temperature and humidity levels causes expansion or contraction issues. These advanced nuances are often overlooked in beginner guides but are critical for ensuring long-lasting results.
By digging into these hidden details—like selecting appropriate sealants, respecting expansion gaps, and accounting for environmental factors—you can avoid common pitfalls and achieve a professional finish. Remember, a small upfront investment in learning and proper planning prevents significant repairs down the line. Updated trends, such as new baseboard styles, also require an understanding of how to properly integrate them into existing structures to elevate your interior design. For more on styling, check out baseboard trends in 2025. Have you ever fallen into this trap? Let me know in the comments.Maintaining your flooring, baseboards, and related installations requires the right equipment and a proactive approach to long-term upkeep. Over the years, I’ve refined my toolkit and methods to ensure my home upgrades stand the test of time, saving me headaches and costly repairs. In this post, I’ll share specific tools I rely on for repairs and maintenance, along with strategies for sustainable results and future scaling.
Investing in Precision with a Quality Multi-Tool
A versatile oscillating multi-tool has become my go-to for small adjustments, removing old adhesive, or trimming baseboards precisely. I prefer models like the Fein MultiMaster, which offers variable speed control and a range of attachments. Its ability to cut, scrape, and sand makes it invaluable, especially when working in tight corners or modifying trim for perfect fits. For example, when installing new baseboards over uneven drywall, using this tool with a scribing blade helps achieve seamless transitions, elevating the overall look (learn more about selecting the right baseboards).
Maintaining a Consistent Level with a Laser Level
A high-quality laser level ensures my installations remain perfectly straight and level, particularly useful when hanging baseboards or laying flooring. Unlike traditional bubble levels, laser levels project a straight line across long distances, reducing human error. I recommend the Bosch GSL2 Professional for its accuracy and ease of use. Regularly checking the level during installation prevents issues like crown molding misalignment or uneven seams that can be visually distracting down the line.
Preparing the Surface with a Cordless Screw Gun
Efficiency in fixing or adding trim is greatly improved with a reliable cordless screw gun, like the Makita XDT13. A cordless screw gun allows for quick, controlled fastening, preventing drywall damage or overdriving nails. When used for installing new baseboards, it speeds up the process and ensures consistent depth and spacing, which is crucial for a professional finish. Properly secured baseboards resist cracking or loosening over time, especially in active households.
Predicting Future Trends and Scaling Up
Looking ahead, automation and smarter tools are likely to revolutionize maintenance routines. Apps that monitor tool performance and suggest maintenance or parts replacements will become more common, extending tool lifespan and performance. Additionally, as eco-friendly materials gain popularity, I foresee a shift toward sustainable adhesives and finishes, requiring adjustments in our maintenance practices.
How can I keep my flooring and trim working seamlessly over the years?
Aside from investing in these specific tools, adopting a regular inspection routine helps catch issues early. Cleaning and checking for loose fasteners every six months keeps everything secure. Furthermore, controlling indoor humidity with dehumidifiers or HVAC adjustments minimizes adhesive failure or warping. For instance, sealing gaps around baseboards with flexible filler like the one discussed here extends their lifespan.
Don’t forget to schedule periodic deep cleans of your flooring and grout to prevent buildup and deterioration. Simple tools like a grout cleaning brush or a steam cleaner can make this easier without damaging surfaces. Ultimately, combining the right tools with a maintenance mindset ensures your investment continues to pay off well into the future.
Few Mistakes Teach Harder Than Overlooking the Details
One of my biggest realizations was that even durable vinyl planks can fail if environmental factors and proper installation aren’t prioritized. I once blamed the product, only to discover that sunlight-induced heat caused the adhesive to soften, leading to separation. This taught me the importance of understanding material limits and controlling indoor conditions, especially in sun-drenched spots. My second lesson was about patience—waiting the full curing time before walking on newly glued flooring saved me from future repairs. The third lightbulb moment involved recognizing the significance of precise measurements and tools like laser levels to ensure smooth, professional finishes. Lastly, I learned that regular maintenance and environmental control are game-changers, extending the life of everything from baseboards to flooring. Trust me, paying attention to these details prevented a cycle of repairs and elevated my home’s look and longevity.