

I was standing in a half-finished bathroom, beads of sweat dripping off my nose, and my hands were covered in a sticky, white mess that refused to come off. My dream of a sleek, spa-like shower was rapidly turning into a nightmare of smeared silicone and jagged edges that looked like a toddler had been playing with cake frosting. I had just spent a fortune on gorgeous tiles, but the final seal looked amateur at best. That was the day I realized that the difference between a DIY disaster and a professional finish isn’t necessarily a decade of experience; it’s often just a five-dollar roll of blue painter’s tape. If you have ever felt the soul-crushing frustration of watching a bead of caulk wander off course, you are in the right place. Today, I’m pulling back the curtain on the simple taping method that guarantees crisp, sharp lines every single time, even if you’ve never held a caulk gun before.
Why Your Shower Caulk Always Looks Like a Mess
I’ll be the first to admit my early mistakes. I used to think I could just ‘wing it’ with a wet finger and a paper towel. The result? A line that was too thin in some spots, thick enough to be a speed bump in others, and a hazy film of silicone that stayed on the tile forever. When you are working on upgrading your bathroom, the silicone bead is the literal seal of approval. It’s what keeps water from getting behind your walls and causing the kind of structural rot that costs thousands to fix. According to the EPA, controlling moisture is the most critical factor in preventing mold growth in the home. But beyond the utility, a messy caulk line is an eyesore that screams ‘unfinished.’ I once made the mistake of trying to fix a bead while it was half-dry, which resulted in a clumped-up disaster that I eventually had to scrape off with a razor blade. It was a waste of time and money, and it’s a trap I don’t want you to fall into. Using blue tape allows you to define the boundaries before the sticky stuff even touches the tile, ensuring you get that leak-proof shower corner without the stress. Have you ever spent more time cleaning up the caulk than actually applying it?
Is the extra prep work actually worth the hassle?
I get it. You’re tired, the project is almost done, and the thought of meticulously applying two rows of tape sounds like a chore. You might be thinking, ‘Can’t I just be really careful?’ Truthfully, even the steadiest hands struggle with the texture of grout lines and the awkward angles of a shower floor. When you install a rock-solid shower floor, you want the finishing touch to match that quality. The tape isn’t just about avoiding a mess; it’s about controlling the depth and width of the silicone so it functions properly. It creates a dam that forces the silicone into the joint, which is the whole point of caulking in the first place. Trust me, the fifteen minutes you spend taping will save you two hours of scrubbing dried silicone off your new tiles later. We are aiming for a result that looks like a pro was there, and this is the shortcut to getting it.
How to Lay Down the Perfect Blue Border
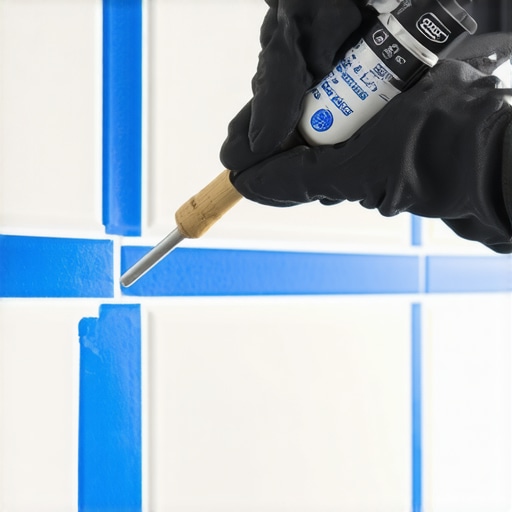
Before you even touch your caulk gun, you need a surface that is surgically clean. I used to think a quick wipe with a towel was enough, but any leftover soap scum or moisture is the enemy of a long-lasting seal. Take a rag soaked in denatured alcohol and run it through the joint. This ensures the silicone actually bonds to the tile rather than just sitting on top of a layer of grime. If you suspect deeper issues with your shower base, it is also worth checking how to spot a bad shower pan liner before tiling to avoid sealing over a disaster. Once dry, apply your first strip of blue painter’s tape about 1/8th of an inch away from the corner on the wall. Repeat this on the floor or shower base. You are essentially creating a runway for the silicone. Think of the tape as a stencil for a painting; it defines the boundaries so you can be as messy as you want in the middle. 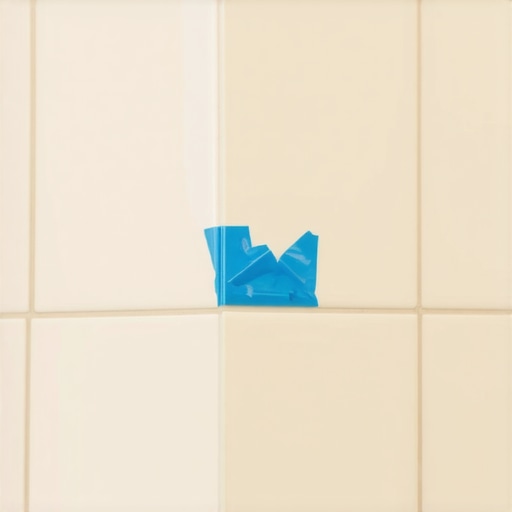
Stop Trying to Use Your Dry Finger
Here is where most DIYers go wrong. They squeeze out a glob of silicone and immediately try to smooth it with a dry fingertip. This creates friction, which leads to those annoying ridges and a sticky mess that migrates everywhere. Instead, keep a small cup of soapy water nearby. After you’ve laid a consistent bead of caulk between your two lines of tape, dip your finger into the soapy water and then run it along the joint. The soap acts like a lubricant, allowing your finger to glide over the silicone and compress it into the gap without pulling the material back out. I remember my first attempt at this on a high-end project; I didn’t use the tape or the soap, and the result looked like a jagged mountain range of white goo. I ended up having to redo the entire section, which was much harder than getting it right the first time during a step-by-step flooring installation.
Pull the Tape Before the Magic Dries
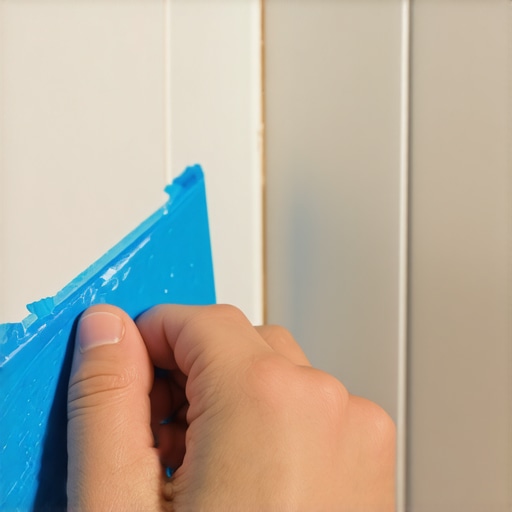
The biggest mistake people make with this method is waiting too long to remove the tape. If the silicone starts to ‘skin over,’ pulling the tape will actually rip the edges of your fresh bead, leaving it looking ragged. You want to pull that tape while the silicone is still very wet. This is why I work in sections. Don’t try to tape and caulk the entire shower at once; do one vertical corner, pull the tape, and then move to the base. This ensures you always have a leak-proof shower corner with edges that are sharp enough to cut paper.
Handle the Corners with Precision
When you get to the spots where three planes of tile meet, the taping gets a bit more technical. I treat these like a ‘triple point.’ You want your tape pieces to overlap slightly at the very corner so there is no gap for the silicone to bleed through. If you find the silicone is still shrinking or cracking after it dries, you might need to look into using a flexible filler for areas with high movement. By pulling the tape at a 45-degree angle away from the joint, you leave behind a bead that is perfectly uniform in width and depth, providing both a waterproof barrier and a finish that looks like it was done by a pro who’s been in the business for twenty years.
The ‘more is better’ myth is ruining your bathroom. Most homeowners think that a thicker, wider bead of silicone offers more protection, but in my experience, the opposite is true. A massive glob of caulk actually loses the flexibility needed to handle the natural expansion and contraction of your home. When you apply too much material, the center of the bead remains soft while the edges cure, leading to internal tension that pulls the seal away from the tile within months. True professionals aim for a concave, thin profile that acts like a gasket rather than a bridge. This is a common theme in flooring installation mistakes to avoid for a seamless look; overcompensating with material often masks a deeper lack of technique.
Why does your brand-new caulk crack after only three months?
The answer usually lies in the ‘Oops’ factor of trapped moisture. I have seen countless DIYers—and even some pros—wipe down a joint and immediately start caulking. However, moisture can linger deep inside the grout or behind the tile for hours. If you seal that water in, it will eventually turn into a gaseous state or harbor bacteria, causing the silicone to delaminate. This is also why your shower grout is turning pink or orange; the moisture trapped behind the seal becomes a breeding ground for Serratia marcescens. According to the Tile Council of North America (TCNA), all changes of plane in a shower must be treated as expansion joints. If you use rigid grout instead of a 100% silicone sealant, or if you apply silicone over a damp surface, the joint is guaranteed to fail as the house settles.
Another nuance that separates the experts from the amateurs is the ‘trowel-side’ awareness. Just as the trowel size mistake that ruins your shower tile bond can lead to hollow spots, failing to properly compress your caulk bead leads to microscopic air pockets. When you use the soapy-finger method I mentioned earlier, you aren’t just smoothing the surface; you are hydraulically forcing the silicone into the pores of the tile and the substrate. Without that pressure, the caulk is merely sitting on the surface like a sticker. If you skip this, you might find yourself wondering why most DIY shower waterproofing fails at the drain or corners even when everything looks fine from the outside. Have you ever fallen into this trap of thinking a surface-level seal was enough? Let me know in the comments. We’re aiming for a bond that lasts a decade, not a season.
If you think you’ve mastered the bead, let’s talk about the hardware in your hand. I’ve spent years wrestling with those cheap, orange-painted caulk guns from the bargain bin, and I’m here to tell you that they are the enemy of a clean finish. I personally switched to a high-ratio, dripless caulk gun because it offers a 12:1 mechanical advantage, which means you don’t need a grip of steel to get a smooth, consistent flow. More importantly, the ‘dripless’ feature instantly stops the pressure the moment you release the trigger, preventing that dreaded ‘over-ooze’ that happens right as you reach the end of your tape line. When you are upgrading your bathroom, these small mechanical wins add up to a professional result.
How do I keep these seals looking brand new for years?
Maintenance is where most people drop the ball. Once the silicone is dry and the tape is pulled, you can’t just forget about it. To prevent the environment from reclaiming your hard work, avoid using harsh bleach-based cleaners that can actually degrade the flexibility of the silicone over time. Instead, a simple mixture of mild soap and water is all you need. If you start seeing issues, check why your shower grout is turning pink or orange as it might indicate a ventilation problem rather than a failure of your seal. Beyond the shower, maintenance extends to your floor transitions. If you have just completed a step-by-step flooring installation, you need to monitor the environment. The National Wood Flooring Association (NWFA) explicitly states that maintaining a relative humidity between 30% and 50% is the only way to ensure your planks don’t expand and contract to the point of failure. I always keep a hygrometer in the room to track this; it’s a ten-dollar tool that protects a ten-thousand-dollar floor.
Keep Your Floors and Baseboards Looking Custom Forever
Long-term success isn’t just about the shower; it’s about the entire room’s ecosystem. As your house settles, you might notice small separations between your walls and your trim. Instead of panicking, you can learn how to fix baseboard gaps without replacing the trim by using a high-flexibility acrylic caulk. This same philosophy applies to your carpeting. If you’ve just finished a carpet install, the most important long-term tool you can own is a power stretcher—not just a knee kicker. Most homeowners see their carpet start to ripple after two years because the installer only used a kicker. I always recommend checking the moisture meter test every flooring pro uses before any install to ensure your subfloor isn’t hiding a secret that will ruin your work later. I predict that as smart-home technology advances, we will see more sensors integrated into our flooring underlayments to alert us to leaks before they ever reach the baseboards. For now, we rely on technique and the right materials. My biggest piece of advice? Go out and buy that dripless caulk gun today and try the soapy-water-and-tape method on just one small corner; I guarantee you’ll never go back to the ‘wing-it’ method again.
I was standing in a half-finished bathroom, beads of sweat dripping off my nose, and my hands were covered in a sticky, white mess that refused to come off. My dream of a sleek, spa-like shower was rapidly turning into a nightmare of smeared silicone and jagged edges that looked like a toddler had been playing with cake frosting. I had just spent a fortune on gorgeous tiles, but the final seal looked amateur at best. That was the day I realized that the difference between a DIY disaster and a professional finish isn’t necessarily a decade of experience; it’s often just a five-dollar roll of blue painter’s tape. If you have ever felt the soul-crushing frustration of watching a bead of caulk wander off course, you are in the right place. Today, I’m pulling back the curtain on the simple taping method that guarantees crisp, sharp lines every single time, even if you’ve never held a caulk gun before.
Why Your Shower Caulk Always Looks Like a Mess
I’ll be the first to admit my early mistakes. I used to think I could just ‘wing it’ with a wet finger and a paper towel. The result? A line that was too thin in some spots, thick enough to be a speed bump in others, and a hazy film of silicone that stayed on the tile forever. When you are working on upgrading your bathroom, the silicone bead is the literal seal of approval. It’s what keeps water from getting behind your walls and causing the kind of structural rot that costs thousands to fix. According to the EPA, controlling moisture is the most critical factor in preventing mold growth in the home. But beyond the utility, a messy caulk line is an eyesore that screams ‘unfinished.’ I once made the mistake of trying to fix a bead while it was half-dry, which resulted in a clumped-up disaster that I eventually had to scrape off with a razor blade. It was a waste of time and money, and it’s a trap I don’t want you to fall into. Using blue tape allows you to define the boundaries before the sticky stuff even touches the tile, ensuring you get that leak-proof shower corner without the stress. Have you ever spent more time cleaning up the caulk than actually applying it?
Is the extra prep work actually worth the hassle?
I get it. You’re tired, the project is almost done, and the thought of meticulously applying two rows of tape sounds like a chore. You might be thinking, ‘Can’t I just be really careful?’ Truthfully, even the steadiest hands struggle with the texture of grout lines and the awkward angles of a shower floor. When you install a rock-solid shower floor, you want the finishing touch to match that quality. The tape isn’t just about avoiding a mess; it’s about controlling the depth and width of the silicone so it functions properly. It creates a dam that forces the silicone into the joint, which is the whole point of caulking in the first place. Trust me, the fifteen minutes you spend taping will save you two hours of scrubbing dried silicone off your new tiles later. We are aiming for a result that looks like a pro was there, and this is the shortcut to getting it.
How to Lay Down the Perfect Blue Border
Before you even touch your caulk gun, you need a surface that is surgically clean. I used to think a quick wipe with a towel was enough, but any leftover soap scum or moisture is the enemy of a long-lasting seal. Take a rag soaked in denatured alcohol and run it through the joint. This ensures the silicone actually bonds to the tile rather than just sitting on top of a layer of grime. If you suspect deeper issues with your shower base, it is also worth checking how to spot a bad shower pan liner before tiling to avoid sealing over a disaster. Once dry, apply your first strip of blue painter’s tape about 1/8th of an inch away from the corner on the wall. Repeat this on the floor or shower base. You are essentially creating a runway for the silicone. Think of the tape as a stencil for a painting; it defines the boundaries so you can be as messy as you want in the middle.
Stop Trying to Use Your Dry Finger
Here is where most DIYers go wrong. They squeeze out a glob of silicone and immediately try to smooth it with a dry fingertip. This creates friction, which leads to those annoying ridges and a sticky mess that migrates everywhere. Instead, keep a small cup of soapy water nearby. After you’ve laid a consistent bead of caulk between your two lines of tape, dip your finger into the soapy water and then run it along the joint. The soap acts like a lubricant, allowing your finger to glide over the silicone and compress it into the gap without pulling the material back out. I remember my first attempt at this on a high-end project; I didn’t use the tape or the soap, and the result looked like a jagged mountain range of white goo. I ended up having to redo the entire section, which was much harder than getting it right the first time during a step-by-step flooring installation.
Pull the Tape Before the Magic Dries
The biggest mistake people make with this method is waiting too long to remove the tape. If the silicone starts to ‘skin over,’ pulling the tape will actually rip the edges of your fresh bead, leaving it looking ragged. You want to pull that tape while the silicone is still very wet. This is why I work in sections. Don’t try to tape and caulk the entire shower at once; do one vertical corner, pull the tape, and then move to the base. This ensures you always have a leak-proof shower corner with edges that are sharp enough to cut paper.
Handle the Corners with Precision
When you get to the spots where three planes of tile meet, the taping gets a bit more technical. I treat these like a ‘triple point.’ You want your tape pieces to overlap slightly at the very corner so there is no gap for the silicone to bleed through. If you find the silicone is still shrinking or cracking after it dries, you might need to look into using a flexible filler for areas with high movement. By pulling the tape at a 45-degree angle away from the joint, you leave behind a bead that is perfectly uniform in width and depth, providing both a waterproof barrier and a finish that looks like it was done by a pro who’s been in the business for twenty years.
The ‘more is better’ myth is ruining your bathroom. Most homeowners think that a thicker, wider bead of silicone offers more protection, but in my experience, the opposite is true. A massive glob of caulk actually loses the flexibility needed to handle the natural expansion and contraction of your home. When you apply too much material, the center of the bead remains soft while the edges cure, leading to internal tension that pulls the seal away from the tile within months. True professionals aim for a concave, thin profile that acts like a gasket rather than a bridge. This is a common theme in flooring installation mistakes to avoid for a seamless look; overcompensating with material often masks a deeper lack of technique.
Why does your brand-new caulk crack after only three months?
The answer usually lies in the ‘Oops’ factor of trapped moisture. I have seen countless DIYers—and even some pros—wipe down a joint and immediately start caulking. However, moisture can linger deep inside the grout or behind the tile for hours. If you seal that water in, it will eventually turn into a gaseous state or harbor bacteria, causing the silicone to delaminate. This is also why your shower grout is turning pink or orange; the moisture trapped behind the seal becomes a breeding ground for Serratia marcescens. According to the Tile Council of North America (TCNA), all changes of plane in a shower must be treated as expansion joints. If you use rigid grout instead of a 100% silicone sealant, or if you apply silicone over a damp surface, the joint is guaranteed to fail as the house settles.
Another nuance that separates the experts from the amateurs is the ‘trowel-side’ awareness. Just as the trowel size mistake that ruins your shower tile bond can lead to hollow spots, failing to properly compress your caulk bead leads to microscopic air pockets. When you use the soapy-finger method I mentioned earlier, you aren’t just smoothing the surface; you are hydraulically forcing the silicone into the pores of the tile and the substrate. Without that pressure, the caulk is merely sitting on the surface like a sticker. If you skip this, you might find yourself wondering why most DIY shower waterproofing fails at the drain or corners even when everything looks fine from the outside. Have you ever fallen into this trap of thinking a surface-level seal was enough? Let me know in the comments. We’re aiming for a bond that lasts a decade, not a season.
If you think you’ve mastered the bead, let’s talk about the hardware in your hand. I’ve spent years wrestling with those cheap, orange-painted caulk guns from the bargain bin, and I’m here to tell you that they are the enemy of a clean finish. I personally switched to a high-ratio, dripless caulk gun because it offers a 12:1 mechanical advantage, which means you don’t need a grip of steel to get a smooth, consistent flow. More importantly, the ‘dripless’ feature instantly stops the pressure the moment you release the trigger, preventing that dreaded ‘over-ooze’ that happens right as you reach the end of your tape line. When you are upgrading your bathroom, these small mechanical wins add up to a professional result.
How do I keep these seals looking brand new for years?
Maintenance is where most people drop the ball. Once the silicone is dry and the tape is pulled, you can’t just forget about it. To prevent the environment from reclaiming your hard work, avoid using harsh bleach-based cleaners that can actually degrade the flexibility of the silicone over time. Instead, a simple mixture of mild soap and water is all you need. If you start seeing issues, check why your shower grout is turning pink or orange as it might indicate a ventilation problem rather than a failure of your seal. Beyond the shower, maintenance extends to your floor transitions. If you have just completed a step-by-step flooring installation, you need to monitor the environment. The National Wood Flooring Association (NWFA) explicitly states that maintaining a relative humidity between 30% and 50% is the only way to ensure your planks don’t expand and contract to the point of failure. I always keep a hygrometer in the room to track this; it’s a ten-dollar tool that protects a ten-thousand-dollar floor.
Keep Your Floors and Baseboards Looking Custom Forever
Long-term success isn’t just about the shower; it’s about the entire room’s ecosystem. As your house settles, you might notice small separations between your walls and your trim. Instead of panicking, you can learn how to fix baseboard gaps without replacing the trim by using a high-flexibility acrylic caulk. This same philosophy applies to your carpeting. If you’ve just finished a carpet install, the most important long-term tool you can own is a power stretcher—not just a knee kicker. Most homeowners see their carpet start to ripple after two years because the installer only used a kicker. I always recommend checking the moisture meter test every flooring pro uses before any install to ensure your subfloor isn’t hiding a secret that will ruin your work later. I predict that as smart-home technology advances, we will see more sensors integrated into our flooring underlayments to alert us to leaks before they ever reach the baseboards. For now, we rely on technique and the right materials. My biggest piece of advice? Go out and buy that dripless caulk gun today and try the soapy-water-and-tape method on just one small corner; I guarantee you’ll never go back to the ‘wing-it’ method again.
Lessons I Learned While Scraping Off Failed Seals
The biggest epiphany I had during my years of trial and error was that the material you choose is just as important as the tape you lay down. I used to reach for the ‘cheapest’ silicone on the shelf, thinking they were all the same. They aren’t. Pure, 100% silicone is the only way to go for wet areas because acrylic blends eventually shrink and pull away from the tile. Another lightbulb moment? Lighting. If you can’t see the gap, you can’t seal it properly. I now bring a high-lumen work light into the shower to spot those tiny gaps that shadow hides. Finally, remember that patience is a tool. If you rush the tape removal or touch the bead while it is tacking up, you will ruin hours of prep in seconds.
Tools That Help You Achieve That Flawless Look
You don’t need a massive workshop to get a pro finish, but these specific items will change the way you work. First, the Newborn 930-GTD Dripless Caulk Gun is my go-to for controlling flow without the mess. Second, I highly recommend a set of Fugi silicone profiling tools; while I love the soapy finger method, these plastic scrapers can create a specific concave shape that is impossible to replicate with a human hand. Third, keep a bottle of denatured alcohol in your kit. It is the best cleaner for prepping tiles because it evaporates completely without leaving a residue. I trust these tools because they eliminate the variables that usually lead to a ‘DIY look.’
Build the Shower You Deserve
Tackling a shower renovation can feel overwhelming, but it is often these final, small details that determine whether the project feels like a success or a source of stress. Your home is your sanctuary, and taking the time to master the blue tape method ensures that your hard work stays protected from water damage for years to come. Whether you are finishing a complete bathroom upgrade or just refreshing an old seal, don’t be afraid to take it slow and aim for perfection. You have the knowledge now—all that’s left is to pick up the gun and start. If you hit a snag or need more personalized advice, you can always reach out to us at our contact page. Have you ever struggled with getting a clean caulk line in a tight corner? Let me know your biggest frustration in the comments below! #IMAGE_PLACEHOLDER_E#