

I was halfway through pouring my first cup of coffee when I heard it—a sickening crunch followed by a wet thud. I looked over my shoulder and my heart sank. A six-inch section of my subway tile backsplash was leaning away from the wall like a drunk at a party. It wasn’t just a loose tile; the entire structure was peeling off, pulling the drywall paper along with it. It felt like my kitchen was literally shedding its skin. I had spent days on that installation, and seeing it fail so spectacularly was a punch to the gut. If you are standing in your kitchen right now staring at a mysterious gap or a wobbly tile, I know that sinking feeling. But don’t panic. We are going to figure out exactly why that bond is failing and how you can fix it before the whole wall comes down. Have you ever walked into your kitchen only to find a tile face-down in your fruit bowl or noticed a weird bulge behind your stove?
My Backsplash Basically Fell Off and Yours Might Too
Working with tile is a labor of love, but it is also a chemistry experiment. When your backsplash starts to separate from the drywall, it is usually because the “handshake” between the adhesive and the wall has been broken. In my early days, I made the classic rookie mistake of thinking I could just slap tile over a painted wall without any prep. I ignored the basic flooring installation mistakes to avoid that apply to walls just as much as floors. I didn’t realize that the glossy paint was acting like a shield, preventing the thinset from actually grabbing onto the drywall. It looked great for a month, then gravity won the battle. Today, we are going to look at why moisture, the wrong tools, and poor substrate prep are the enemies of a lasting backsplash.
Is it actually possible to save the drywall?
Many homeowners fear that once the tile starts to peel, they have to rip the entire wall down to the studs. It is a valid fear. If the tile has pulled the paper off the gypsum, you have a structural problem on your hands. According to the Tile Council of North America (TCNA), a substrate must be able to support the weight of the tile without any deflection or delamination. If your drywall is crumbling, you can’t just glue things back on. However, if the failure is caught early, you can often stabilize the area. [IMAGE_PLACEHOLDER]
Stop the Peel Before the Whole Wall Comes Down
The most common reason for this heartbreak is often the trowel size mistake that ruins your tile bond. If you don’t use a large enough notch, you aren’t getting enough coverage, leading to those dreaded hollow spots under your new tile. Another huge culprit is moisture. If your backsplash is behind a sink and you didn’t seal the joint where the counter meets the wall, water can wick up into the drywall. Once that paper gets wet, it loses all its strength. I learned that lesson the hard way when I had to figure out how we fixed the grout crack in the shower corner for good; the same principles of water management apply to your kitchen. If you don’t address the source of the moisture, no amount of glue will keep those tiles in place. We need to look at how you prepped the surface—or more likely, how you didn’t—to ensure your next attempt stays put for decades, not days.
Strip it Back to the Bone
To fix a backsplash that is literally jumping off the wall, you have to be ruthless. If a tile feels even slightly hollow or the grout is cracking, it has to come off. You cannot build a lasting structure on a failing foundation. Think of it like a step-by-step flooring installation from planning to perfect finish; if the subfloor is soft, the tiles will crack. Use a stiff putty knife to gently pry the loose tiles away. If they take chunks of drywall with them, don’t sweat it yet. Our goal is to reach a stable, non-peeling surface. I once spent four hours trying to ‘save’ a section of tile by injecting adhesive into a gap, only to have the entire three-foot section collapse the next morning. It was a messy, expensive lesson in why you must remove anything that isn’t 100% bonded.
Repair the Fuzzy Drywall Paper First
When tile pulls away, it often leaves ‘fuzzy’ brown paper exposed. If you apply wet thinset directly to this, the paper will absorb the moisture, swell, and then delaminate again. You need to seal it. Use a shellac-based primer or a thin layer of setting-type joint compound to lock those fibers down. It’s a similar logic to how to fix baseboard gaps without replacing the trim; you are creating a solid, stable bridge before you apply your finish. Once the primer is dry, the wall should feel hard and ‘plastic-like’ rather than soft and papery. [IMAGE_PLACEHOLDER_B#]
Scuff the Surface to Give the Thinset Teeth
Most kitchen walls are covered in semi-gloss or satin paint, which is designed to repel stains—and unfortunately, it also repels adhesive. You need to create a ‘mechanical bond.’ Take some 80-grit sandpaper and scuff the paint until the shine is completely gone. You aren’t trying to sand through the wall; you just want to create microscopic scratches for the mortar to bite into. This is just as critical as the carpet install secrets professionals use to ensure a rug doesn’t shift underfoot. If the wall is too smooth, the weight of the tile will eventually cause it to slide right off.
The Difference Between a Good Bond and a Failure
Now, let’s talk about the ‘meat’ of the installation. Many DIYers reach for a tub of premixed mastic, but for a backsplash near a sink or stove, a high-quality modified thinset is usually a safer bet. You must avoid the trowel size mistake that ruins your shower tile bond. For standard subway tiles, a 1/4″ x 1/4″ square-notch trowel is usually the sweet spot. You need to stop shower floor tiles from popping with the proper thinset coverage by ensuring you are getting at least 95% contact between the tile and the wall.
Seal the Counter Joint to Block Moisture
The most common point of failure is actually the very bottom of the backsplash. Water from the counter wicks up into the drywall. Never fill the gap between the tile and the countertop with grout; it will crack and let water in. Use 100% silicone caulk. To get those crisp lines, use the blue tape secret for professional shower silicone lines every time. This creates a flexible, waterproof gasket that allows the house to move and shift without popping your tiles off the wall.Continuing from that mess in my kitchen, it’s important to realize that the ‘tight is right’ mentality is often the root of all evil in home improvement. Most DIYers believe that a perfect fit means zero gaps, but in the world of professional installation, a zero-gap fit is actually a failure in progress. Whether it is a backsplash, a hardwood floor, or baseboards, you have to account for expansion. If you ignore the 4 subfloor prep mistakes that make new vinyl planks sound hollow, you’ll likely overlook the mandatory perimeter gap. When the humidity hits 60%, those planks will expand, hit the wall, and have nowhere to go but up, creating a ‘bouncy’ floor that drives homeowners crazy.
Does Your Home Actually Need Room to Breathe?
The technical answer is a resounding yes. The ANSI A108.02 standards specifically mandate movement joints for any tile installation, yet almost no one puts them in a backsplash. This is why you see that vertical crack in the corner of your tile work; the two walls are moving independently, and your grout isn’t flexible enough to handle it. It is the same reason we use the back-bevel secret for inside baseboard corners. By slightly angling the cut, you allow the wood to stay tight at the face while providing a tiny bit of relief behind it for when the house inevitably settles.
The Knee Kicker Trap That Ruins Great Carpeting
We see a similar ‘force over finesse’ issue in other rooms. A common belief is that the tighter you kick a carpet onto the tack strip, the better it will hold. However, the knee-kicker mistake that ruins new carpet is a frequent sight in botched DIY jobs. If you over-tension the primary backing, you can actually cause delamination, where the fuzzy part of the carpet separates from the structural grid underneath. This leads to wrinkles that no amount of re-stretching can fix because the material has been permanently ‘fatigued.’
The Hidden Danger of Trapped Moisture in Modern Showers
Even in the bathroom, the nuances of moisture management are frequently misunderstood. People often assume that ‘waterproof’ products are a silver bullet. I’ve seen gorgeous shower renovation ideas turn into expensive disasters because the installer didn’t use the moisture meter test every flooring pro uses before applying the membrane. If you trap residual moisture from a fresh mortar bed behind a topical membrane, you create a perfect environment for anaerobic bacteria. 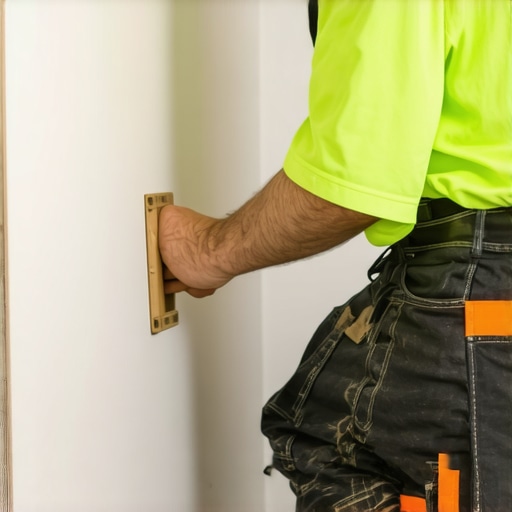
The Secret to Longevity is Respecting Physics
Ultimately, a backsplash that stays on the wall or a floor that doesn’t squeak is the result of respecting the physics of the materials. Don’t be afraid of small gaps—embrace them and fill them with the correct flexible materials, like 100% silicone or specialized caulks. Have you ever fallen into this trap where you tried to make something too tight, only to have it backfire? Let me know in the comments below; I’d love to hear your ‘oops’ stories so we can all learn the hard way together!I have moved past the stage of “feeling” if a wall is dry or “eyeballing” a straight line. If you want a result that doesn’t just look good on Instagram but actually survives a humid summer, you have to upgrade your kit. I never start a project without my pinless moisture meter. It is the only way to perform the moisture meter test every flooring pro uses to prevent disaster before it begins. The National Wood Flooring Association (NWFA) provides strict technical documentation stating that for planks wider than 3 inches, the moisture content (MC) difference between the subfloor and the hardwood should never exceed 2%. Ignoring this is how you end up with “cupping,” where your expensive floor looks like a series of tiny wooden half-pipes.
Stop Guessing and Start Measuring
Precision tools are the bridge between a “DIY-ish” look and a professional finish. Beyond moisture, I have become obsessed with 360-degree laser levels. They are the only way to ensure that a step-by-step flooring installation from planning to perfect finish stays truly level across multiple rooms. Even with carpets, the right tension is key. I have seen so many people fall for the knee-kicker mistake that ruins new carpet because they did not use a power stretcher for the heavy lifting. If you are lining up a shower, use the hidden spacers for perfectly even shower grout lines to maintain that laser-straight layout. 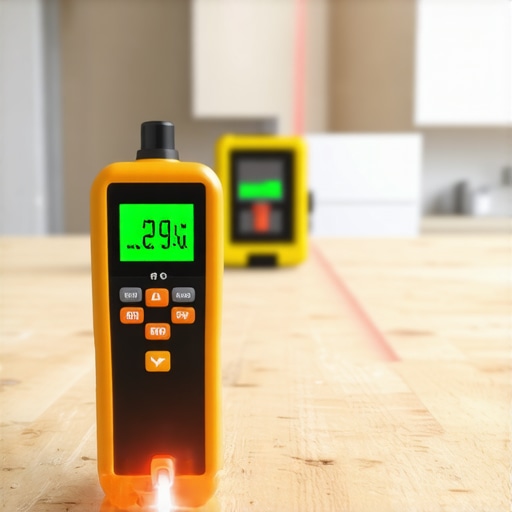
Keep Your Hard Work Looking Fresh for a Decade
Once the tools are put away, the real work begins. I always tell my clients that maintenance is not a chore; it is an insurance policy. For showers, you need to be proactive about shower repairs: when to fix vs replace for longevity. Do not wait for a leak to show up on the downstairs ceiling. Resealing your grout every year is a ten-minute job that saves you ten thousand dollars. For flooring, follow your guide to durable flooring installation for a stylish home by avoiding harsh steam mops on laminate—they are the silent killers of click-lock joints.
Why Your Next Floor Might Be Smarter Than Your Phone
Looking ahead, I predict a massive shift toward “smart” flooring and sub-structures. We are already seeing baseboard trends in 2025 that incorporate hidden LED channels and integrated wiring for home automation. Soon, we will have subfloors with embedded leak detection sensors that alert your phone the second a pipe under the vanity starts to drip. It sounds sci-fi, but when you consider how much a single leak costs, it is the most logical step in home evolution. To start leveling up your skills today, I challenge you to ditch the freehand caulk lines. Try the blue tape secret for professional shower silicone lines every time on your next bathroom touch-up. It is a game-changer that makes even a novice look like a seasoned pro.
The Three Brutal Truths My Kitchen Taught Me
Looking back at that pile of tiles on my counter, I realized that home improvement isn’t about strength; it’s about anticipation. First, houses are constantly moving. If you pin your materials too tightly, the house will find a way to break them. This is why I always check baseboard trends in 2025 to see how modern installers are hiding these necessary expansion gaps. Second, drywall is surprisingly fragile. It is essentially compressed chalk and paper; treating it like a structural beam is a recipe for disaster. Finally, moisture is a silent predator. Even a tiny amount of humidity can ruin a bond before you even realize the air is damp. [IMAGE_PLACEHOLDER]
My Must-Have Gear for a Forever Finish
I stopped guessing years ago, and my work has never looked better. If you are serious about your DIY journey, you need a pinless moisture meter. It is the only way to perform the moisture meter test every flooring pro uses to ensure your substrate is actually ready for adhesive. I also never start a project without a 360-degree laser level. Whether I am doing a backsplash or a step-by-step flooring installation from planning to perfect finish, that red line keeps me honest when my eyes want to lie. Lastly, don’t overlook the simple things like the blue tape secret for professional shower silicone lines every time. It is the difference between a messy caulk job and a factory finish.
Take the First Swing at Your New Foundation
Don’t let a few loose tiles or a peeling wall intimidate you. Every professional you see today started with a project that failed or a backsplash that ended up on the floor. The difference is that they learned how to repair the surface, scuff the paint, and use the right tools for the next attempt. You have the knowledge now to turn that wobbly tile into a rock-solid feature. Your kitchen is waiting for its comeback. Have you ever had a tile fall off at the worst possible moment or found a mysterious bulge in your wall? Let me know in the comments below!