

I’ll never forget the sound of that first tile hitting the floor. It was a Tuesday evening, the house was quiet, and then—crack. I walked into the guest bathroom to find a beautiful, expensive piece of porcelain lying in shards. I’d done everything according to the book, or so I thought. I had followed the step-by-step flooring installation guides, bought the fancy spacers, and spent way too much on the grout. But when I looked at the back of that fallen tile, it was almost clean. The mortar had stayed on the wall, and the tile had just let go. It was a classic case of poor adhesion, a mistake I see DIYers and even some pros make every single day. I had the tools, but I didn’t have the technique. Today, I’m going to share the simple adjustment that changed my tiling game forever, ensuring your renovation stays stuck for a lifetime.
Why Your Tiles Are Popping Off and How I Learned the Hard Way
I used to think that as long as there was enough mud behind the tile, it wasn’t going anywhere. I was a big fan of the swirl method—moving the trowel in big, satisfying arcs like I was frosting a cake. Boy, was I wrong. That is one of the most common flooring installation mistakes to avoid if you want your work to last. When you swirl that trowel, you trap air pockets. Those pockets are the enemy of a solid bond. If you have ever dealt with shower grout crumbling shortly after an install, there is a high chance your tiles are shifting because they aren’t fully bedded. My guest bath failure was my lightbulb moment; the ridges on the wall were still standing tall, never having touched the tile.
Is a specific trowel pattern really that big of a deal?
You might be thinking that it is just glue and surely the weight of the tile will squish it flat. I thought so too. But the truth is, without the right notch and the right movement, you are likely getting less than 50% coverage. According to the Tile Council of North America (TCNA), you need at least 80% coverage in dry areas and a critical 95% in wet areas like showers. If you are skipping the full-bed mortar rule for large format shower tiles, you are essentially setting yourself up for a very expensive renovation do-over. It isn’t just about the amount of thinset; it is about how you spread it.
The Physics of a Bond That Actually Lasts
The secret isn’t actually a secret; it is just simple physics. When we talk about the trowel-notch secret, we are talking about directional troweling—combing the mortar in straight lines, always perpendicular to the long side of the tile. When you press the tile into those straight ridges, the air has an easy escape route. The ridges collapse into the valleys, creating a vacuum-like bond that is incredibly hard to break. I once had to rip up a floor where I had used this method, and let me tell you, I practically had to use a jackhammer. It is the difference between a proper thinset coverage job and a weekend project that ends in repair bills. Have you ever tapped on your bathroom floor and heard that dreaded hollow thud instead of a solid click? That is the sound of a tile waiting to fail. Drop me a comment if you’ve ever dealt with a hollow floor—I’d love to hear how you handled the fix. Now, let’s get into the nitty-gritty of how to choose your trowel and perfect that comb technique.
Pick the Right Notch or Watch Your Tiles Fail
Choosing a trowel isn’t about what’s on sale; it is about the size of your tile. I learned this the hard way on a laundry room floor where I used a tiny 1/4-inch notch for large 12×24 porcelain planks. I thought I was being efficient with the mortar, but I was actually starving the bond. For those bigger pieces, you absolutely must follow the full-bed mortar rule for large format shower tiles and floor tiles alike. Generally, the larger the tile, the deeper the notch needs to be to bridge the gap between a potentially uneven substrate and the tile back. If you are working with standard subway tile, a 1/4″ x 1/4″ square notch is your best friend, but once you step up to those modern, heavy planks, you better reach for at least a 1/2″ x 1/2″ square notch or a U-notch to get the coverage required.
Check Your Work with a Quick Peel-Back
Early in my career, I started a habit that saved me thousands in potential repairs. Every few tiles, I would intentionally pull one back up right after setting it. It’s a messy, annoying thing to do, but it’s the only way to see what’s happening underneath. If you pull it up and see 50% gray mortar and 50% white tile back, you’re in trouble. You want to see total coverage. During a particularly humid July install, I noticed the mortar was skinning over faster than I could work. I used the finger test for checking thinset moisture in a shower and realized I was waiting too long. My ‘peel-back’ revealed that the mortar wasn’t transferring to the tile at all. If I hadn’t checked, that entire wall would have likely collapsed within a year. 
Comb Your Mortar Straight to Kill Air Pockets
The biggest mistake I see—and the one that caused my guest bath disaster—is the ‘swirl’ pattern. You must comb your mortar in straight, parallel lines. Why? Because when you press a tile into straight ridges, the air can escape through the valleys. If you swirl it, you create closed loops of air that get trapped. Those air pockets act like little cushions, preventing the tile from ever fully seating. When you are following a step-by-step flooring installation, focus on the direction of your ridges. Always comb them perpendicular to the long side of the tile. This is the shortest path for air to travel to escape. If you are doing a shower, start by establishing the level line rule for starting your first row of shower tile, then comb your lines vertically or horizontally—just keep them straight.
The Set-and-Slide Move for Maximum Grip
Once your mortar is combed perfectly, the way you place the tile is the final piece of the puzzle. Don’t just drop it and hope for the best. Place the tile a fraction of an inch away from its final position and then slide it into place. This ‘set-and-slide’ motion collapses the ridges and spreads the mortar into the valleys, ensuring you stop shower floor tiles from popping with the proper thinset coverage. It’s like the difference between laying a piece of tape flat and rubbing it down to get all the bubbles out. If you’re worried about the tiles shifting or height differences, you should definitely stop tile lippage with this leveling system move to lock everything in place while the mortar cures. Avoiding these flooring installation mistakes to avoid means your floor will be rock solid underfoot, with no hollow sounds or loose corners.
Don’t Trust Your Grout to Keep the Water Out
Most people believe that once the grout is in, the shower is sealed. I used to think the same thing until I pulled up a ‘perfect’ floor and found the subfloor rotting underneath. Here is the hard truth: grout is not waterproof. It is a porous, cement-based product that will eventually allow moisture to migrate through it. If you are relying on that decorative finish to protect your home, you are ignoring the most critical layer of the system. In my experience, the real magic happens before a single tile is set. Professionals who know their stuff prioritize the liquid membrane move for fail-proof shower pans because that rubberized barrier is what actually stops the leaks. According to the Tile Council of North America (TCNA), waterproofing should be treated as a continuous system, not a series of disconnected parts. If you skip the prep, the prettiest tile in the world won’t save your floor joists from rot.
Can a shower pass the 24-hour flood test if it looks dry?
I’ve seen many DIYers finish a pan and immediately start tiling because it ‘looks’ solid. This is a massive mistake. You must stop shower pan leaks with the flood test requirement before you even think about opening a bag of thinset. This involves plugging the drain and filling the pan with two inches of water for a full 24 hours. It is the only way to prove your ‘invisible’ work is actually holding up. I once worked on a luxury remodel where the owner wanted to skip this step to save a day. We insisted, and guess what? A tiny pinhole in the corner showed up eight hours in. Had we tiled over that, the entire $20,000 bathroom would have been ruined within two years. Have you ever fallen into this trap of rushing the ‘ugly’ stages? Let me know in the comments. 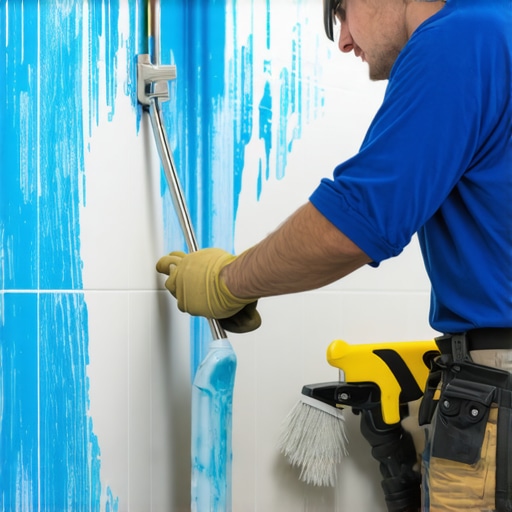
The Foundation Matters More Than the Finish
Whether you are working with tile or hardwood, the surface you are building on dictates the life of the project. If you are dealing with a mortar base, you need to master the dry pack secret for a perfectly sloped shower floor. A common myth is that you can just ‘feather’ thinset to create a slope, but that leads to uneven support and eventual cracking. The same logic applies to soft surfaces. Many installers reach for a small tool for every room, but the knee kicker mistake that ruins luxury carpets is a lesson in physics. For any room larger than a small closet, you need a power stretcher to achieve the proper tension, otherwise, you’ll see ripples in three years. When it comes to the finishing touches, don’t just butt your trim pieces together and hope the caulk hides the gap. I always recommend the inside corner cope for perfect baseboard installs. Mitering inside corners is a beginner’s move that almost always opens up as the house settles. Coping creates a joint that stays tight even when the walls aren’t perfectly square. It’s these small, ‘unseen’ technical choices that separate a weekend hobbyist from a master craftsman.I have spent years watching beautifully installed floors fail because the homeowner didn’t know the first thing about upkeep. It isn’t just about the day you finish the project; it’s about the next five thousand days. To get there, you need a combination of professional-grade tools and a strategy for what I call ‘preventative craftsmanship.’ If you aren’t thinking about how a material expands or how a specific cleaner might eat your grout, you are just building a ticking time bomb.
The Specialized Gear That Saves My Back and My Reputation
If you’re serious about moving beyond basic DIY, you have to stop relying on a four-foot spirit level. I’ve transitioned almost exclusively to a 360-degree green beam laser level. It’s the centerpiece of the laser level move for perfectly horizontal shower tiles. Why? Because a bubble level can be off by a fraction of an inch over ten feet, but a laser provides a consistent, unwavering datum line across the entire room. It’s the difference between a shower that looks ‘okay’ and one where every grout line hits the corner at the exact same height. For my carpet work, I refuse to step on a job site without a telescopic power stretcher. According to the Carpet and Rug Institute (CRI) Standard 105, power stretching is a mandatory requirement for residential installs, yet I see people trying to get away with just a knee kicker every single week. Following the power stretcher rule for large living room carpets is the only way to ensure you aren’t dealing with ripples in three years.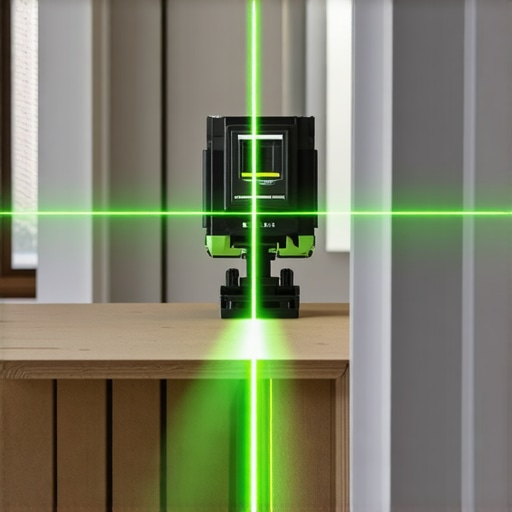
Stop the Slow Decay Before It Starts
Maintenance isn’t just about mopping; it’s about understanding the chemistry of your surfaces. For those of you who just finished a luxury vinyl or hardwood project, the biggest threat isn’t water—it’s grit. Small grains of sand act like sandpaper under your feet. This is why I always tell my clients to stop hardwood scratches with the felt pad routine on every single piece of furniture. It sounds like a small detail, but it can double the life of your finish. In the bathroom, the focus shifts to moisture management. If you notice a tiny crack in the corner, don’t wait. You need to understand shower repairs: when to fix vs. replace for longevity before a small hairline fracture turns into a structural rot issue.
How do I keep my new installation looking brand new for years?
Consistency is your best friend. For tiles, use a pH-neutral cleaner that won’t strip your sealer. If you chose one of the best carpet types for high traffic areas in 2025, make sure you are using a vacuum with adjustable brush rolls so you don’t fray the fibers. For your trim, a simple damp microfiber cloth is usually enough, but you should also keep an eye on the joints. If you see separation, it’s usually a sign of humidity swings. Re-addressing these spots with the inside corner cope for perfect baseboard installs during the initial build usually prevents the worst of the seasonal gaps.
Robotic Mapping and the Future of Your Floors
I suspect we are nearing a point where manual room measuring becomes a relic of the past. We are already seeing AI-driven mapping tools that can calculate the exact waste percentage for baseboard styles that elevate your interior design with 99% accuracy. I predict the next decade will bring ‘smart’ grouts that change color when moisture is detected behind the tile, acting as an early warning system for leaks. Until then, we rely on our eyes and our tests. I want you to try one thing on your next project: the ‘peel-back’ test I mentioned earlier. Don’t just trust the thinset; verify it. It’s the single most effective way to upgrade your skill level overnight.
What I Wish I Knew Before My First Hundred Square Feet
Looking back at my guest bath disaster, I realize that the most expensive mistakes were almost always invisible. First, never underestimate the power of the subfloor. I’ve seen homeowners spend $30 a square foot on marble only to have it crack because they didn’t want to spend a little extra time on how to reinforce a bouncy subfloor before tiling. Second, ‘good enough’ doesn’t exist in a wet environment. If you aren’t 100% sure about your prep, stop and re-evaluate. Finally, remember that your thinset has a life of its own. If it starts to look dull or skin over, scrap it and mix a fresh batch. It’s better to lose five dollars in mortar than five thousand in replacement tiles and labor.
The Gear That Separates Pro Work from Weekend Hacks
I don’t go into any project without a specific set of tools that I’ve curated over years of trial and error. My number one recommendation is a high-quality laser level; it ensures expert flooring installation tips for 2025 are actually achievable by giving you a perfect baseline that never moves. For anyone tackling carpet, don’t even look at a knee kicker for main rooms—you need a power stretcher to avoid the ripples that plague so many DIY jobs. I also swear by the TCNA Handbook. It’s the industry bible for a reason, providing the literal physics behind why specific methods work. Lastly, invest in a dedicated margin trowel. It’s the most versatile little tool in my bucket for cleaning joints and mixing small test batches without making a mess.
Build a Floor You Can Trust for Decades
Tackling your own renovation can be daunting, but there is an incredible sense of pride that comes from walking across a floor you know was built to last. Whether you are looking for shower renovation ideas or just trying to get your baseboards tight, the secret is always in the patience you show during the prep work. Your home deserves a professional-grade finish, and with these techniques, you are more than capable of delivering it. Take it one row at a time, check your coverage constantly, and don’t be afraid to pull a tile up to verify your bond. Your future self—and your subfloor—will thank you for it. Have you ever had a project where the prep work took twice as long as the actual installation? Let me know in the comments below!