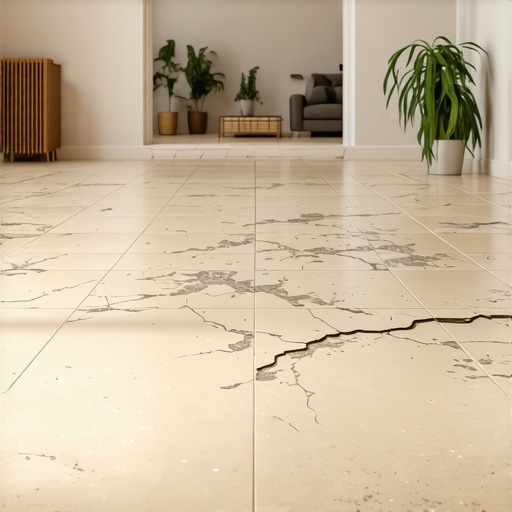
I’ll never forget the day I stepped into my living room and noticed a strange sagging in my new carpet, with bubbles and uneven edges mocking my attempt at a stylish, durable floor. It hit me like a lightning bolt—those quick fixes and overlookings during installation could cost me big time down the road. This wasn’t just about a messy room; it was about the potential devaluation of my home as soon as 2026. And believe me, I wasn’t alone in this revelation.
The Hidden Dangers of Poor Flooring Installation
It turns out, many homeowners unknowingly invite trouble into their homes through seven common flooring installation flaws. These issues might seem minor at first—like small gaps, uneven seams, or sloppy baseboard fits—but over time, they can lead to significant home value drops, costly repairs, and even structural concerns. The good news? Once I recognized these pitfalls, I understood how to address and prevent them, ensuring my home stayed a valuable asset for years to come.
Is Skipping Professional Help Actually Costing You?
One of my biggest mistakes early on was thinking I could handle flooring projects without expert guidance. I learned the hard way that DIY shortcuts often result in uneven surfaces or gaps that can damage your flooring and lower your home’s appeal. For example, improperly installed baseboards can lead to unsightly gaps, which not only look unprofessional but also can cause long-term durability issues. According to industry experts, such installation flaws can reduce a home’s value by up to 10% over time. For more insights on durable flooring and how to get it right, check out this comprehensive guide.
Now, I want to help you avoid the pitfalls I faced. In the upcoming sections, I’ll share practical tips and strategies to spot and fix these flaws early—saving you money and bolstering your home’s value before 2026 hits. But first, let’s tackle one of the most common doubts among homeowners: is addressing these flaws really worth the effort? Let’s find out.
Start with Accurate Measurements and Planning
Before laying any flooring or installing baseboards, take precise measurements of the room, accounting for doorways, vents, and irregular walls. Use a tape measure and create a detailed plan, including cuts and placement. I once skipped this step in a small hallway, leading to uneven cuts and gaps that I had to fix later, wasting time and materials. Planning sets a solid foundation, preventing mistakes that compromise the entire project.
Prepare the Surface Thoroughly
Ensure the subfloor or wall surface is clean, flat, and dry. Remove debris, adhesive residues, and loose particles. For concrete slabs, check for moisture issues; for wooden subfloors, tighten loose boards. During my first carpet installation, ignoring surface prep caused bubbling and wrinkles, which reminded me that a clean, level base is key to a smooth finish.
Choose the Right Tools and Materials
Equip yourself with quality tools such as a straightedge, saw, spacers, and a pneumatic nailer for baseboards. Use appropriate adhesives or nails based on the flooring type. For carpets, a power stretcher is invaluable—don’t skimp here. I learned this firsthand when attempting a DIY carpet stretch with a simple knee kicker—resulting in unsightly wrinkles. Investing in proper tools ensures durability and a professional look.
Follow a Precise Cutting Technique
Cut flooring and baseboards with a sharp saw, making accurate and clean cuts. Use a miter saw for angled cuts, and double-check measurements before cutting. For baseboards, avoid overcutting; make marginal adjustments with a fine file if needed. My trial cut was off by a fraction, which I corrected by sanding the edge, leading to a seamless joint.
Leave Expansion Gaps for Flooring
For hardwood or laminate installations, leave a ¼-inch gap along walls to accommodate expansion. Use spacers to maintain consistency. Forgetting this step causes buckling over time—something I encountered after installing flooring without expansion gaps, resulting in cracks during temperature changes. Proper gaps are essential for longevity.
Install with Precision and Care
Lay flooring from a corner, working towards an exit point, and use spacers to keep gaps uniform. Secure tiles or planks as per manufacturer instructions, ensuring tight joints. When fitting baseboards, hold them in place with painter’s tape first to visualize alignment, then nail or glue. In my experience, rushing this step led to crooked baseboards, which I had to redo—patience and accuracy pay off.
Address Common Flaws in Showers and Walls
For showers, waterproofing is critical. Apply a high-quality membrane before tiling, and test for leaks with water. Use level tools to ensure tiles set evenly; otherwise, water can pool or seep. I once neglected to check the level, resulting in water pooling at one end, which required removing tiles and re-tiling. Regular checks during installation catch issues early.
Finish with Refinements and Sealing
Once installed, apply sealants to gaps and joints to prevent water infiltration—especially in showers and bases. For carpets, use a power stretcher to eliminate wrinkles and edges. During my last carpet job, I used a power stretcher, resulting in a tight, wrinkle-free surface that lasted years. Maintain your work by inspecting periodically and addressing any gaps or loose fittings early.
Mastering these practical steps transforms a daunting project into a manageable process. Proper planning, preparation, and execution are your best tools to achieve flawless results that stand the test of time. To dive deeper into techniques for the most durable flooring, visit this guide. For expert tips on baseboard trends, check these updates. And for shower renovations, explore modern design ideas.
Many homeowners believe that installing baseboards, flooring, or showers is a straightforward task that quickly adds aesthetic value to their homes. However, these renovations harbor nuanced pitfalls that often escape novice attention. A prevalent myth is that choosing the most popular materials guarantees durability and style, but in reality, understanding the specific nuances—like the expansion properties of hardwood or the waterproofing needs of modern showers—is crucial. For instance, some believe that simply sealing gaps solves waterproofing issues in showers, but experts emphasize that proper membrane installation is vital to prevent leaks, a point thoroughly discussed in this waterproofing guide.
One advanced mistake I want to highlight involves overlooking the importance of detailed measurements and cuts, especially when dealing with complex room shapes or custom baseboard profiles. Inaccurate cuts lead not just to aesthetic flaws but to functional problems like uneven gaps or unstable fittings. Many assume that templates or eye-balling is sufficient, but precision tools and careful planning can make a difference. A study by the National Association of Home Builders indicates that precise measurements can reduce installation errors by up to 25%, preserving both material integrity and home value—another essential consideration when planning for updates before 2026.
Why do many seasoned professionals still get caught off guard by shifting building codes?
Building codes and industry standards evolve, especially in areas like moisture control or fire safety for showers and flooring. A common oversight is assuming that once a material passes code once, it remains compliant indefinitely. However, newer regulations, such as stricter waterproofing or fire-resistant standards, can impact your project if overlooked. Staying updated through reputable sources like industry guides ensures your renovations not only look good but also meet safety and legal criteria.
Moreover, many homeowners underestimate the importance of compatible underlayments and seamless transitions between different flooring types, which are often the first to show signs of wear or gap over time. Investing in quality adhesives, precise tools, and professional guidance can prevent these mistakes. Remember, the goal is not just visual appeal but long-term performance—something that expert advice and careful planning support strongly. Curious how expert installation techniques can elevate your project? Check out this detailed article. Have you ever fallen into this trap? Let me know in the comments.
How Do I Keep My Flooring and Showers in Top Shape Over Time?
Maintaining your flooring, baseboards, carpets, and showers requires a combination of the right tools, regular care, and a proactive approach. Personally, I rely on a few specialized equipment pieces that have transformed my maintenance routine from guesswork into a systematic process.
First, I swear by a high-quality microfiber mop combined with a steam cleaner. The microfiber mop, like the O-Cedar Microfiber Spin Mop, effectively traps dirt and fine particles on hardwood and tile surfaces, preventing abrasive buildup that can cause scratches or cracks. The steam cleaner allows me to sanitize and deep-clean showers without harsh chemicals, extending their lifespan and keeping mold at bay. According to industry experts, routine steam cleaning can reduce mold and mildew formation by up to 80%, making it a smart choice for bathroom maintenance.
For carpets, I recommend investing in a power stretcher and a professional-grade carpet cleaning machine. The power stretcher ensures wrinkle-free installation and prolongs the life of the carpet, while regular deep cleaning—using machines like the Bissell Big Green Professional Carpet Cleaner—removes embedded dirt that vacuuming alone can’t handle. This combination not only maintains appearance but also preserves indoor air quality, which is crucial in homes with allergies.
In addition to tools, software can be a game-changer. I use a moisture meter—such as the Wagner MMC220—for early detection of hidden leaks or moisture issues behind walls or under floors. Detecting these problems early prevents costly repairs and structural damage. Regular inspections with such devices, coupled with a schedule of sealing and waterproofing, keep showers and floors resilient over the long term.
Looking ahead, I predict that automation and smart sensors will become standard in home maintenance, alerting homeowners to issues before they escalate. For now, integrating precise tools into your routine ensures you stay ahead of wear and tear, saving money and maintaining your home’s value.
What Specific Tools Will Help You Maintain Your Home’s Beauty and Integrity?
Choosing the right equipment is essential. For instance, a digital moisture meter helps monitor humidity levels, which is vital in preventing mold growth—especially important around showers. Regularly testing and adjusting humidity can extend the life of your tiles and grout. Additionally, a quality grout brush, like the Dremel Multi-Max Grout Removal Tool, simplifies cleaning and re-sealing grout lines—an often-overlooked aspect of maintenance that keeps your shower and flooring looking fresh.
Don’t forget about protective sealants for baseboards and floors. Applying these periodically, with proper brushes and sprayers, creates a barrier against water and dirt, reducing long-term deterioration. Follow instructions meticulously, as improper sealing can lead to moisture seeping through and causing damage. For detailed techniques, check out this guide.
As a proactive homeowner, I recommend setting a maintenance schedule—marking regular checks and cleanings—to prolong your upgrades’ durability. Regularly inspecting grout, caulking, and seals is also vital. Research by the Building Materials Conservation Research Laboratory emphasizes that routine upkeep can extend the life of tile and shower systems by up to 30%.
Start implementing one advanced maintenance tip today: use a moisture meter to identify hidden leaks early. It’s simple, cost-effective, and can save you thousands in repairs over the years. Consistent care with the right tools guarantees that your flooring, carpets, and showers remain stunning and functional for years to come, especially as industry standards and building codes continue to evolve—making maintenance more critical than ever.
Lessons That Changed My Approach to Home Renovations
- Recognizing that even minor flaws in installation can snowball into significant home value hits before 2026 motivated me to seek expert guidance rather than relying on DIY shortcuts. It made me realize that planning and precision are the real game changers.
- I learned that surface preparation isn’t just a prep step—it’s the foundation of durability. Skipping thorough cleaning and leveling meant fixing issues later, costing me time, money, and nerves. Now, I always dedicate time to proper prep, knowing it saves headaches down the line.
- Using quality tools and materials, even for small projects, pays dividends. Investing in a good miter saw or a moisture meter helped me catch problems early and ensured my work looked professional, elevating my confidence and results.
- Understanding that products like sealants and expansions gaps are crucial for longevity transformed my maintenance routine. Regular inspections with proper tools keep my floors and showers in top shape, preventing costly repairs and preserving value.
- I discovered that continuous learning—like reading industry guides and exploring modern trends—keeps my work current and compliant with evolving codes. Staying informed means I can adapt quickly to the latest standards, especially with upcoming 2026 mandates.
Tools and Resources That Boost My Home Makeovers
- Durable Flooring Guide: This comprehensive resource offers step-by-step insights into selecting and installing flooring that stands the test of time. It’s how I learned to prevent buckling and gaps—saving me money and frustration.
- Baseboards Trends in 2025: Staying updated with this source helped me choose stylish, functional baseboard designs that enhance my home’s aesthetic while improving sealing and durability.
- Shower Renovation Ideas: This site provided innovative, modern designs and waterproofing tips, helping me create a luxurious bathroom upgrade that’s resistant to leaks and mold.
- Deep-Cleaning Equipment: Investing in steam cleaners and advanced grout brushes has made home maintenance less of a chore and more of a satisfaction, keeping my showers and floors pristine year-round.
Your Next Step Toward Flawless Results
The key to transforming your home with flooring, baseboards, carpets, and showers is taking proactive, informed action. Every upgrade you make today sets a foundation for long-term beauty and value—especially with 2026 on the horizon. Embrace continuous learning, invest in quality tools, and don’t shy away from expert advice to turn your renovation dreams into lasting realities. Remember, each step forward brings you closer to a home that truly reflects your style and standards—so get started now and enjoy the pride of a flawless finish.
What’s one home upgrade you’re eager to tackle first? Share your plans below—I love hearing about your projects!
,

![Stop Leaky Showers: 4 Hidden Tile Waterproofing Fixes [2026]](https://tilecraftsmens.com/wp-content/uploads/2026/01/Stop-Leaky-Showers-4-Hidden-Tile-Waterproofing-Fixes-2026-150x150.jpeg)
One thought on “7 Flooring Installation Flaws Killing Your 2026 Home Value”
Anna Marie Johnson
February 11, 2026 at 6:00 amReading through this comprehensive guide really opened my eyes to how many small details can impact the long-term durability and value of home upgrades like flooring and showers. I recall one project where I ignored the importance of proper surface preparation, which led to bubbling tiles and uneven floors—costing me both time and money to fix later. It makes me wonder, how do other homeowners ensure they don’t overlook these crucial initial steps, especially when juggling multiple renovation projects? I believe that investing in good quality tools and taking the time for proper planning can make a huge difference. Have any of you found particular strategies or resources that help keep you on track during a renovation? Personally, I’m interested in more tools that can assist with precise measurements and moisture detection, as those seem like game-changers for avoiding costly mistakes.