I remember the first time I installed baseboards in my living room—everything seemed straightforward until I stepped back and noticed those tiny gaps at the mitered corners. At first, I thought it was normal—just a quirk of how the cuts came together. But as days passed, the gaps seemed to widen, turning my neat trim into an uneven patchwork. Frustration set in. Have you ever faced this frustration, too? That lightbulb moment hit me when I realized there had to be a better way. Today, I’m excited to share a simple, effective hack that transformed my approach and can do the same for you.
The Hidden Problem Behind Baseboard Gaps
Gaps in baseboards are more than just an aesthetic bother—they can compromise the entire look of your newly renovated space. Many DIYers and even seasoned pros miss a crucial step, leading to gaps that stubbornly refuse to close, especially on irregular walls or when dealing with old, uneven surfaces. Early on, I made the mistake of trying to fill these gaps with caulk or sanding down the edges repeatedly—ineffective and time-consuming. It wasn’t until I discovered the power of the glue-and-clamp method that I finally gained control over those pesky gaps. This technique creates a strong bond that pulls the mitered corners tight, ensuring a seamless look. If you’re tired of battling gaps that just won’t close, stick around. We’re about to dive into a step-by-step process that turned my DIY game around and might just do the same for you.
Is the Glue-and-Clamp Hack Actually Worth the Hype?
At first glance, it might sound too simple—glue, clamps, and some patience. But trust me, after making some early mistakes—like rushing through the process or choosing the wrong adhesive—I learned that this method demands a bit of finesse. One tip I wish I’d known earlier: avoid using low-quality glue, which can weaken over time. The right adhesive, combined with proper clamping pressure, makes all the difference. This approach not only fixes gaps effectively but also extends the durability of your baseboards, according to flooring expert insights. Ready to get those joints perfect? Let’s explore the step-by-step process, so you can achieve professional-looking results right at home.
Securely Clamping the Mitered Corners
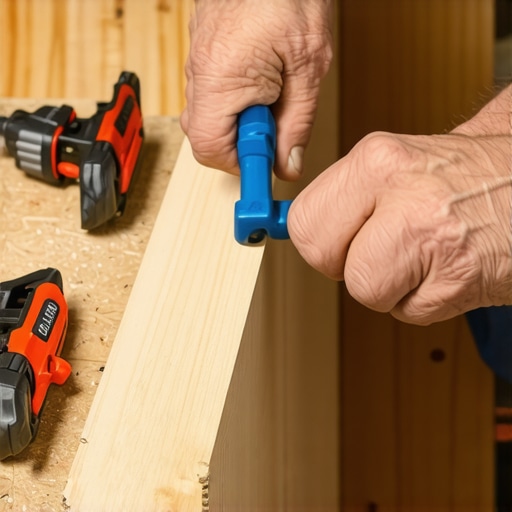
After cleaning the cut edges with a damp cloth, apply a generous bead of high-quality wood glue into the miter joint, ensuring complete coverage. Place the baseboard against the wall, aligning the mitered ends. Using bar clamps or pipe clamps, gently but firmly press the joints together, making sure they stay flush. Tighten the clamps gradually, checking alignment frequently. I once clamped a stubborn corner for 10 minutes, and the next day, I noticed a much tighter, gap-free joint—saving me hours of sanding and filling.
Choosing the Right Adhesive and Applying Proper Pressure
Select an industrial-strength wood glue or construction adhesive designed for molding and trim. Avoid cheap or thin glues that can weaken over time. Squeeze the adhesive evenly along the joint with a caulking gun, then clamp immediately. Apply consistent pressure across all corners to prevent gaps. During my last project, I used a rapid-set adhesive and adjustable clamps, which allowed me to work efficiently and achieve perfect, tight corners without extra steps.
Fine-Tuning with a Back-Cut Technique
If gaps persist after clamping, there’s a trick you can try: back-cut the miter angle by about 1-2 degrees to open the joint slightly. Once glued, clamp again and let it cure. This subtle adjustment helps the pieces seat more tightly, especially on uneven surfaces. I experimented with this method after noticing slight gaps on a curved wall, and it made a remarkable difference in achieving a flush fit. For more tips on handling complex walls, check out this guide on coping vs. miters.
The Power of Scribing and Custom Fitting
Sometimes, walls are uneven, and standard cuts won’t close gaps completely. Use a scribing tool or a compass to trace the wall’s contour onto a scrap piece of the baseboard. Cut along the scribed line using a coping saw or a fine teeth saw, then fit it into place. Secure with adhesive and clamps. This technique ensures a seamless fit that covers irregularities. I recall scribing a baseboard along a wavy wall and ending up with a perfect, gapless finish—making the final look professional and clean. For advanced scribing techniques, see this expert tutorial.
When tackling home improvement projects like flooring, baseboard installation, or shower renovations, many enthusiasts rely on common beliefs that might actually hinder their success. For instance, a frequent misconception is that Calibrating the perfect cut is all about precision, but in reality, understanding the material’s expansion and contraction factors can make or break your installation. Ignoring these nuances can lead to gaps, buckling, or water leaks over time, which are costly to repair.
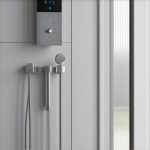
Why Do So Many Homeowners Oversimplify Shower Waterproofing
Many believe that applying a standard sealant is sufficient to prevent leaks. However, expert waterproofing involves multiple layers—proper membrane, sealing techniques, and drain integration—to ensure durability. Neglecting this complexity often results in mold growth or structural damage. Read more about advanced shower waterproofing secrets to avoid common pitfalls.

Advanced shower waterproofing techniques involve precise membrane application for optimal leak prevention.
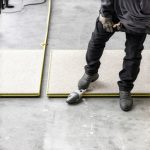
Avoid These Costly Floor Installation Mistakes
One trap is choosing a material solely based on appearance without considering the home’s humidity levels or foot traffic. For example, vinyl planks may buckle if exposed to excessive moisture, but selecting the right underlayment and installing moisture barriers can mitigate this risk. To learn about durable options that suit your environment, explore professional flooring strategies.
Make sure to account for environmental factors that affect your flooring’s longevity. Failing to do so is an advanced mistake that often catches even seasoned DIYers off guard. Remember, a well-planned installation is about foreseeing issues before they happen rather than fixing them after.
Advanced Insight Into Baseboard Installation
Many underestimate the importance of wall irregularities. Simply cutting your baseboards to a perfect miter won’t suffice if the walls are uneven. Advanced installers use techniques like scribing and back-cutting to conform to irregular surfaces, ensuring a seamless look. This nuanced approach prevents gaps and enhances aesthetic appeal, especially on historical or textured walls. For comprehensive tips, check this expert guide on coping and scribing baseboards.
Have you ever fallen into this trap? Let me know in the comments and share your experiences with nuanced home upgrades.
Maintaining high-quality results in flooring, baseboard, and shower projects requires more than just skill; it demands the right tools. Personally, I swear by a few specialized instruments that streamline my workflow and ensure professional durability. One of my top picks is a high-precision miter saw with a fine tooth blade, which guarantees clean, accurate cuts, especially for complex angles in baseboards or intricate flooring patterns. The importance of using the right equipment cannot be overstated, as it minimizes errors and reduces material waste, ultimately saving time and money.
For delicate finishing touches, I rely on an oscillating multi-tool fitted with a segmented sanding attachment. It’s perfect for smoothing out edges after cutting or sanding stubborn spots, particularly around uneven walls or tight corners. When it comes to sealing grout lines or filling gaps in baseboards, I prefer a high-grade caulking gun with adjustable pressure to prevent uneven application, which is crucial for long-term durability.
Powerful yet precise, a cordless cordless drill kit with multiple bit sizes and a fast-charging battery system allows me to install hardware, secure baseboards, or drill pilot holes efficiently. The flexibility of cordless devices ensures I’m not tethered to outlets, especially in large or complex spaces. For measuring and layout, I lean on laser distance finders, which save me from the inaccuracies of traditional tapes, particularly when dealing with large rooms or irregular surfaces.
As tools evolve, I predict that future advancements will focus on integrated smart sensors and digital calibration features. These innovations can further improve accuracy and reduce human error, especially in high-stakes projects like waterproofing showers or installing complex flooring systems.
How do I maintain my tools over time? Proper maintenance begins with regular cleaning to remove dust and debris, especially from moving parts. Lubricating joints and blades ensures smooth operation and prevents rust. Additionally, calibrating laser measures periodically guarantees continued accuracy. Storing tools in climate-controlled environments extends their lifespan, and sharpening blades when dull maintains cutting precision.
For anyone serious about long-term results, investing in quality tools is vital. For instance, a professional-grade miter saw with precise angle adjustments can drastically improve your baseboard fits and minimize gaps. Remember, the right tools make all the difference, especially when scaling projects or tackling intricate details. If you’re ready to elevate your home upgrade game, consider trying the advanced techniques I mentioned, such as back-cutting or precise scribing, with the proper tools—it truly pays off.
Want personalized advice on selecting the best equipment for your project? Don’t hesitate to reach out via our contact page. And for more expert tips to transform your home, visit this guide.
Lessons from the Trenches: What Truly Made the Difference in My Home Upgrades
- One of the biggest revelations was realizing that perfect cuts aren’t enough; understanding wall irregularities and adapting with techniques like scribing or back-cutting transformed my finished look from amateurish to professional. I learned that patience and precise adjustments pay off, especially on uneven walls.
- Consistency in adhesive choice profoundly affected the durability of my baseboards and shower waterproofing. Investing in high-quality glues and proper clamping made extended joint life possible, teaching me that inexpensive materials often cost more in the long run due to failures and rework.
- Timing and patience during curing and drying phases cannot be overstated. Rushing through clamping or sealing just leads to gaps or leaks. Embracing a methodical pace, even in small projects, resulted in a noticeable boost in craftsmanship and pride in my work.
Tools and Resources That Elevated My DIY Game
- Precision Miter Saws: A game-changer for clean, accurate cuts, especially for complex angles in baseboards. I trust my Dewalt or Bosch for their reliability and fine-tuned adjustments.
- Laser Distance Meters: These help measure irregular walls quickly and accurately, saving time and ensuring perfect fits. I rely on those from Leica for their long-range accuracy.
- Heavy-Duty Clamps and Fine-Tip Caulking Guns: Essential for applying consistent pressure and neat fills. My favorite brands are Irwin and Surebonder, which handle the demands of home projects.
- Educational Guides and Pro Tips: I found value in dedicated DIY blogs and tutorials, especially those that discuss scribing and coping techniques. The thorough insights on copping vs. miters helped me perfect my corner finishes.
Take the Next Step with Confidence
Embarking on home upgrades like installing baseboards or renovating showers can seem daunting, but with the right knowledge, tools, and mindset, you can achieve truly professional results. Remember, every challenge offers a lesson in disguise—stay curious, patient, and willing to adapt your techniques.
Are you ready to start your own home transformation journey? What’s the biggest obstacle you’ve faced in ensuring a flawless finish? Share your experiences below!