I’ll never forget the first time I installed a patterned carpet and ended up with an awkward mismatch right in the middle of the room. The design was supposed to flow seamlessly, but instead, I had a visible seam that ruined the entire look. It was frustrating, and honestly, I felt I had wasted my time. That lightbulb moment made me realize—there’s a lot more to seaming patterned carpets than just laying them down and hoping for the best.
Why Mastering Carpet Seaming Saves Your Projects and Your Peace of Mind
If you’ve ever struggled with uneven seams, puckerings, or mismatched patterns, you’re not alone. Achieving that flawless, professional finish can be surprisingly challenging, especially with intricate designs. But here’s the good news—there are secret tactics hiding in plain sight that can transform your carpet installation results, making seams virtually invisible and ensuring your work stands the test of time.
Is All the Hype About Hidden Seaming Tricks Just a Gimmick?
Trust me, early in my career I made a rookie mistake—believing that if I aligned the patterns as best as I could, everything would look perfect. Turns out, that wasn’t enough. Small details like strategic heat-iron techniques and precise seam preparation are what make or break patterned carpet projects. According to flooring experts, paying attention to these tiny hidden tactics can drastically reduce post-installation issues and boost your confidence in your craft (source).
So, are you ready to learn these lesser-known tricks and elevate your carpet game? Let’s dive into the secret strategies that the pros use to ensure seamless patterns every time.
Aligning Patterns with Precision
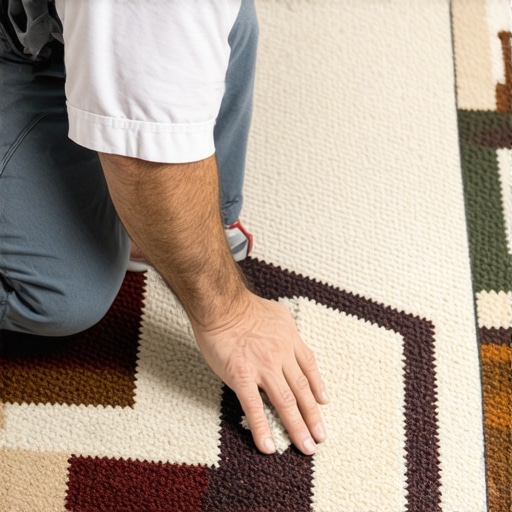
Begin by unrolling the carpet sections side by side on a clean, flat surface. Use painter’s tape to temporarily hold edges together, adjusting the pattern alignment meticulously. I once spent extra time here, tweaking alignment until patterns matched perfectly, which paid off during install. This prevents visible mismatches and ensures seamless visual flow.
Use a Laser or Straight Edge for Accuracy
Set up a laser level along the seam line, or employ a straightedge extended along the edge of your installation. This guides your cutting and seaming, maintaining straightness and pattern alignment. During one project, I used a laser level, and it drastically reduced deviations, resulting in a professional finish that clients noticed immediately.
Preparing the Seam for Perfect Bonding
Trim excess backing and pile from both carpet edges, ensuring the cuts are clean and straight with a sharp utility knife. This step resembles laying tiles precisely, ensuring a tight fit. I remember a time I hurried this step; the seam creased and was visible, which made me realize the importance of meticulous preparation.
Apply a Suitable Seam Adhesive
Use a high-quality carpet seam adhesive, applying a thin, even layer with a notched trowel or sponge. Broadcast heat-activated tape or glue to one edge, then fold the edges together, pressing firmly with a seam roller. This creates a strong, invisible bond. I once used a cheap glue, and the seam came apart after a week, reinforcing the need for the right adhesive.
Heat Activation for Seam Concealment
Employ a commercial heat seaming iron designed for carpets, heated to the manufacturer’s recommended temperature. Glide the iron along the seam for 10-15 seconds, activating the adhesive thoroughly. A trick I learned was to press down with a seam roller immediately afterward, ensuring the adhesive bonds deeply. Proper heat activation makes the seam nearly invisible.
Sanitize and Notify for Environmental Safety
Once sealed, allow the adhesive to cure as per instructions, typically 24 hours. Use clean gloves and a damp cloth to wipe excess adhesive immediately during the process to avoid residue. Remember, a clean, dust-free environment prevents debris settling into your seam, keeping it neat. If you notice a gap or wrinkle, reheat and press again before the adhesive sets fully.
Final Inspection and Touch-ups
After curing, position a bright light at an angle to the seam to reveal any irregularities or puckering. If you spot imperfections, reheat those sections slightly with the seam iron, pressing firmly with the roller. This is similar to ironing a fabric for a smooth finish. When I applied these steps diligently, my seams looked almost invisible, elevating the overall room aesthetic.
Remember, practice makes perfect. For more detailed tips on seaming techniques and troubleshooting, visit this comprehensive guide. Consistently applying these methods reduces post-installation issues and boosts your confidence with every project.
 Many homeowners and DIY enthusiasts operate under the assumption that following basic steps guarantees a flawless finish in projects like carpet laying, shower setup, flooring, and baseboard installation. However, this oversimplification often leads to common mistakes that can compromise both aesthetics and durability. One widespread myth is that perfect alignment is solely about matching patterns or seams visually; in reality, it requires understanding subtle differences in material behavior under different conditions. For example, with flooring, environmental factors such as humidity and temperature fluctuations can cause materials to expand or contract, leading to gapping or buckling if not properly accommodated, as highlighted in a recent study by the National Wood Flooring Association. Recognizing these nuances helps prevent costly repairs down the line.
Another misconception pertains to shower waterproofing. Many believe that applying a thick layer of sealant or membrane is enough to prevent leaks. In fact, the real key lies in meticulous detail—ensuring all joints, corners, and drains are sealed with proper vapor barriers and that installation follows a precise waterproofing sequence. Skipping these steps or rushing through them can result in hidden leaks, mold growth, and structural damage. For advanced builders, understanding that waterproofing is a layered process rather than a single application makes all the difference.
In the realm of baseboard installation, a common mistake revolves around ignoring the wall’s irregularities. People often assume straight-line miter cuts and tight gaps are all that matter. But aligning baseboards to uneven walls without proper scribing or shimming results in gaps or misaligned corners that are hard to fix later. The secret is to adapt your approach—using techniques like back-cutting or employing flexible caulks—to create a seamless look, especially in older or wavy walls. For more about this, check out tips on how to fix baseboard gaps on wavy walls.
Complex home projects also involve nuanced decisions, such as choosing materials that complement each other and the home’s environment. For example, selecting the right flooring underlayment can prevent issues like moisture build-up or sound transmission, which are often overlooked by DIYers. In fact, research indicates that improper underlayment installation is a leading cause of floor failure within the first few years.
Let’s not forget about advanced mistakes like neglecting to account for material movement or environmental factors. These subtle yet critical considerations distinguish novice results from professional finishes. For instance, allowing a floor to settle and acclimate before installation can avoid later buckling or gaps—a challenge many overlook.
In your projects, have you ever fallen into this trap? Share your experiences or questions below, and remember, paying attention to these hidden details can elevate your craftsmanship. For deeper insights into professional installation techniques, visit our contact page.
Mastering Maintenance for Durability and Continued Performance
Maintaining your flooring, showers, and baseboards is crucial to preserving their appearance and functionality over time. The key lies in using the right tools and adopting proactive maintenance routines. For example, regularly inspecting grout lines and sealing them periodically can prevent water intrusion that causes damage and mold. Employing a high-quality grout sealer, like those recommended by industry experts, helps maintain a waterproof barrier and keeps your shower looking pristine for years.
Invest in Precision Tools for Consistent Results
One tool I rely on heavily is the digital laser level. Unlike traditional bubble levels, a laser level provides exact alignment over large surfaces, which is essential when installing baseboards or flooring transitions. It minimizes errors, saving time and material costs while ensuring a professional finish every time. Personally, I prefer models with adjustable mounting options so I can use them in tight or awkward spaces. As technology advances, we’re seeing smarter tools like laser levels that sync with smartphone apps, making alignment even more straightforward and accurate.
Preserve Your Work with Proper Cleaning Techniques
Maintaining your installations extends beyond initial work. Regular cleaning with gentle, non-abrasive products preserves the surface finish. For floors, a microfiber mop and pH-balanced cleaner prevent scratches and wear. For shower tiles, using a squeegee after each use helps reduce soap scum and water spots, decreasing the need for harsh cleaning chemicals. Paying attention to these routine chores extends the lifespan of your investments and keeps everything looking fresh.
Tools for Long-Term Success
For flooring, I recommend a high-quality demolition scraper with a carbide tip. It’s invaluable for removing old adhesives or preparing subfloors without damaging them. When it comes to baseboards, a power miter saw with fine-adjustment capabilities makes cross-cutting miters precise, producing tightly fitting joints that prevent gaps and improve overall aesthetics. Investing in good-quality caulking guns and specialty sealants also ensures you can effectively seal joints and edges, preventing water infiltration and drafts.
How do I keep my installations working flawlessly over time?
The secret is consistent checkups and timely repairs. Regularly inspecting grout lines, caulking, and sealants allows you to catch minor issues before they escalate. Using specialized tools like a grout saw or a flexible pressure washer can aid in cleaning and repairing surfaces quickly. Additionally, applying protective coatings, such as a silicone-based barrier for baseboards, can prevent moisture buildup and paint chipping, especially in humid environments. These strategies, coupled with tools designed for precision and durability, will keep your project looking like new for years.
Looking ahead, I believe the future of maintenance tools will involve more smart devices that can monitor environmental factors like humidity and temperature, alerting you to potential issues early. Already, some advanced moisture meters and environmental sensors can be integrated with smartphone apps, offering real-time data. Incorporating these into your routine ensures proactive care, saving time and money in the long run.
One advanced tip I encourage you to try is using a moisture meter before sealing or painting. It can reveal hidden dampness that might cause problems later. Regularly maintaining your installations with the right tools will ensure they perform flawlessly and look fantastic for years to come. For personalized advice or expert assistance, don’t hesitate to reach out to us.
The Hardest Lesson I Learned About Carpet Install, Showers, Flooring, and Baseboards
One revelation that truly transformed my approach was realizing that beauty often lies in the details we overlook—like the way a seam lines up or how a baseboard sits next to an uneven wall. My biggest lightbulb moment was discovering that perfect alignment isn’t accidental but the result of deliberate, informed techniques—something I wish I had known from the start.
3 Myths About Carpet Install, Showers, Flooring Installation, and Baseboards That Held Me Back
Initially, I believed that following the basic steps was enough. However, I learned that environmental factors such as humidity and temperature, as well as material behaviors, influence long-term success more than I appreciated. For example, assuming that a simple sealant suffices in showers ignores the layered waterproofing crucial for durability. Busting these myths opened the door to more resilient, professional-looking results.
What Experts Won’t Tell You About Carpet Install, Showers, Flooring, and Baseboards
Professionals know that the magic is often in the prep work—like meticulously aligning patterns, selecting the right adhesives, or customizing cuts for uneven surfaces. I’ve found that taking extra time with these behind-the-scenes steps makes all the difference, ensuring seamless transitions and lasting quality. Learning these insider secrets has elevated my craftsmanship beyond average DIY work.
Guided Path: Your Next Steps in Home Improvement
If you’re eager to elevate your home projects, start by investing in quality tools like laser levels and precision cutters. Educate yourself on layered waterproofing techniques or the best adhesive choices for different materials. Remember, each detail you master will compound into a beautifully finished space that truly feels polished and professional. For tailored guidance or expert assistance, don’t hesitate to reach out to our team.
Your Turn to Transform—Embrace the Hidden Details
The journey to flawless home renovations is paved with attention to the small, often unseen, details. Take that extra step today—measure twice, prep thoroughly, and choose the right materials. Your future self will thank you for the effort. What challenge are you currently facing in your installation process? Share your story below and let’s learn together.