

Ever had that gut-wrenching moment when, during a simple flooring installation, I accidentally left a hot tools or object branded into my brand-new laminate flooring? The shock was real. I remember staring at that stubborn burn mark, feeling helpless and a tad defeated. That lightbulb moment hit me hard: if I could fix this, I could save my entire room from costly replacements.
Don’t Let a Burn Ruin Your Beautiful Floors: Here’s How I Fixed Mine
In this post, I’m sharing my personal experience with removing and repairing burn marks in laminate flooring. If you’re tired of those unsightly blemishes marring your space, stay with me. We’ll explore proven methods to restore your floors and get them looking fresh again — without draining your wallet or tearing everything out.
Is DIY Repair in This Case Really Worth the Effort?
Early on, I made the mistake of thinking I needed a professional to handle it. Turns out, with a little patience and the right products, I could do it myself. Making that mistake cost me more time and money than I’d like to admit. But as I learned, tackling minor damage like burn marks with DIY tricks is often effective and satisfying. For more on common flooring blunders and how to avoid them, check out this guide. We’ll walk through my process, step by step, ensuring you have all you need to fix that burn and breathe new life into your laminate floor.
Removing the Burn Mark
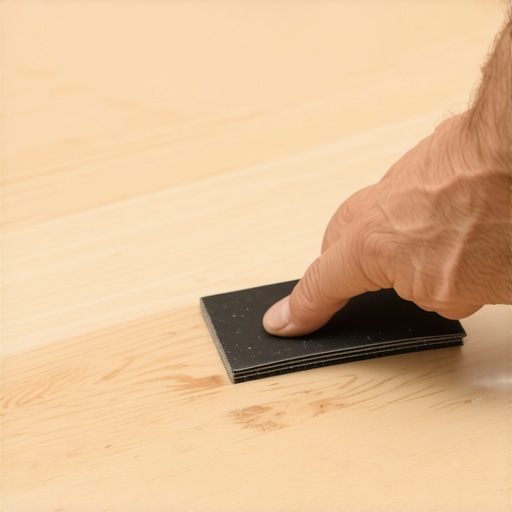
Start by gently sanding the damaged area with fine-grit sandpaper to level the surface. I used a piece of 220-grit sandpaper and carefully sanded in a circular motion. Be cautious not to sand beyond the burn, as this can create uneven patches. Once smooth, vacuum the dust thoroughly to prepare for the next step.
Applying Wood Filler or Touch-Up Kit
Choose a wood filler or laminate touch-up kit that matches your flooring color. I applied a small amount using a putty knife, pressing it into the burn impression. After smoothing the surface, I let it dry for the time specified on the product instructions. This step fills in the burn spot, making it less conspicuous.
Blending with the Surrounding Floor
Once dry, lightly sand the area again to blend the repair seamlessly. Use a sanding block to ensure an even finish. To match the sheen, I applied a laminate floor polish or sealer over the patched area, which helped it blend with the rest of the floor. For larger damages, replacing planks might be necessary, but minor burns can often be fixed with this process.
Resealing and Protecting the Fix
After repairing, protect the area from future damage by applying a clear sealing coat. I used a laminate sealant and applied it with a small brush, allowing it to cure overnight. This creates a protective barrier, minimizing the risk of further burns or scratches.
Tips for Success
Always test your touch-up products on a hidden spot first to ensure color match. When sanding, use light pressure to avoid removing too much material. If the burn is deep or extensive, consider replacing the affected planks entirely for a perfect finish. Remember, patience and precision are key when restoring your flooring without professional help. For more detailed insights on flooring repair techniques, visit this guide.
 While many DIY enthusiasts focus on the broad strokes of home improvement, understanding the subtle nuances can make all the difference between a professional finish and a costly mistake. For instance, a common misconception about baseboards is that simply nailing them straight across ensures a perfect look. In reality, wall irregularities require strategic scribing techniques to achieve seamless results, as discussed in our post on selecting the right baseboards. When it comes to showers, many believe sealing with standard caulk suffices. But in high-moisture areas, choosing the correct waterproofing membrane and applying it meticulously is crucial to prevent long-term water damage, which you can learn more about in this detailed guide. Flooring installation isn’t just about dropping planks into place; paying attention to expansion gaps, moisture barriers, and subfloor preparation is vital. Skipping these steps often leads to buckling and gaps, a topic elaborated in latest installation trends. Similarly, carpet installation might seem straightforward, but neglecting proper seam matching and tensioning can cause ripples and visible joins. Our in-depth insights on seamless carpet techniques reveal how small adjustments can dramatically improve the outcome.
### What Advanced Details Do Experts Focus On?
Professional installers understand that controlling humidity during floor and carpet installation prevents warping and buckling. For example, acclimating flooring materials to room conditions before installation reduces surprises later. Moreover, paying attention to room transitions, such as between carpet and hard flooring, ensures a cohesive aesthetic and structural integrity. This nuance often gets overlooked but can be the difference between a flawless transition and a tripping hazard. According to industry experts, neglecting these finer points leads to an increased rate of callbacks and customer dissatisfaction. Check out floating floor fixes for a comprehensive look at moisture control.
### Avoid Common Traps That Sabotage Your Project
One frequent trap is overlooking the importance of proper surface preparation. Skipping the cleaning and leveling of subfloors or wall surfaces can cause uneven installations that compromise durability and appearance. Another mistake is misjudging the type of adhesive or sealant required for specific materials, which can result in adhesion failure or water ingress. Precise measurements and understanding material compatibility are subtle skills that elevate your work from amateur to professional. For example, properly applying a bead of silicone in a shower nook prevents water from seeping behind tiles, a simple step that guards against long-term damage.
Remember, mastery lies in the details. For in-depth strategies on perfecting your installation skills, visit bathroom upgrade tips or luxury shower secrets. Don’t fall into the trap of assuming these nuances are minor—they’re fundamental to a flawless finish. Have you ever fallen into this trap? Let me know in the comments.
Maintaining your home’s flooring, baseboards, showers, and carpets requires more than just occasional cleaning; it demands the right tools and a proactive mindset. Personally, I rely on specific equipment that ensures precision, durability, and long-term performance. Investing in quality tools not only makes installations and repairs more manageable but also extends the lifespan of your investments.
My Go-To Tools for Long-Term Success
First and foremost, a high-quality oscillating multi-tool has become indispensable. Its versatility allows me to sand, cut, and scrape in tight spaces—perfect for trimming baseboards or removing stubborn mortar around tile edges. I personally prefer models with variable speed control, such as the Fein MultiMaster, because they adapt to delicate tasks like scribing baseboards on uneven surfaces, which is crucial for a seamless finish. This guide dives deeper into finishing details that elevate your installation.
Next, a digital moisture meter helps me monitor the moisture content of subfloors and wall areas before installing flooring or tile. Proper moisture control is essential to prevent buckling and long-term damage, especially when working with materials like laminate or engineered wood. According to industry standards, maintaining optimal moisture levels significantly reduces callbacks related to flooring issues.
For cleaning and maintenance, a microfiber vacuum with HEPA filtration ensures that dust and debris are captured without scratching surfaces. Regular debris removal is vital for showing off your work and preventing scratches or abrasions that can lead to quicker wear.
Anticipating Future Trends in Tools and Maintenance
The future points toward smart tools equipped with digital sensors, IoT connectivity for maintenance alerts, and automated calibration. These innovations promise to make upkeep more efficient and precise, minimizing mistakes that can lead to costly repairs. For example, a smart sealer that monitors its own drying time and indicates the best moment to apply the next coat can vastly improve sealing results, especially for showers and high-moisture areas.
How can I maintain my flooring and installations over time?
Consistent inspection and cleaning are key. For flooring, plan routine moisture checks and avoid excessive water exposure. Use appropriate cleaning products that won’t harm your finish—avoid generic cleaners that can degrade sealants or gloss. For showers and tiles, ensure grout lines are sealed annually and replace caulk as needed to prevent water intrusion. Similarly, regular check-ups of baseboards for gaps or cracking help you plan timely repairs, preventing more extensive problems down the line.
Additionally, keep tools sharp and calibrated for precise work. Dull blades or misaligned tools increase the risk of imperfect cuts or uneven surfaces. A quick inspection before starting each project saves time and ensures quality results. Investing in dedicated maintenance tools, like a high-precision level or laser measure, simplifies tasks like aligning baseboards or ensuring even flooring transitions. These small, consistent efforts create a lasting finish.
Another often overlooked aspect is understanding material-specific nuances. For instance, applying a UV-rated sealant on showers minimizes discoloration over time, maintaining a fresh look even after years of use. Consulting technical documentation, such as the expert guides, can help you select the best products and techniques for longevity.
Try incorporating one advanced maintenance tip: schedule seasonal moisture checks with a digital sensor, and proactively reseal grout lines in high-use areas. This proactive approach minimizes long-term repairs and keeps your space looking pristine.

What I Wish I Knew Before My First Flooring Fix
- I underestimated the power of thorough surface prep. Skipping cleaning and leveling subfloors or walls often led to wobbly or uneven finishes. Now, I see that dedicating extra time here saves headaches later.
- Using the right tools makes all the difference. Investing in a quality oscillating multi-tool or a digital moisture meter has transformed my DIY approach, making tasks quicker and results more professional.
- Patience outperforms rush. Waiting for sealants and adhesives to cure properly ensures longevity and reduces callbacks. Rushing often means redoing work sooner than expected.
Tools and Resources That Changed My Perspective
- The Fein MultiMaster is my go-to for detailed sanding and trimming — its versatility is unmatched for baseboard finishing.
- A reliable digital moisture meter helps me prevent future problems caused by unseen moisture issues, especially crucial with laminate or engineered wood flooring.
- Language and guidance from seasoned professionals, found through detailed online tutorials, have equipped me with techniques that elevate my DIY game.
- For materials, I trust brands recommended by industry experts, ensuring color match and durability. Learning from trusted sources cuts down on costly mistakes.
Seize Your Next Project with Confidence
Every renovation presents a chance to learn and improve. With patience, the right tools, and a willingness to embrace the details, you can achieve results that rival professionals. Your home’s transformation begins with a single step—so why not start today? Remember, every challenge is an opportunity to grow and create something lasting.
What’s the one area in your home improvement journey where you’ve learned a hard lesson? Share below—I’d love to hear your stories and tips!
,