

It happened during a lazy Sunday afternoon—my foot suddenly sank into what once was a firm section of my vinyl flooring. At first, I thought maybe I just stepped into a soft patch, but as I pressed down, it became clear something was seriously amiss. That feeling of instability, like walking on a waterbed, was unsettling. I knew right then I had to figure out how to fix that spongy spot before it worsened.
Dealing with a spongy or bouncy vinyl floor can turn your home’s beautiful surface into a source of constant worry. But here’s the truth: this problem is more common than you might think, and it’s often fixable with the right approach. Today, I’ll share the insights I’ve gathered from personal experience—and plenty of trial and error—to help you restore your vinyl flooring back to its former glory.
Why a Spongy Vinyl Floor Demands Attention
Vinyl flooring is popular for its durability and ease of maintenance, but it’s not invincible. A spongy or bouncy area often indicates underlying issues—most commonly trapped moisture or subfloor problems—that need addressing. If ignored, these can lead to more severe damage, like tiles lifting or even mold growth. According to flooring experts, moisture beneath vinyl can compromise its adhesive and create a need for repair or complete replacement—so catching it early is key. If you’ve ever faced this problem, you know how frustrating it can be, especially when you want your home to be both comfortable and beautiful.
What I Messed Up Early On
When I first encountered my soft spot, I assumed it was just a minor imperfection that would resolve itself. I brushed it off with a quick patch, but the issue persisted and got worse. That mistake taught me a valuable lesson: ignoring a spongy section can turn a small problem into a costly repair. Instead, I should have investigated the cause thoroughly—checking for moisture, examining the subfloor, and consulting professional resources, like experts’ advice on moisture issues. Recognizing early warning signs can save you time, money, and a lot of frustration.
So, if you’re wondering whether you should ignore that soft spot or take action, know this: addressing it promptly can mean the difference between a simple fix and a full-blown replacement. Let’s go through the steps to diagnose and repair that soggy area safely and effectively, so you can get back to enjoying your home—without the worry of hidden damage lurking beneath your beautiful vinyl.
Assess the Damage and Gather Tools
Start by inspecting the affected area to determine if moisture or subfloor issues are causing the sponginess. You’ll need a putty knife, screwdriver, moisture meter, and possibly a pry bar. Wear gloves and safety glasses for protection. I once grabbed a screwdriver without gloves, and a rusty screw caused a small cut, so safety first.
Remove the Vinyl Flooring Carefully
Use a utility knife to cut around the soft spot, making a clean, square opening. Gently pry up the damaged vinyl with a pry bar, working from the edges inward. Think of it like removing a stubborn sticker—slow and steady prevents unnecessary damage. I learned this when I accidentally tore nearby tiles, so take your time.
Inspect and Treat the Subfloor
Check for moisture using a moisture meter; levels above 12% suggest a problem. If wet, locate the source—leaking pipes, poor drainage, or high humidity. Remove any damp debris and let the subfloor dry completely, which may take 48-72 hours. I neglected this step once, and the moisture caused mold growth under my new flooring, highlighting its importance.
Address Moisture Issues
Fix leaks, improve ventilation, or install a vapor barrier if necessary. For basement floors, consider a dehumidifier. This step is crucial—ignoring moisture only prolongs the problem. After curing the moisture source, proceed to repair or replace damaged subfloor sections.
Replace or Patch the Subfloor
If the subfloor is compromised, cut out the damaged section with a saw, ensuring a clean and level surface. Install a new piece of plywood or OSB, securing it with screws every 8 inches. Think of it like patching a hole in the drywall—precision ensures longevity. I once made a hasty repair, which caused unevenness, so take your time aligning the new patch.
Seal and Prepare the Area
Apply a high-quality vapor barrier over the repaired subfloor to prevent future moisture issues. Follow this with a thin layer of waterproof adhesive for added protection. Ensuring a dry, sealed environment is key—don’t skip this step, or you risk recurring problems.
Reinstall the Vinyl Flooring
Lay the vinyl sheet back, matching the pattern and seams carefully. Use a roller to adhere it firmly to the subfloor, eliminating air bubbles. When reapplying, ensure no trapped moisture or debris beneath. I once rushed this step, causing seams to lift days later, so patience here pays off.
Final Inspection and Prevention
Check for any signs of movement or bubbling over the next few days. Maintain good ventilation and regularly inspect for leaks to prevent recurrence. Think of it as regularly watering a plant—you need ongoing care to keep it healthy.
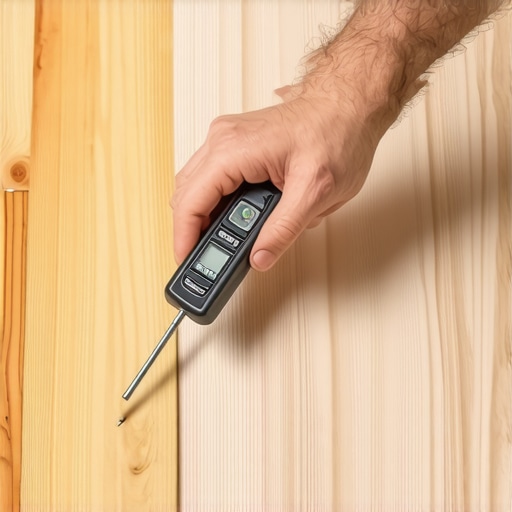 While many homeowners focus on choosing the right materials or colors, they often overlook critical installation details that fundamentally affect longevity and appearance. A common misconception is that following standard procedures guarantees perfect results; however, the reality is that nuances—like proper subfloor preparation or precise baseboard mitering—can make or break your project. For example, many assume that sealing a shower niche is enough to prevent water damage, but neglecting the slope of the shelves can lead to persistent leaks, as highlighted in expert bathroom guides. An often-overlooked trap is rushing to install flooring without acclimating materials to ambient humidity, which causes buckling later. Advanced tasks like leveling uneven subfloors or aligning baseboards with wavy walls demand an attention to detail that amateurs rarely consider. Did you know that improper expansion gap management in hardwood floors causes cupping and gaps? A 2024 study emphasizes that even minor miscalculations in expansion allowances lead to costly repairs—so it’s crucial to understand each step’s subtleties. When installing carpets, the secret isn’t just about stretching but also about choosing the correct padding; too soft or too firm can impair comfort and durability. For bathrooms, integrating the latest trends suggests that even small upgrades—like adding a waterproofed shower curb—need meticulous slope and sealing work to prevent long-term issues. These details underscore the importance of mastering the nuances, helping you avoid the typical pitfalls that often plague DIY or even professional projects. Want to master these hidden aspects? Visit modern shower renovation ideas to get inspired for your next upgrade. Remember, understanding the subtleties not only saves money but also ensures your home remains beautiful and functional for years to come. Have you ever fallen into this trap? Let me know in the comments.Maintaining your flooring and renovation details over time requires more than just great initial installation—it’s about having the right tools, following precise methods, and understanding future trends to make your efforts sustainable. One of my go-to tools is a high-quality moisture meter, essential in pinpointing hidden moisture behind vinyl or under tiles before it causes significant damage. I personally prefer the Protimeter Surveymaster because it provides quick, accurate readings and helps me decide whether to dry out the subfloor or proceed with repairs. For cutting and trimming baseboards or tiles, I rely on a top-tier miter saw with a sliding function—this ensures clean, precise cuts, especially for intricate corners or detailed designs. Investing in a decent level, like the Bosch Electronic Digital Level, gives me confidence that every piece aligns perfectly during installation or renovation, preventing issues down the line.
Beyond tools, software like photo documentation apps has become invaluable for tracking the condition of your installations over the years. Apps like Houzz or even specialized project management tools help set maintenance reminders, ensuring you’re proactive rather than reactive. Predicting future trends, I believe that smart home integration, where sensors monitor humidity, temperature, and moisture levels in real time, will become standard, maximizing the lifespan of floors, showers, and baseboards.
How Do I Maintain My Flooring, Baseboards, and Showers Over Time?
Regular cleaning with appropriate products, like pH-neutral cleaners for hardwood and tile, prevents buildup that can cause staining or damage. Checking for early signs of issues—such as loose baseboards or bubbling in vinyl—allows swift intervention. For showers, applying a grout sealant annually and inspecting for leaks can prevent extensive water damage—a step detailed in expert maintenance guides. Scaling these practices involves adopting moisture barriers during initial installation and upgrading to smart sensors for continuous monitoring.
Trying out advanced techniques like sealing grout with epoxy sealers can dramatically reduce long-term maintenance. Additionally, regular inspections and professional cleanings are crucial; a thorough check-up can reveal subtle issues before they escalate. For example, integrating moisture sensors with your smart home system can send alerts when humidity rises unexpectedly, helping you act quickly and prevent costly repairs. As DIY enthusiast, I recommend trying the multi-step cleaning regime involving deep scrubbing and sealing—this prolongs the fresh look and structural integrity of your installations.
Ensuring your home’s surfaces age gracefully hinges on these details—are you ready to elevate your maintenance game? Dive into detailed tutorials and consider investing in the right equipment to streamline your upkeep. Remember, the key is consistency; routine inspections combined with smart tools can save you thousands in repairs and replacements down the road. Explore more about smart maintenance solutions in our comprehensive guide on [upgrading your bathroom](https://tilecraftsmens.com/upgrade-your-bathroom-the-ultimate-shower-renovation-guide), and start implementing one new tip today: for example, set a schedule for grout sealing every 12 months to maintain a waterproof barrier. Your future self will thank you for the effort—quality tools combined with proactive upkeep are the best way to keep your home looking and functioning at its best.
Lessons From My Most Challenging Flooring Moments
One of the toughest lessons I learned was the importance of patience when dealing with moisture detection. Rushing into repairs without thoroughly checking for hidden water can lead to recurring problems that cost more in the long run. Additionally, I realized that small imperfections in subfloor prep can cause big issues later—skipping proper leveling and sealing steps often resulted in uneven surfaces and gaps. These experiences taught me that attention to detail and not taking shortcuts are crucial for durable, beautiful results in flooring and bathroom renovations.
Another insight was the value of investing in quality tools. A reliable moisture meter or a precise level can save hours of frustration by catching issues early. I’ve also discovered that understanding the subtle signs of subfloor damage—like faint dips or soft spots—enables proactive fixes, preventing costly replacements later. Embracing these lessons transformed my approach from reactive to preventive, ensuring longevity and a polished look that lasts.
Tools That Made a Difference in My Projects
My top recommendation is the Protimeter Surveymaster, a moisture meter I trust for its accuracy and ease of use. It helps me identify hidden water issues before they escalate. For precise cuts and ensuring perfect fitment, a high-quality miter saw like the Bosch Electronic Digital Level has been indispensable—accuracy here means fewer adjustments and cleaner results. When it comes to sealing, I rely on epoxy-based grout sealers, which provide an extra layer of protection against moisture and staining, especially in bathrooms. Lastly, a reliable roller for vinyl adherence ensures that no bubbles or wrinkles compromise the finish. Combining these tools has significantly improved my efficiency and outcomes.
Your Next Move Toward Perfect Floors and Bathrooms
Take these insights and tools as a sign to start your own transformation journey. Each small improvement—like carefully inspecting subfloor moisture or investing in the right equipment—pays off in the long term, giving you a home that’s both stunning and resilient. Don’t wait for issues to become major; proactive maintenance combined with learned techniques keeps your floors and showers in top condition for years to come. Ready to implement these tips? Visit our latest shower design ideas or explore [how to choose the right baseboards](https://tilecraftsmens.com/how-to-choose-the-right-baseboards-for-a-homes-style) to elevate your interiors. Remember, your home’s beauty is rooted in the details you tend to today—start now and enjoy the results tomorrow.