

I remember the moment clearly—standing in my living room, staring at that irritating gap where my baseboard met the rugged stone fireplace. It wasn’t just an eyesore; it was a constant reminder of my DIY overconfidence. In my early days of home improvement, I thought a quick paint job or some caulk would do the trick. Turns out, those quick fixes only made things worse, accentuating the gap rather than hiding it.
Then, one evening, as I was researching how to address this issue, I had a lightbulb moment. I realized that my earlier mistake was treating the problem as just a cosmetic fix when, in reality, it needed a thoughtful approach that accounted for the unique interplay between the smooth baseboards and the uneven, textured stone.
Today, I want to share my journey from frustration to a flawless finish and show you how to effectively seal those stubborn gaps. Whether you’re dealing with a new build or renovating an older home, solving this common challenge can dramatically improve your room’s overall look and feel.
Imagine walking into a room where every element feels intentionally crafted—no distracting gaps, no jagged lines. That’s what I aim to help you achieve.
Why Gaps Between Baseboards and a Stone Fireplace Matter More Than You Think
Having clean, seamless transitions between your baseboards and a stone fireplace isn’t just about aesthetics. These gaps can lead to dust buildup, pest intrusion, and even moisture problems over time. Plus, they can undermine the overall integrity of your trim work, no matter how beautiful the rest of the room looks.
In my experience, addressing these gaps early not only elevates your home’s appearance but also saves you money on future repairs. And let’s be honest—there’s something deeply satisfying about a neatly finished room.
If you’ve ever faced this issue, you’ll know how frustrating it can be. But don’t worry—I’ve found that with a little patience and the right techniques, you can achieve a professional-grade result. In fact, according to the National Association of Home Builders, proper sealing and finishing details in home decor contribute significantly to property value and homeowner satisfaction. That’s why fixing even small imperfections pays off in the long run.
Now, let’s get into how you can tackle this problem head-on. Believe me, it’s easier than it looks, and I’ll walk you through each step to ensure your baseboards sit perfectly against that stone wall.
Prepare Your Workspace and Materials
Start by clearing the area around your fireplace and baseboards. Gather your essentials: high-quality caulk designed for interior use, a flexible filler if needed, painter’s tape, a putty knife, a damp cloth, and a razor blade or utility knife. I once attempted to use a cheap caulk without prepping and ended up with a messy finish—so invest in good supplies for best results.
Cut and Apply Filler if Needed
If the gap exceeds 1/4 inch, insert a flexible filler, like foam backer rod, into the space before caulking. Press it snugly, ensuring it fills the gap without protruding. I remember squeezing a bead of foam into a large gap and watching it expand unevenly—lesson learned: cut the filler to size first for a cleaner result.
Mask the Area with Painter’s Tape
Apply painter’s tape along the edges of the baseboard and the stone to protect the surfaces and create a crisp caulk line. This simple step prevents excess caulk from smearing onto your stone or trim, saving you cleanup time. I once skipped this step and spent an hour scraping excess caulk from the textured stone—trust me, tape is your friend.
Apply the Caulk with Precision
Cut the caulk tube nozzle at a 45-degree angle. Squeeze a steady bead into the gap, moving along smoothly. Think of it like icing a cake—consistent pressure yields a neat line. For larger gaps, apply in sections to prevent sagging or uneven flow. I once tried to do it all in one go and ended up with uneven blobs; patience is key.
Tool and Smooth the Caulk Line
Use your finger dipped in a damp cloth or a caulk finishing tool to smooth the bead immediately after application. This creates a seamless transition between the baseboard and stone. In my experience, working quickly prevents the caulk from skinning over before you’re done smoothing. For tight corners, the side of a plastic spoon can help achieve sharp, clean lines.
Remove Masking and Clean Up
Carefully peel away the painter’s tape before the caulk cures. Use a razor blade or a damp cloth to clean any excess from the stone or baseboard edges. Proper cleanup ensures your stone’s texture remains intact. Once, I left the tape on too long, and it pulled off paint—the importance of timely removal cannot be overstated.
Final Inspection and Touch-Ups
After the caulk cures (usually 24 hours), inspect your work for gaps or uneven lines. Use a small brush or touch-up tool to fix minor imperfections. Remember, patience during this final step results in a professional-looking finish. I once hurried through this step and regretted it later when a corner looked uneven upon closer inspection.
When it comes to home improvements like installing baseboards, carpets, showers, or new flooring, many homeowners focus on surface-level issues—carefully selecting styles, matching colors, and choosing the right materials. However, beneath these common concerns lie nuanced pitfalls that can sabotage even your best efforts if overlooked. As an experienced DIY enthusiast and professional contractor, I can shed light on the subtle complexities that often trip up those attempting their own renovations.
One widespread misconception is that following standard guidelines guarantees success. For instance, many believe that a straightforward application of caulk or sealant suffices to fix gaps around an uneven surface, but in reality, ignoring surface prep or using the wrong materials leads to premature failures. Proper surface preparation, including cleaning, priming, and selecting the right compound, significantly affects longevity and appearance—details many underestimate.
A frequent mistake in flooring installation involves neglecting expansion gaps. Too often, homeowners or even inexperienced installers ignore the importance of leaving space to accommodate natural material expansion, especially with wooden floors or tiles. Failing to do so results in buckling or cracking over time. According to flooring experts, such as those highlighted in our comprehensive guide on [flooring installation mistakes](https://tilecraftsmens.com/flooring-installation-mistakes-to-avoid-for-a-seamless-look), accounting for climate-related expansion is crucial for durability.
Common myths about shower renovations include the idea that waterproofing can be skipped if tiles are sealed properly. In fact, expert advice and studies emphasize that a comprehensive waterproofing membrane beneath tiles prevents leaks and water damage, especially behind niches or curved surfaces. Skipping this step might seem like saving time and money initially but risks costly repairs later.
In my experience, one advanced mistake that’s often overlooked by homeowners is the improper handling of transitions between different flooring types—say, a luxury vinyl plank meeting ceramic tile. This area requires precise planning, use of transition strips, and careful measurement to prevent gaps, squeaks, or misalignment. The secret lies in understanding the working principles of each material and how they respond to environmental changes, which is often missed without proper professional guidance.
Ever wondered why your baseboards crack or pull away over time? The answer often lies in not coping or scribing them to match uneven walls or floors. This advanced technique ensures that trim aligns perfectly, providing a seamless finish. Similar attention is vital when installing carpet transitions or sealing around irregularly shaped shower enclosures.
Finally, respecting the nuance of material compatibility and environmental factors is essential. For example, using non-porous sealants in high-moisture areas without considering thermal expansion can cause deformation and leaks. Professional-grade materials and techniques, like those detailed in our [shower enclosures](https://tilecraftsmens.com/shower-enclosures-101-expert-tips-for-modern-bathroom-makeovers) guide, can make a significant difference.
By understanding these subtle yet critical nuances, you elevate your project from amateurish to professional quality. It’s not just about getting it done but about ensuring it lasts and performs as intended. Do you think you’ve fallen into these traps before? Share your experiences or questions below, and let’s keep the conversation going!
Invest in Quality Tools for Precision and Durability
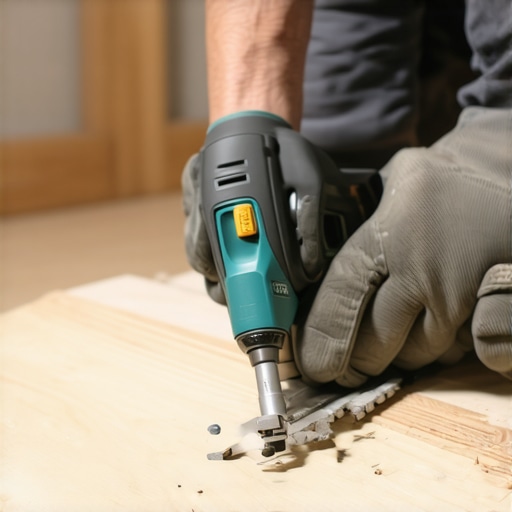
When it comes to maintaining your home projects like baseboards, flooring, or shower installations, having the right tools is essential. I personally rely on a high-quality oscillating multi-tool, such as the Fein MultiMaster, because it offers versatility for sanding, grinding, and detail removal in tight spaces. Its variable speed control prevents damage to delicate surfaces and ensures precise cuts, which is vital when fitting baseboards around uneven walls or tricky corners.
Additionally, a durable right-angle drill with adjustable clutch settings helps in installing fixtures or drilling into hard surfaces without slipping or overdriving screws. For sealing gaps and joints, a professional-grade caulking gun, like the Ryobi Dual-Action Caulk & Adhesive Gun, minimizes user fatigue and provides smooth, consistent bead application, essential for a seamless finish around showers or baseboards.
Adopt Software and Methodical Approaches
Beyond manual tools, leveraging measurement software and laser levels, such as the Bosch GLL 3-80, greatly improves long-term results. These devices ensure level and plumb lines over large surfaces, preventing issues like uneven flooring transitions or misaligned baseboards that could cause headaches down the line. In my experience, regularly double-checking measurements with digital tools helps catch errors early, saving time and materials.
Develop a Routine for Long-Term Upkeep
Consistent maintenance is key to ensuring your home improvements stand the test of time. This includes re-caulking around showers every 2-3 years to prevent water leaks, inspecting baseboards for cracks or separation, and cleaning floors with appropriate solutions to avoid moisture buildup that can damage materials. I recommend scheduling quarterly check-ins to spot potential issues early, especially in high-moisture or high-traffic areas.
Where Does Future Home Maintenance Trend Go?
Looking ahead, the integration of smart home technology will revolutionize maintenance. Devices like moisture sensors connected to your smartphone can alert you immediately about leaks or humidity spikes, allowing for prompt action before significant damage occurs. Additionally, innovations in self-healing paints and sealants promise to extend the lifespan of surfaces, reducing the frequency of repairs.
How Do I Keep Up with Home Care Over Time?
Establishing a systematic maintenance schedule and investing in versatile, durable tools are crucial. For instance, creating a checklist for quarterly inspections—checking caulking, sealing, and structural integrity—can save you costly repairs later. Remember, the key is consistency and proactive care rather than reactive fixes. For advanced sealing techniques, try the tips discussed on professional sites, like the long-term flooring guide.
Lessons That Could Have Saved Me Time and Frustration
One of the biggest surprises during my home renovation journey was realizing how overlooked detailed finishing touches can make or break a room’s look. For example, ensuring your baseboards fit snugly against irregular stone surfaces requires patience and skill—something I underestimated early on. I learned that taking the time to properly scribe and tailor the trim prevents gaps that scream amateur. Additionally, I discovered that choosing the right caulk and applying it with care creates a seamless transition—if you rush, it shows. Lastly, the importance of precise measurement and masking tape can’t be overstated; these small steps transformed my final result from messy to professional-looking. These lessons taught me that a little extra effort upfront pays off in stunning, durable finishes.
My Toolbox for Perfect Baseboard and Fireplace Sealing
Over the years, I’ve curated a set of trusted tools that consistently deliver professional results. The first is a high-quality, flexible putty knife, which helps in smoothing out caulk and filling gaps without damaging surfaces. I also swear by a precision caulking gun—like the Ryobi Dual-Action model—that provides a steady bead and reduces fatigue during long applications. For measuring and aligning, a laser level ensures your baseboards are straight across uneven walls or stone features, which is crucial for a polished look. To finish, a damp sponge or finger dipped in water makes the caulk line clean and smooth. These tools, combined with good-quality materials and patience, can elevate your finishing game like nothing else.
Your Turn to Elevate Your Space
Remember, mastering the art of sealing gaps around baseboards and fireplaces isn’t just about aesthetics—it’s about enhancing your home’s longevity and value. With the right techniques and tools, even tricky textured surfaces can be transformed into a seamless look that feels intentional and refined. Don’t be discouraged by initial mishaps; every project is a learning opportunity. I encourage you to give these tips a try and share your results or questions. Your home deserves those small finishing touches that make a big impact. What’s the most challenging gap you’ve tackled so far? Let’s discuss below and keep improving together!