

It was a typical Saturday morning when I stepped into my living room and noticed something unsettling—gaps forming in my beautifully installed click-lock vinyl floor. At first, I thought it was just a temporary issue, something easily fixed with a quick tap here or a shim there. But as I inspected further, I realized these gaps were widening, threatening the sleek, seamless look I had worked so hard to achieve. That moment of frustration turned into a lightbulb realization: I didn’t need to rip up my entire floor or call in a costly contractor. There had to be a smarter way to fix these gaps without all the hassle.
Say Goodbye to Floor Removal: Fix Click-Lock Vinyl Gaps Effectively
In this post, I’ll share practical, proven techniques that helped me restore my vinyl floor’s appearance without damaging the underlying layers. Whether you’re dealing with minor separation or persistent gaps, I’ll guide you through simple fixes you can perform yourself, saving you time and money while preserving your beautiful flooring.
Is Fixing Gaps in Vinyl Flooring Actually Worth the Effort? And Will It Last?
Initially, I was skeptical. I worried that attempting to fix the gaps could make matters worse or cause damage to the planks. Early on, I made the mistake of using overly aggressive tools, thinking more force would seal the gaps faster. Spoiler alert: that only worsened the problem. My mistake was underestimating the importance of gentle, precise techniques. According to flooring experts, improper handling can lead to more gaps or even damage the click-lock mechanism, which is why understanding the right approach is crucial. Fortunately, with some patience and the right tools, I was able to restore my floor’s integrity without parsing up the entire surface.
Now, let’s get into exactly how you can achieve this yourself—without the need to bust up your beautiful floor. Keep reading, and I promise you’ll see a visible improvement in your vinyl’s appearance soon.
Identify the Root Cause of Gaps
Before jumping into repairs, examine whether the gaps are due to environmental factors like humidity changes or installation issues. During my last renovation, I noticed that the gaps expanded during the dry season. To confirm this, I checked the subfloor moisture levels with a moisture meter (see this guide for proper testing). Ensuring the subfloor is stable prevents future movement that can cause gaps.
Prepare Your Tools and Workspace
Gather essential tools: a putty knife, a rubber mallet, a clean cloth, and a heat gun or hairdryer. Clear the area, and ensure proper lighting. During my last fix, I laid down a cloth to protect the planks, which I later used to wipe away residual adhesive or dust that could impede a proper seal.
Use Gentle Heat to Expand the Planks
Apply heat uniformly to the area with a heat gun set on low or a warm hairdryer held a few inches away. Heat softens the vinyl slightly, allowing the material to expand. I held the heat source for about 30 seconds, watching the material gently loosen from the edges, similar to how plastic softens when heated. This step helps close small gaps without damaging the planks.
Work Carefully to Avoid Overheating
Overheating can cause warping. Keep the heat source moving and maintain a safe distance. During my previous attempt, I mistakenly held the heat in one spot for too long, which resulted in a slight discoloration. Recognizing this, I adjusted my technique to keep the heat moving for more even, safe expansion.
Apply Pressure to Sealing Edges
Once heated, use a rubber mallet or your hand to gently tap the edges and encourage the planks to settle snugly together. Think of it like pressing puzzle pieces together; light, consistent taps help lock the planks firmly without damaging the locking mechanism. I did this after heating, and the gaps visibly shrank within minutes.
Secure Gaps with Appropriate Adhesives or Fillers
If minor gaps persist, consider using vinyl floor filler or a flexible adhesive recommended for vinyl floors. Apply with a putty knife, pressing into the gaps, then wipe excess. For larger gaps, a vinyl patch might be necessary. During my fix, I used a vinyl seam sealer, which blended well and prevented further movement.
Monitor Effects and Future Movements
After repairs, control indoor humidity with a dehumidifier or humidifier as needed. Regularly check the floor for new gaps, especially during seasonal changes. This proactive approach prevents small issues from becoming major distractions, similar to managing baseboard expansion with proper spacing. Learn more about choosing the right baseboards at this resource.
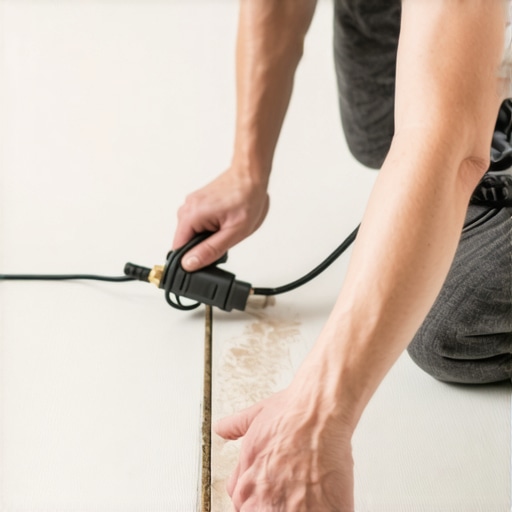 Even seasoned DIYers often fall for simplistic advice that overlooks crucial details, especially concerning baseboards, carpet installation, showers, and flooring. One prevalent myth is that “one-size-fits-all” solutions work across different materials and environments. For example, many believe that simply nailing baseboards tightly against the wall guarantees a perfect finish, but in reality, this overlooks the importance of allowances for seasonal expansion and contraction, which can prevent cracking or gaps. To get this right, check out this guide.
A common trap in carpet installation is assuming that stretching is unnecessary if the pad is new. Yet, without proper tension, carpets can develop wrinkles over time, especially in high-traffic areas. This minor oversight can lead to costly re-installation or replacement. Learning the precise techniques, like the power stretch, is key—and you can find detailed tips at this page.
When it comes to shower installations, many people underestimate the complexity involved in waterproofing. A typical mistake is neglecting the proper application of membranes or the slope of the pan. This can cause water leaks and subsequent mold or rot—problems that are expensive to fix later. Experts recommend meticulous sealing of niches and proper slope for drains; see this resource for advanced insights.
In flooring, a widespread misconception is that acclimating materials is optional. However, ignoring this step might cause the flooring to warp or gap as humidity levels fluctuate. For serious results, understanding how to manage these environmental factors is essential. Learn how to optimize your installation environment at this article.
One hidden nuance worth emphasizing is the importance of precise measurements and fitting, especially with complex corners or uneven walls. A small mistake here can cause visual distortions and gaps that are hard to rectify afterward. For advanced techniques on this, visit this guide.
Making assumptions or skipping planning stages can lead to costly mistakes and subpar finishes. By understanding these hidden nuances and avoiding common myths, you’ll ensure your projects are both durable and visually appealing. Remember, even the best materials require proper handling and attention to detail.
Have you ever fallen into this trap? Let me know in the comments.
Tools That Keep Your Projects Running Smoothly
Having the right tools is crucial for maintaining the longevity and appearance of your flooring, baseboards, and bathroom fixtures. I rely on a few specific items that have proven invaluable over years of DIY renovations. First, a high-quality drywall sander with a dust collection system helps me keep baseboards and walls clean while smoothing imperfections. For precise measurements, a laser distance meter ensures cuts and placements are spot-on, reducing waste and ensuring tight-fitting corners. An oscillating multi-tool is a game-changer for making intricate cuts around door jambs or adjusting flooring boards without creating a mess.
Maintaining Your Installations Over Time
Consistency in maintenance guarantees that your investment remains durable. Regularly inspect your baseboards for cracks or separation—address small issues immediately before they escalate. For floors, I suggest cleaning with pH-neutral cleaners tailored to your specific material; for vinyl floors, a MOP & GLO-type product works well. Keeping humidity levels in check with a dehumidifier prevents expansion and contraction that cause gaps or warping. Don’t forget to reapply sealants on shower niches and seams every couple of years—missing this step is a common cause of leaks and water damage, as discussed here.
Predicting Future Trends in Maintenance and Tools
The next few years will likely see the rise of smart maintenance systems integrated with home automation. Wireless sensors embedded in floors and walls could alert homeowners to moisture buildup, structural shifts, or air quality issues. I’m seeing advances in AI-powered cleaning devices capable of detecting and addressing specific issues like grout discoloration or loose tiles automatically. Staying ahead means investing in versatile tools and regular checkups—this proactive approach minimizes costly repairs down the line.
How do I keep my renovations in top shape over time?
One proven method is scheduling routine inspections and cleanings tailored to your materials. For example, I recommend inspecting baseboards for gaps after seasonal shifts—using a simple gauge and reattaching or sealing as needed. For floors, vacuuming or sweeping daily prevents debris from scratching surfaces or damaging finishes. Applying protective coatings periodically, especially in high-traffic zones, extends their lifespan. Also, educate yourself on specific maintenance best practices, such as using the correct sealants and adhesives, which can be found at this guide. Implementing these habits ensures your home stays beautiful and functional for years to come.

Elevate your maintenance game by investing in a digital moisture meter to monitor humidity and subfloor conditions, preventing problems before they escalate. Here’s a quick tip: regularly checking subfloor moisture levels with a reliable meter can save you thousands by avoiding moisture-related issues in your flooring projects. Explore reviews and expert picks at this resource.
Over the years, I’ve learned that the path to a flawless flooring isn’t paved with shortcuts or guesswork—it’s about understanding the subtle nuances that professionals swear by but often keep under wraps. When I first encountered those pesky gaps in my click-lock vinyl, I realized firsthand that the most effective solutions involve patience, precision, and a keen eye for detail. Sharing these insights now, I hope to empower you to tackle similar issues confidently and creatively, turning a potential headache into a triumph of DIY craftsmanship.
Lessons from the Trenches: Hidden Pitfalls in Baseboard and Flooring Work
- The Myth of Tightly Nailing Baseboards: Taping and nailing without allowances for seasonal shifts can lead to cracking or gaps. Always leave slight gaps to accommodate expansion, and use flexible caulks to seal without sacrificing movement.
- Overlooking Environmental Factors: Humidity swings are silent enemies of your flooring. Investing in a good moisture meter and maintaining consistent indoor climate is as crucial as the fix itself—it’s the unsung hero behind long-lasting results.
- The Heat Is Your Friend—But Use It Wisely: Gentle heat softens vinyl, enabling closer fitting, but overdoing it can cause warping. I found that moving the heat source consistently and testing a small area first saved me from costly mistakes.
- Precision Is Power: Small miscalculations in measurement or uneven pressure can amplify problems down the line. Embrace tools like laser measures and rubber mallets, ensuring every tap counts towards a perfect fit.
Tools and Resources That Make a Difference
- Infrared Thermometer: For gauging exact temperature requirements, helping you apply heat safely without risking damage.
- Vinyl Floor Seam Sealers: Reliable adhesives that blend seamlessly and prevent future separation—trustworthy and easy to apply.
- Moisture Meter: A game-changer for pre-installation testing and ongoing monitoring—prevents moisture-related gapping.
- Comprehensive Guides and Tutorials: Resources like detailed blogs or video walkthroughs, such as those at this site, can clarify tricky steps and validate your approach, boosting confidence along the way.
Your Next Step: Embrace the Learning Curve
Fixing vinyl misalignments or gaps isn’t just about aesthetic perfection—it’s a testament to patience and problem-solving. Every minor success builds your skills and enhances your satisfaction, turning DIY into a rewarding adventure. Remember, the biggest breakthroughs often come from the small adjustments you make with care and curiosity. Don’t hesitate to experiment cautiously, and if a fix doesn’t work the first time, view it as a valuable lesson that brings you closer to mastery.
What About You?
Have you ever struggled with vinyl floor gaps or tricky baseboard corners? Share your experiences or ask your burning questions below—your journey to a seamless finish starts with a single step, and I’d love to hear about yours!