

I remember the first time I tackled a home renovation project where two floors of different heights met. I thought, how hard can it be to join these uneven surfaces smoothly? Turns out, quite hard—especially when I overlooked the importance of a proper transition strip. That oversight led to a tripping hazard and an unsightly gap that was a pain to fix later. Have you ever faced that frustrating moment when your new flooring doesn’t quite line up with the rest of your home, leaving you wondering if there’s a straightforward solution? Well, you’re not alone, and I’m here to tell you there’s an effective way to make those transitions look professional and feel safe.
Why Your Floors Deserve a Smooth Transition
When dealing with different floor heights—say, a carpeted living room meeting a tile kitchen or a hardwood hallway adjoining a concrete porch—the transition between these surfaces becomes more than just a detail. It’s about safety, aesthetics, and long-term durability. If not handled correctly, uneven edges can cause trips, damage over time, and an overall disjointed look that can diminish your home’s charm. From personal experience, I learned that the key lies in choosing and installing the right custom transition strip tailored specifically for your unique floor heights.
Is the Hype Around Custom Transition Strips Justified?
Initially, I dismissed these transition solutions as unnecessary extra steps—until I made a costly mistake. Early in my renovation, I tried to force two floors of different heights together with a basic strip that didn’t account for the height discrepancy. The result? An awkward, wobbly line that collected dirt and made my space look unprofessional. That experience taught me that investing time and effort into a well-designed transition strip is absolutely worth it. According to flooring experts, proper transitions not only improve safety but can also protect your floors from cracking or buckling over time. If you’re tired of tripping over mismatched floors or end up with an unsightly gap, then it’s time to consider a custom transition strip solution that works for your specific situation.
Measure and Determine Floor Heights Accurately
Start by precisely measuring the height difference between the two flooring surfaces using a laser level or a reliable spirit level placed across the joint. I once rushed this step and ended up with an uneven transition, which I had to correct later. Ensuring accurate measurements upfront is crucial for a professional finish.
Select the Right Transition Solution
Choose a transition strip that matches the height discrepancy. For small gaps, a soft rubber or vinyl reducer may suffice, while larger height differences benefit from custom-made aluminum or wood thresholds. I once needed a custom wood reducer for my hallway that measured about 1.5 inches difference; I ordered it from a local carpenter, which ensured a perfect fit.
Prepare the Subfloor and Surface
Before installation, clean both surfaces thoroughly, removing debris and dust. If necessary, sand or smoothen uneven edges to create a flat surface. I had to sand down the rough edges of a concrete slab to get the transition strip to sit flush, which made a visible improvement.
Cut and Fit the Transition Strip
Measure and cut the strip precisely, allowing for expansion and contraction. Use a fine-tooth saw and take your time to get a clean cut. During my project, I used a miter saw for accuracy, ensuring the joint was seamless. Dry-fit the strip to check the fit before securing it permanently.
Secure the Transition Strip Properly
Attach the strip using appropriate adhesives or screws, depending on the material. For example, I used flooring adhesive for vinyl transitions and wood screws for wooden thresholds, pre-drilling holes to prevent splitting. Always follow the manufacturer’s instructions for best results.
Seal and Finish for a Professional Look
Apply sealant or caulk along the edges to prevent dirt accumulation and water infiltration. I recommend a flexible, paintable silicone for moving joints to accommodate slight shifts over time. After completing my transition, I sealed the edges, which prevented dirt from collecting and kept the finish looking sharp.
Final Inspection and Adjustments
Check the installed transition for stability and safety. Walk over it to ensure no wobbling or gaps. I once noticed a slight wobble, which I fixed by tightening the screws. Confirm that the transition is flush and smooth for a seamless appearance and safe passage.
Many DIY enthusiasts and even seasoned professionals often get the basic principles right but overlook the subtle complexities that can make or break the durability and appearance of a project. Contrary to popular belief, installing a shower or flooring isn’t merely about laying materials; it’s about understanding the intricacies that can lead to costly mistakes if ignored. Let’s explore some common myths and advanced pitfalls that can trip up even experienced installers, and I’ll share expert insights to help you avoid these traps.
Why Do Most People Overlook the Significance of Proper Subfloor Preparation?
One of the biggest oversights is neglecting the importance of a stable, level subfloor. Many assume that the final layer—whether tile, hardwood, or carpet—can hide uneven surfaces, but this is a recipe for problems like squeaks, cracks, and premature wear. For example, a spongy or uneven subfloor can cause tiles to crack or vinyl planks to warp over time. To avoid this, always test for moisture issues and use appropriate leveling compounds. Understanding subfloor moisture issues is crucial, especially in wet areas.
Common Myth: More Adhesive Means Better Bond?
Many think that applying more adhesive guarantees a stronger bond, but excess glue can cause uneven curing, bubbling, or even damage the materials. The expert tip is to follow manufacturer instructions precisely and use the right type of adhesive for your specific flooring or shower materials. For instance, in shower pan installation, a thin, even layer is preferred to prevent trapping air or moisture, which can lead to leaks. Expert sources like shower enclosure tips emphasize proper adhesive application for longevity.
When Installing Baseboards, Overlooking Expansion Gaps Can Backfire
It’s common to snap baseboards tightly to walls, but that neglects the natural expansion and contraction of materials. Without proper gaps, seasonal changes can cause warping or cracking. An advanced mistake is sealing the gaps instead of leaving space for movement, leading to damage over time. A better approach involves leaving a small expansion gap and sealing it with flexible caulk, which accommodates movement without sacrificing aesthetics. Check out latest baseboard trends for how to implement this smart strategy.
What Smarter Techniques Can Elevate Carpet Installations Beyond the Basics?
Many installers rely solely on tack strips and staple guns, assuming that’s enough for a flawless finish. In reality, advanced techniques like proper stretching, smoothing, and tuck-ins around doorways are essential for long-term durability. Over-tensioning can cause ripples, while under-tension leaves loose areas. Learning the carpet installation secrets ensures a professional look that lasts.
Also, understanding how humidity and temperature affect flooring materials can prevent problems like gapping or buckling. For example, vinyl planks are sensitive to direct sunlight, causing warping if not installed with a proper expansion gap—an aspect often overlooked by beginners. Always consult an expert or comprehensive guide like modern flooring trends for 2025.
Don’t Fall for the Trap of Color and Texture Mismatch
A seemingly minor yet overlooked nuance is ensuring color and texture consistency when transitioning between materials. Subtle differences can become glaring after installation, especially with natural stone or wood. Proper planning, including sample testing and precise measurements, can save you from expensive redo’s. For sophisticated projects, consider custom transition trims or reducers, which can seamlessly blend different heights and textures, preserving your home’s aesthetic integrity. Need help designing a flawless transition? Contact experts experienced in seamless installations.
Understanding these advanced nuances ensures your project not only looks good but withstands the test of time. Did you ever fall into these common traps? Share your experiences in the comments, and let’s continue the conversation to master the art of flawless flooring and shower installations.
Investing in the right tools is crucial for ensuring your home renovation projects, from flooring installation to shower renovations, stand the test of time. Personally, I prioritize equipment that offers precision, durability, and ease of use. A high-quality Bosch oscillating multi-tool has become my go-to for detailed cuts and sanding, especially when working around irregular shapes or tight corners. Its versatility allows me to seamlessly modify trim or create precise joints, saving me hours of manual work. Additionally, I rely on a laser level from Leica for accurate alignment, which is essential when installing baseboards or leveling uneven floors. Reliable leveling ensures that your flooring, whether tiles or vinyl, remains flush over the years, reducing maintenance headaches down the line.
When it comes to sealing and finishing, I recommend a professional-grade caulk gun like the Newborn 930G. Its smooth trigger action and adjustable pressure prevent messy application, which is vital for clean grout lines or sealing shower niches. Good tools not only improve the quality of your work but also reduce fatigue, especially during extensive tasks like tiling or baseboard installation.
Furthermore, I’ve incorporated digital moisture meters to assess subfloor conditions before installing flooring. Spotting hidden moisture issues early can prevent future problems like buckling or mold growth. According to experts at TileCraftsMen, proper moisture assessment is often overlooked but is key to long-lasting results.
Looking ahead, I foresee smart tools becoming more integrated into DIY projects. Bluetooth-enabled laser levels or app-controlled finishing tools will allow for even greater precision and automation, reducing human error further. Embracing these advances now can give you an edge in achieving professional results at home.
How do I maintain my tools to keep them working reliably over time?
Regular maintenance is essential for longevity. Clean your oscillating multi-tool blades after each use to prevent degradation and store tools in a dry environment to avoid corrosion. Lubricate moving parts periodically and calibrate digital devices, like moisture meters, as recommended by manufacturers. Keeping your tools in top condition not only prolongs their lifespan but also ensures consistent, high-quality performance on each project. Integrate these maintenance routines into your workflow, and you’ll find that your tools continue to support your home improvement efforts effectively for many years.
Don’t forget to explore reliable sources like contacting seasoned professionals when you hit snags or need expert advice. Remember, using the right tools and maintaining them properly can drastically reduce mistakes and save you time and money. Why not try out a laser level or upgrade your caulking gun today? Small investments in quality tools can pay off in flawless finishes and long-term durability—your home will thank you for it!
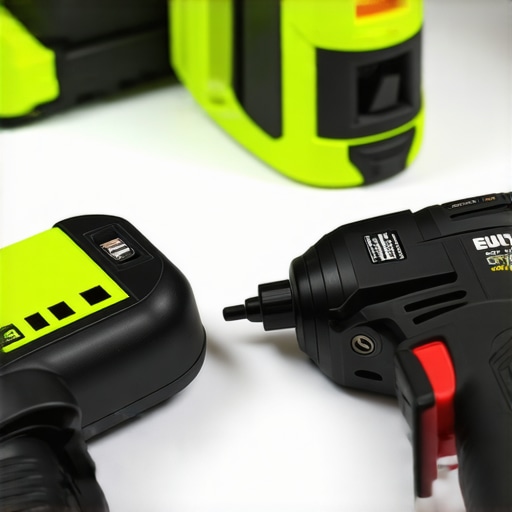
What I Wish I Knew About Seamless Floor and Shower Transitions
One of the most overlooked yet critical aspects of home renovation is achieving perfect transitions between different materials and surfaces. My biggest lightbulb moment came when I realized that no amount of skill with a saw or adhesive can compensate for neglecting the nuanced steps that ensure longevity and aesthetic appeal. For instance, meticulously measuring height differences and choosing the right transition profiles can save you from future headaches like gaps, wobbling, or even safety hazards. This insight transformed my approach from guesswork to precision, and I wish I had grasped this earlier.
Essential Tools That Changed My Renovation Game
Investing in quality tools made all the difference in my projects. A laser level from Leica helped me establish flawless lines, especially when aligning baseboards or tiles across uneven walls. My oscillating multi-tool from Bosch proved invaluable for detailed cuts and smoothing edges around irregular surfaces. For sealing, a reliable caulk gun like the Newborn 930G ensured neat, professional finishes. These tools, trusted by professionals, became my allies, making complex tasks manageable and results enduring. If you’re serious about home upgrades, these investments are worth every penny.
Empowering Your Next Project: Take Action Today
Now that you understand the significance of precise measurements, proper tool use, and thoughtful planning, it’s your turn to elevate your home renovation game. Whether you’re tackling transitions between floors or designing a modern shower, applying these lessons will set you apart from DIY amateurs. Remember, each well-executed detail contributes to a safer, more beautiful space that lasts. So, what’s the first transition you’re going to perfect on your home improvement journey? Share your plans below—I’d love to hear how you’re making your vision come true and help you avoid common pitfalls!