

I remember the exact moment I realized my subfloor was more sponge than solid—standing in the middle of my living room, feeling an unsteady bounce every time I stepped, and thinking, What did I get myself into? It was a lightbulb moment that made me question everything I thought I knew about flooring installation. I had hoped to lay down luxurious vinyl, expecting a smooth, flawless surface, but my spongy, uneven subfloor threatened to ruin the entire project.
Why a Spongy Subfloor Can Turn Your Dream Floor into a Nightmare
If you’ve ever tried to install luxury vinyl or any other flooring over a soft or uneven surface, you know it can become a logistical nightmare. A subfloor that feels bouncy or unstable can cause air bubbles, unsightly seams, or even damage your new flooring over time. The truth is, a properly prepped subfloor is the foundation of a durable, beautiful floor.
Early in my renovation journey, I made the mistake of ignoring the extent of my subfloor’s softness—thinking a simple patch or layer of plywood could fix everything. Spoiler alert: that was a mistake. As I learned, trying to cover up a bouncy surface can lead to bigger problems down the road, including flooring failure and costly repairs. According to flooring experts, uneven subfloors are among the top reasons for installation issues, and addressing them beforehand can save you tons of frustration and money. (See more about common flooring mistakes here.)
Is Leveling a Spongy Subfloor Really Worth the Effort?
Experience taught me that investing time and effort to level my subfloor wasn’t just about aesthetic appeal—it was about making sure my new vinyl flooring would last and perform properly. If you’ve faced unexplained bubbles or seams, chances are your subfloor wasn’t up to the task. But don’t worry—getting it right is easier than you think, and I’ll walk you through each step.
So, have you encountered a spongy, unreliable subfloor that’s thrown off your project? If yes, stick around because I’m about to share the practical, proven methods I used to transform my uneven slab into a solid base. Let’s get our floors truly ready for the beautiful finish we deserve.
Ready to tackle this challenge? Let’s dive into the step-by-step process, starting with how to assess your current subfloor and identify the problem areas.
,
Assess Your Subfloor’s Condition
Before diving into repairs, identify the extent of the soft spots. Walk across the floor, pressing firmly on suspect areas. A telltale sign is a bouncing or squishy feel underfoot. For example, I found a particularly bouncy section in my living room where a section of plywood was water-damaged. Mark these areas with chalk or painter’s tape for easy reference.
Check for Moisture and Damage
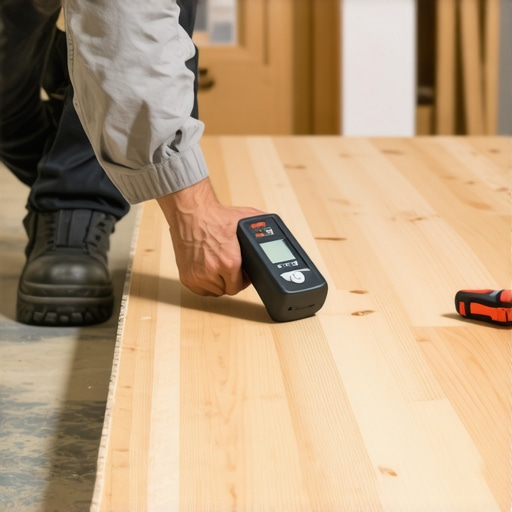
Use a moisture meter to determine if water is causing swelling or deterioration. High readings indicate the need for drying or replacing affected sections. In my case, I discovered moisture seeping through from a slow leak, which I stopped before proceeding.
Remove and Prepare the Subfloor
Take out any loose or damaged materials carefully with a hammer and pry bar. Clean the area from dust and debris. I used a shop vacuum to clear out loose particles, ensuring a clean surface for repairs. This step prevents debris from interfering with the fixing process.
Choose Your Leveling Method
Decide between self-leveling compounds, shimming, or replacing sections. For minor soft spots, tripling plywood layers or shimming with high-density foam can suffice. For extensive damage, replacing the entire section is more reliable. I opted for adding a layer of 1/4-inch plywood over the existing substrate, fastening it securely with screws.
Applying a Self-Leveling Compound
If the unevenness is minor, pour a high-quality self-leveling compound over the area after priming the surface. Use a gauge rake to spread it evenly. In my project, I poured the compound in the low spots and used a long trowel to smooth it out, ensuring a flat surface. This step effectively filled minor dips, providing a solid base.
Shimming and Reinforcing
For uneven but structurally sound areas, shims or foam insulation boards can level the surface. Place shims strategically under joists or the subfloor to eliminate bounce. I used heavy-duty foam shims in certain areas where the plywood was slightly sagging, secured with construction adhesive, and screwed down.
Securing the New Layers
Fasten the added plywood or shim layers with screws every 12 inches, ensuring they sit flush. Be careful to avoid over-tightening, which can cause splitting. I used a cordless drill with a depth-limiting bit to prevent going too deep, maintaining a smooth surface for your final flooring.
Test the Stability
Once the repair is complete, walk over the entire area to verify the firmness. If bouncing persists, repeat the process or add additional support. In my case, after shimming and adding plywood, I tested again and found the floor now felt solid, ready for your next flooring layer.
Addressing a spongy subfloor might seem daunting, but with patience and the right tools, you can create a dependable foundation. Proper preparation ensures your new flooring will last and perform as intended, avoiding costly repairs down the line.
Many homeowners believe that following standard procedures guarantees a flawless finish, but in my experience, there are subtle pitfalls that can sabotage even the most meticulous projects. For instance, the myth that carpet padding is a one-size-fits-all solution is widespread; in reality, choosing the wrong padding density or thickness can lead to premature wear or sagging. Similarly, many assume that baseboards are just decorative, neglecting their role in covering gaps and hiding uneven walls. Overlooking these details often results in visible seams or gaps that compromise the room’s aesthetics.
When it comes to flooring installation, a common mistake is ignoring moisture testing on concrete slabs before laying down materials like vinyl or hardwood. Moisture can cause expansion, warping, or adhesive failure, which are costly to repair once the floor is in place. Experts suggest performing a calcium chloride test to accurately assess moisture levels, as recommended by industry standards. Skipping this step often leads to issues that could have been prevented with proper prep.
Showers, especially, harbor hidden traps that many overlook. For example, neglecting to install a proper membrane or to slope the shower pan correctly can result in leaks and mold growth. An advanced tip is to incorporate a pre-slope and create a continuous waterproof barrier above the subfloor, which requires precise measurements and understanding of the entire shower Know-How. Failure to do so is one of the most common causes of long-term moisture problems—something experienced pros will tell you can take years to manifest, but once it does, repairs are expensive.
What are the subtle indicators of a poorly installed shower that even seasoned DIYers might miss?
A keen eye looks for uneven grout lines, inconsistent slope, or tiny gaps at the corners—not just the obvious leaks. Recognizing these signs early can save you from extensive damage. Studies in building science have shown that proper slope and waterproofing are essential for long-lasting showers, but many overlook these nuances in favor of quicker installs. To deep-dive into the detailed steps and avoid these pitfalls, check out my guide on shower renovation tips.
Understanding these hidden nuances—whether it’s in carpentry, flooring, or tile work—can dramatically improve your outcome. While the surface appearance may look satisfactory, the longevity and performance depend on the overlooked details. Remember, what seems minor often turns out to be major in the long run. If you’ve ever fallen into this trap, share your experience below—I’d love to hear your stories. For more expert insights on how to avoid common installation pitfalls, visit my carpet installation tips page or explore the latest trends in flooring for 2025.
Keeping It Working: Essential Tools for Long-Term Success
Maintaining your flooring, baseboards, and shower setups requires not just routine inspections but also having the right tools at hand. Personally, I rely on a high-quality moisture meter, such as the Protimeter Surveymaster, which allows me to detect hidden moisture issues in subfloors or concrete slabs before they escalate. This proactive approach prevents costly repairs and ensures your installations stand the test of time. For precision cutting and fitting, a compact oscillating multi-tool with specialized blades is invaluable—whether you’re trimming baseboards or adjusting tile edges. I favor the Fein Multimaster due to its durability and versatility, making intricate adjustments quicker and cleaner.
Additionally, investing in a digital level with a laser pointer helps maintain perfect alignment over large surfaces, saving both time and frustration. I use the Johnson Level & Tool 40-6482 Laser Level to ensure my work remains in plane, especially when dealing with uneven walls or floors. Combining these tools with meticulous methods guarantees your project’s long-term performance.
How do I maintain my flooring and shower systems over time?
Long-term maintenance is about consistency and attention to detail. Regularly inspecting grout lines and sealing them annually prevents water infiltration that can damage substructures. For floors, keeping the environment controlled—managing humidity and avoiding excessive moisture—is critical, especially for hardwood and laminate. For showers, wipe down tiles and waterproof membranes to prevent mold and mildew buildup. I recommend checking the waterproofing details periodically and reapplying sealant as needed. These small habits keep your installations looking pristine and functioning flawlessly for years to come.
Looking ahead, the industry is trending toward smart moisture sensors and automated maintenance alerts that could revolutionize home upkeep. Embracing these innovations now can give you a significant advantage in preserving your investments. For an advanced tip, incorporate a moisture alarm system in vulnerable areas; it immediately alerts you to issues before they cause damage. Try installing such a sensor along your shower wall or under flooring to stay ahead of potential problems. This proactive step exemplifies how modern tools can extend the lifespan of your home’s critical components.
To explore more about long-term care, check out my detailed guide on ensuring your flooring remains in top condition. Remember, investing in the right tools today saves you from expensive repairs tomorrow. Keep your floors and showers functioning flawlessly with consistent maintenance and the latest tech innovations.
The Hardest Lessons I Learned About flooring installation
Patience pays off—rushing through subfloor prep led to recurring issues that could have been avoided with meticulous assessment and leveling. I once skipped moisture testing, and it resulted in warping that haunted me months later. Now, I understand that thorough inspection and proper preparation form the backbone of a flawless finish.
3 Myths About subfloor leveling That Held Me Back
I believed that minor soft spots weren’t worth fixing, assuming they wouldn’t affect the final result. Turns out, even small imperfections can cause significant problems down the line. Dispelling this myth taught me that addressing every uneven area ensures longevity and beauty in your flooring.
What Experts Won’t Tell You About Subfloor Preparation
Industry pros often emphasize the importance of moisture testing and proper leveling, but what truly sets apart a durable installation is tailored problem-solving. For example, I learned that in cases of extensive water damage, simply adding plywood isn’t enough—sometimes, full replacement is necessary to prevent future issues.
My Essential Toolkit for Flooring Success
Having the right tools transforms a challenging repair into an achievable project. A moisture meter, like the Protimeter Surveymaster, helps detect hidden issues early. A high-quality self-leveling compound ensures a flat surface, while foam shims make quick adjustments. These trusted tools have been game-changers in my craftsmanship and can help you achieve professional results.
Your Turn to Build Strong Foundations
Embrace the importance of thorough subfloor evaluation and proper leveling to protect your investment. Remember, the effort you put into preparing your surface now will pay dividends in durability and aesthetics. Don’t shy away from tackling these hidden challenges—your future self will thank you. Are you ready to give your subfloor the attention it deserves? Share your experiences below and let’s grow together in mastery.