

It was one of those mornings where I thought I had everything under control—until I noticed a nasty cigarette burn staring back at me from my brand-new carpet. That tiny, blackened spot instantly turned my lounge into a reminder of my clumsy moments. I remember the sinking feeling all too well because, trust me, I’ve been there, trying to ignore the burn, hoping it would somehow fade away. But after a while, I realized that this isn’t a battle I could ignore—that burn was screaming for a fix. So, I roll up my sleeves and dove into learning how to repair it myself, saving a few bucks and gaining confidence along the way. Now, I want to share what I discovered because, let’s face it, nobody wants a scorched carpet ruining the cozy vibe of their home. If you’re tired of your carpet looking peppered with burns or just want a quick DIY fix, then stick around. Today, I’ll walk you through proven methods to mend that burn, making it almost like it never happened. Ready to turn that eyesore into a story of a DIY victory? Great, let’s get started!
Why a Cigarette Burn Doesn’t Have to Be Permanent
Many homeowners feel overwhelmed the moment they see a cigarette burn on their plush carpet. The good news? You don’t need to replace the whole section or fret over costly professional repairs. Small burns are often repairable with simple tools and materials, saving you both time and money. Plus, fixing it yourself can be surprisingly satisfying, turning an eyesore into a little badge of DIY prowess. I learned that early on when I made the rookie mistake of ignoring the burn, hoping it would somehow vanish. Spoiler alert: it didn’t. Instead, I ended up with a bigger problem—melted fibers and a visible scar that just screamed, ‘I didn’t know how to fix this.’ That’s when I decided to dig into DIY solutions, and I found that with patience and a few supplies, restoring the beauty of the carpet is absolutely doable. Want to see how I did it? Or maybe you’re doubtful if such small fixes really work? That’s natural, and I’ll address those doubts soon. But trust me, understanding the right approach can make all the difference in maintaining a pristine look for your home’s flooring.
Will I Really Be Able To Fix This Without Professional Help?
When I first faced my own burn, I thought only a pro could handle it. My biggest mistake was underestimating the power of simple repair kits and household tools. In fact, many DIYers stumble early on because they try to do too much, like matching every fiber perfectly—which is nearly impossible without experience. But I learned that the key is choosing the right method for the burn’s size and depth and not aiming for perfection but rather a seamless blend. If you’re worried about ruining your carpet further or making it worse, don’t be. I’ve been there, and with some guidance, you can restore your carpet’s look without professional intervention. Curious about the best techniques? I’ll walk you through each step, share the supplies you’ll need, and dispel some of the myths that make carpet repair feel intimidating.
Preparing Your Workspace and Supplies
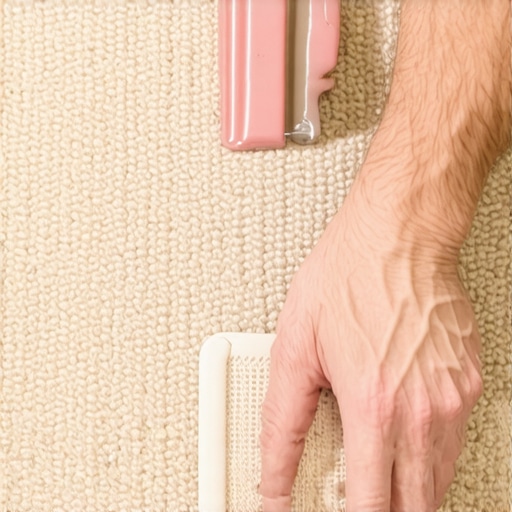
Start by clearing the area around the burn, removing furniture and rugs if possible, to give yourself space to work. Gather essential materials: a sharp utility knife, a small piece of matching carpet or scrap, carpet adhesive, scissors, and a seam roller. I remember the first time I did this; I laid out all tools on the floor like a surgeon prepping a patient, making sure nothing was overlooked. Having everything within reach minimizes frustration and speeds up the process.
Assessing the Damage and Planning the Repair
Examine the burn’s size, depth, and fiber condition. For minor surface burns, a simple patch might suffice. Deeper burns may require replacing a small section. I once faced a sizable burn that deep into the pile, and I decided to cut out a square larger than the damaged area, then patch it with a matching piece of carpet from a less-visible spot. This approach prevents the need for extensive re-carpeting and helps maintain visual consistency.
Cutting and Removing the Damaged Area
Use the utility knife to carefully cut out the burned fibers, staying just outside the damage zone. For better precision, I like to mark the area with masking tape before cutting. Think of it like trimming a figure in fabric to ensure clean edges. Remember, it’s better to remove a bit more than less, because you can always trim down, but fixing a ragged edge is more complicated.
Preparing and Fitting the Replacement Patch
Cut a patch of matching carpet slightly larger than the area you’ve removed. Use the original piece or a remnant from a less noticeable location. Position the patch underneath the existing fibers, aligning the pile direction for consistency. In my experience, slipping the patch in and using a seam roller like a pro ensures a tight, seamless blend. This step is crucial, like fitting puzzle pieces together, to make sure the patch vanishes into the surrounding carpet.
Applying Adhesive and Securing the Patch
Apply a thin layer of carpet adhesive to the backing of the patch and the prepared area. Place the patch carefully, pressing firmly with a seam roller to eliminate air pockets and ensure adherence. I remember the first time I did this; I was nervous about getting adhesive on the visible surface, but using a little painter’s tape along the edges kept it clean. Precise application is key to avoiding bumps or uneven surfaces later.
Blending Fibers and Final Touches
Once the adhesive sets, gently brush the fibers of the patch to match the surrounding pile. If needed, trim the fibers to level the surface. I found that using the seam roller again after fibers are brushed helps the patch to fully embed and blend smoothly. For more complex fixes, consider using a carpet repair kit that includes fiber filler and color dyes—these can help make the repair virtually invisible. Don’t forget, patience and attention to detail will turn a messy patch into a seamless repair, restoring your carpet’s beauty and your home’s comfort.
Additional Tips and Tricks for Best Results
Always test any adhesive or dye on a hidden area first to ensure color match and compatibility. For large or deep burns, consulting a professional might save time and ensure a perfect finish. Remember, practice makes perfect: the more repairs you do, the more confident you’ll become at achieving flawless results on your own. Want tips on choosing the right carpet to match your existing floor? Check out this guide for expert advice.
 When it comes to home upgrades like carpet installation, showers, or adding baseboards, many homeowners rely on common advice that might be misleading. One prevailing myth is that following standard procedures guarantees perfect results every time. But in reality, small overlooked nuances can make or break a project’s success. For instance, in carpet installation, many believe that stretching the carpet aggressively ensures a flawless look. While tension is important, over-stretching can cause the carpet to buckle later, especially in high-traffic areas—an issue I’ve tackled firsthand. Proper tension balancing, considering room humidity, and correct tack strip placement are subtle details often missed. Dive deeper into the secrets of flawless carpet installation by visiting this detailed guide.
Another misconception surrounds shower remodels. Many think that sealing everything with silicone guarantees a watertight enclosure. However, เทคนิคความร้อนที่ซ่อนอยู่คือ การใช้ waterproof membrane underneath tiles, which many DIYers skip, leading to leaks and mold over time. Mistaking silicone for waterproofing is a costly error. Additionally, in installing baseboards, a common trap is ignoring the expansion gaps, causing warping or cracks when indoor temperatures fluctuate. Utilizing proper scribing techniques and understanding the role of caulk in expansion joints can prevent such issues. For insights into stylish and durable baseboards, visit this resource.
Advanced homeowners and pros alike often make the mistake of assuming that following the basic steps is enough for a polished result. However, the real hidden nuance is understanding the context-specific adjustments needed—such as selecting the right underlayment for flooring or adapting installation methods to room conditions. For example, choosing the wrong carpet pile or density can lead to premature wear in high-traffic zones, which is why researching the best carpet types makes a difference.
Never underestimate the value of precise measurements and tailored techniques. In flooring, a small misalignment can ruin the entire visual harmony, especially with patterned tiles or carpets. Be aware of the impact of environmental factors like humidity and temperature shifts, which can subtly influence how materials settle and adhere. Remember, choosing the right materials and installation practices tailored to your specific space is crucial for long-lasting, professional results.
Here’s an interesting question for serious DIY enthusiasts: How do you adjust your installation approach for rooms with uneven subfloors? The answer lies in techniques like gradual shimming and precise leveling, which experts often implement to avoid cracks or gaps that compromise the look and durability of your flooring. For a comprehensive take, check out this article on advanced flooring methods.
In conclusion, understanding these nuanced details upfront can save you from costly mistakes and yield a truly professional finish. Whether it’s ensuring proper tension in carpets or applying the right waterproofing for showers, every step matters. Have you ever fallen into this trap? Let me know in the comments. For more expert tips on elevating your home’s interior, visit our contact page.
Keeping Things Running Smoothly with the Right ToolsHaving the right tools in your arsenal is essential for maintaining your home’s flooring, showers, and baseboards over time. For flooring, I rely heavily on a high-quality tapping block and pull bar. These allow me to make precise adjustments during installation or repair, especially when aligning vinyl planks or tiles. The tapping block helps prevent chipping, while the pull bar ensures tight seams without damaging the material. When working on showers, I recommend a grout float with beveled edges; it’s perfect for applying and smoothing grout without pulling up too much material, which helps maintain long-term durability. I personally prefer a siliconized sealant applicator tube for sealing around shower enclosures. It provides better control than a standard caulking gun, reducing mess and ensuring a professional finish. For baseboards, a miter saw with a fine-tooth blade is invaluable for executing clean cuts, especially at inside corners. Additionally, a scribing tool can help adapt baseboards to uneven walls or floors, ensuring a tight fit and minimizing gaps over time.The Hidden Lessons No One Tells You About Repairs
Throughout my journey repairing carpets, showers, and flooring, I realized that patience, attention to detail, and embracing imperfections are the real keys to success. One thing I didn’t expect was how often small tweaks in technique trump fancy tools or expensive materials—sometimes a simple sanding block or a steady hand makes all the difference. I also learned that accepting mistakes as part of the process rather than setbacks opens the door to genuine growth. Moreover, understanding the nuances of materials, like how humidity affects carpet stretching or how a slight angle in tiles can be invisible to the eye, dramatically improves outcomes. These personal revelations transformed my approach from rushed repairs to thoughtful craftsmanship, a lesson I hope you’ll take to heart on your own DIY path.