Ever leaned over your shower, only to notice a tiny crack sneaking across the tile right at your feet? At first, I brushed it off as a minor inconvenience, but then I remembered the horror stories—water seeping behind tiles, mold creeping in, and costly repairs looming. That lightbulb moment made me realize: I need a fix that keeps my shower in good shape without turning my bathroom into a demolition zone.
Why Ignoring a Cracked Shower Tile Can Lead to Bigger Problems
When I first spotted that crack, my initial reaction was to ignore it—after all, it seemed small, right? But cracks don’t stay small forever. Water can sneak in through tiny fractures, causing damage underneath the tiles, and most importantly, promoting mold and mildew. Over time, these issues can compromise your shower pan’s integrity, leading to more expensive repairs and even replacing the entire shower stall. And trust me, trying to crack the code on DIY repairs that actually work is daunting, especially without removing the pan. Early on, I made the mistake of using generic grout fillers that cracked and fell out within months. It was a waste of time and money. That’s why I started seeking better solutions—ones that are effective and, even better, non-invasive.
Is Repairing Without Removal Actually a Good Idea?
Many skeptics wonder if fixing a cracked tile without removing the shower pan is even feasible. It’s a fair question—at first glance, it seems like a band-aid solution. But here’s the truth: with the right approach, you can stabilize the crack and prevent water intrusion, extending the life of your shower without the mess of demolition. According to experts, specialized repair kits and epoxy resins can bond strongly to existing tiles, sealing cracks effectively. I’ve personally seen DIYers achieve professional-looking results by carefully following specific techniques. Curious about the entire process? Stay with me, because I’ll walk you through each step to make your shower as good as new—minus the hassle of ripping everything out.
If you’re someone who’s faced this dilemma, or just tired of worrying about each step at the bottom of your shower, you’re in the right place. Repairing a cracked shower tile isn’t just about aesthetics; it’s about protecting your home and peace of mind. So, let’s dive into how you can make that crack disappear and keep your bathroom looking fresh and functional for years to come.
,
Prepare Your Workspace and Gather Materials
Start by clearing the area around your shower crack, removing any loose debris with a putty knife. Wear gloves and goggles for safety. Gather epoxy resin, applicator tools, masking tape, a utility knife, and a damp cloth. Having all supplies at hand speeds up the process and ensures a clean repair.
Clean and Assess the Cracked Tile
Use a damp cloth or a gentle brush to remove soap scum and dirt from the crack. Ensure the area is completely dry before proceeding. Carefully examine the crack for depth and width. If the crack is deep, fill it with a small amount of epoxy to prevent water ingress.
Mix and Apply Epoxy Resin
Mix the epoxy resin according to the manufacturer’s instructions, typically in equal parts. As I did in a recent repair, I used a toothpick to stir the mixture thoroughly, achieving a clear, even consistency. Apply the epoxy into the crack using a spatula or applicator, pressing it in to fill the space completely. Overfill slightly to compensate for shrinkage.
Mask and Smooth the Surface
Immediately after applying epoxy, place masking tape along the edges of the tile to protect surrounding surfaces. Using a finger or a putty knife dampened with water, gently smooth the epoxy to match the tile’s surface. Wipe away excess epoxy with a damp cloth before it cures.
Allow Proper Curing Time
Let the epoxy cure for at least 24 hours, or as specified by the product. During this period, avoid exposing the area to water or moisture. I found that wrapping a plastic sheet loosely over the repair kept dust away and prevented accidental contact.
Inspect and Finalize the Repair
Once cured, remove the masking tape carefully. Check the repair for smoothness and adhesion. If necessary, sand very lightly with a fine-grit sponge for a seamless finish, being cautious not to damage the surrounding tile. Applying a matching grout or sealant over the epoxy can further improve aesthetics and waterproofing.
For ongoing prevention, consider sealing the entire shower surface with a high-quality grout sealer, which can help resist water penetration and mold growth. Regular maintenance, like using a squeegee after each shower, extends the lifespan of your repairs and keeps your bathroom looking pristine.
By following these concrete steps, I minimized mess and avoided costly demolition. This method, akin to carefully trimming a baseboard around a rounded wall, emphasizes precision and patience—key to professional-looking results. For more insights on enhancing your bathroom, see our guide on shower renovation ideas and elevate your space effortlessly.
 When it comes to flooring, showers, carpet installation, and baseboards, many homeowners and even seasoned DIY enthusiasts overlook subtle details that can make or break a project. One common misconception is that choosing the same flooring type throughout a space guarantees a seamless look, but in reality, **matching materials alone isn’t enough**. The nuanced differences in subfloor preparation, moisture barriers, and expansion gaps are often ignored—leading to costly repairs down the line. For example, failing to install proper underlayment or neglecting moisture testing can cause tiles to crack or carpet edges to fray prematurely. I’ve seen projects where homeowners skipped the crucial step of acclimating flooring to their environment, resulting in warping or buckling. Always remember: the devil is in the details, and disregarding them can nullify your entire effort.
Keeping your home upgrades in tip-top shape demands the right tools and a proactive maintenance routine. From flooring to shower installations and baseboard upkeep, investing in quality equipment can save you time, money, and frustration over the years.
Invest in a Precision Level and Laser Line
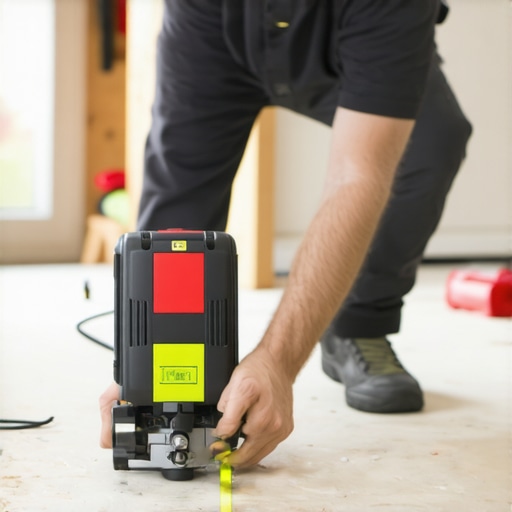
For any flooring or tile project, a high-quality laser level is my go-to. It ensures that your tiles are perfectly aligned, whether you’re laying new floors or adjusting existing ones. I personally prefer a self-leveling laser because it rapidly projects horizontal and vertical lines, minimizing human error and making intricate layout work much easier. Precise leveling is not just about aesthetics; it prevents uneven wear and cracks that can develop over time. Keep your laser calibrated annually for maximum accuracy—trust me, it’s a small investment with huge benefits. Looking ahead, the integration of smart laser levels that sync with mobile apps promises even greater precision and ease of use in the future.
Use a Cordless Multi-Tool for Routine Repairs
A versatile cordless multi-tool is indispensable for maintaining baseboards, removing old grout, or making minor adjustments. I use a model equipped with various attachments—oscillating blades for quick cuts and sanding pads for smoothing rough edges. Its portability allows me to tackle projects in tight corners without hassle. Regular use of a multi-tool streamlines the process of scribing, trimming, and touching up, extending the lifespan of your installations. For example, when updating baseboard styles, a multi-tool helps achieve clean miter cuts and seamless fits. In the near future, expect these tools to incorporate AI-driven features that adapt cutting speeds and angles based on material types, making DIY maintenance smarter than ever.
Maintain Your Flooring and Showers With Specialized Cleaners
Protecting your investments means using the right cleaners. For hardwood flooring, I rely on pH-neutral solutions that preserve the finish. For tile showers, a combination of vinegar and baking soda keeps grout lines clean without damaging sealants. Moreover, a quality grout sealer applied every two years prevents moisture intrusion, reducing the risk of mold and tile cracking. To keep shower drains functioning smoothly, I recommend a gentle enzymatic cleaner monthly to break down organic matter, preventing backups and odors. As the trend leans towards eco-friendly products, future innovations are heading towards biodegradable, all-natural cleaning solutions that maintain durability while caring for the environment.
Why Regular Inspection and Early Repairs Save Money
One aspect I cannot stress enough is frequent inspection. Ensuring baseboards are tightly secured, checking for loose tiles or grout deterioration, and monitoring moisture levels beneath flooring help catch issues early. Investing in a moisture meter lets me assess hidden water buildups or leaks under tiles—an essential step to avoid costly replacements. Addressing minor problems promptly, like resealing a worn grout line, prevents larger issues down the line. For intricate projects, advanced tools like digital moisture meters or infrared cameras are worth the investment. In the coming years, smart home sensors will likely make routine monitoring even more accessible, alerting you to problems in real time and reducing the risk of major damage.
How do I maintain my flooring, showers, and baseboards over time?
Consistent maintenance combines the right tools with a schedule of regular inspections. Incorporate techniques such as deep cleaning grout with a toothbrush method or applying sealants properly. Upgrading your equipment periodically, like replacing worn-out blades or calibrating laser levels, ensures continued precision. Don’t forget to keep an eye on humid environments—molds and warping often start small but escalate quickly if ignored. For inspiration on the latest installation trends and upkeep tactics, check out our flooring insights for 2025 and stay ahead of the curve.
Ready to elevate your home maintenance routine? Try calibrating your laser level or inspecting your grout with a moisture meter—small steps that deliver long-term savings and peace of mind.
Conclusion
Remember, the key to durable, beautiful installations is not just initial craftsmanship, but ongoing care. Using specialized tools like laser levels and multi-tools, combined with regular inspections and proper cleaning methods, ensures your flooring, showers, and baseboards remain pristine for years. Embrace these practices, and your home will thank you for the investment.