

Ever spend hours meticulously laying down beautiful tile, only to reach that pesky round shower drain and realize your pattern doesn’t quite fit? I remember the exact moment I faced this frustration. I’d just finished a perfect mosaic, only to stare at the round drain and see a jagged, awkward gap. It was a lightbulb moment—this isn’t just an aesthetic issue; it’s about craftsmanship and making it look seamless. If you’ve ever felt that sting of a poorly finished drain, you’re not alone. That’s precisely why I want to share what I’ve learned over years of tinkering and testing—so you won’t have to repeat my mistakes.
The Challenge of Round Drains in Tile Installation
When tackling a tiled shower, the goal is often a flawless, professional finish. But a round drain? That’s where most DIYers and even pros stumble. It can seem daunting—how do you cut and scribe around a perfect circle without ruining your pattern? And let’s be honest, the fear of making a costly mistake can stop even the most confident homeowner in their tracks. Early on, I made the mistake of thinking I could just force tiles around it—big no-no. I learned the hard way that precision is everything, especially when dealing with curved surfaces and round fixtures.
Why This Matters More Than You Think
Properly scribing around a round drain isn’t just about looks; it impacts the durability and integrity of your shower floor. Poor cuts can lead to cracked tiles, water leaks, or mold behind unsightly gaps. According to a study by the Tile Council of North America, well-installed, precisely-scribed tiles can last twice as long and resist water damage much better than those with shoddy cuts and gaps. That’s a game-changer—and why taking the time to master this technique is so worthwhile.
Now, I know many of you might be skeptical, wondering if this really makes a difference in the long run. Trust me, it does. I’ve faced clients’ complaints about cracked grout and water seeping through uneven tiles, and most of these issues trace back to poorly scribed around drains or fixtures.
So, are you ready to stop gingerly fitting tiles around that stubborn round drain? If yes, let’s jump into the tricks of the trade. We’ll cover everything from careful planning to cutting techniques—so your tile job turns out as flawless as you envisioned. And for those looking to elevate their entire shower project, I recommend checking out this guide on creating a spa-like shower experience.
Mark Your Cut Lines Precisely
Begin by measuring the diameter of your drain opening with a flexible tape measure—trust me, eyeballing it leads to uneven cuts. Transfer this measurement onto your tile, drawing a light circle with a pencil. I once made the mistake of estimating; the result was a jagged edge that required extra grout to hide. To avoid this, use a compass or a simple string attached to a pencil to trace the exact circle, ensuring a perfect fit every time.
Prepare Your Tools for the Job
Use a high-quality diamond-tipped hole saw or a carve-out bit designed for porcelain or ceramic tiles. A steady hand and a drill with variable speed make the difference between a smooth cut and cracked tile. I learned this the hard way when rushing through a DIY project—slow, controlled rotations produce cleaner, more precise holes. Having a damp sponge nearby helps keep the tile cool and reduces chipping, especially important when working around delicate surfaces.
Cut With Confidence and Care
Secure the tile firmly on a non-slip surface. Start drilling at a slow speed to establish a clean, centered hole, then gradually increase. Don’t force the drill—let the bit do the work. When I first tried this, I ended up with a fractured tile because I applied too much pressure. Remember, patience is key; slow, steady drilling yields best results.
Refine and Fit the Tile
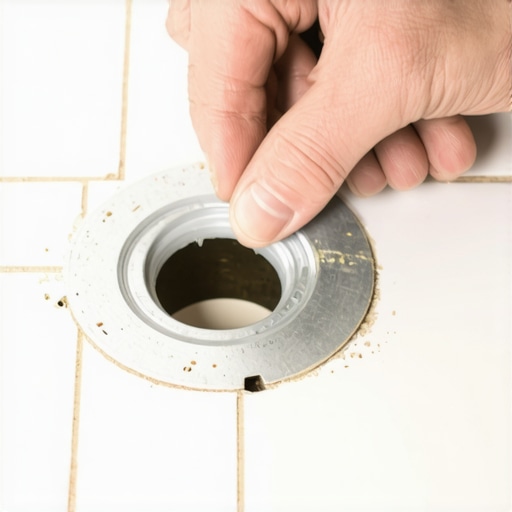
After cutting, use a diamond file or sandpaper to smooth out rough edges around the hole. Test fit the tile over the drain—if it’s tight, gently sand the edges until it fits snugly without forcing. My initial fit was too tight, causing stress cracks; a little sanding made a huge difference. This step ensures a seamless, professional appearance and an even grout line.
Seal the Edges for Durability
Apply a small bead of waterproof silicone or thin-set mortar around the edge of the hole before laying the tile. This prevents water infiltration and prolongs the life of your work. I always seal around the drain after fitting the tile—I’ve seen years-old installations with cracks and mold where this step was skipped. Proper sealing guarantees a watertight finish that lasts.
Handle Difficult Shapes with Flexibility
In some cases, the drain may not be a perfect circle or might have irregular edges. Use a tile saw or angle grinder with a diamond blade for larger or more complex cuts. I once faced a vintage drain with uneven edges; carefully marking and slowly trimming with a grinder gave me the perfect fit without damaging the tile. Remember, working in small increments prevents overcutting and wastage.
Test Fit Before Final Installation
Always position your tile over the drain before applying adhesive. This dry fit allows you to make final adjustments and ensure a seamless appearance. I once installed several tiles prematurely, only to find the fit was off—costing me time and extra grout. Taking this extra step saves hassle and guarantees a professional look.
Practice, Patience, and Precision Pay Off
Every project involving round cuts around a drain is a learning opportunity. When I was new to this, my first attempts looked amateurish, but through patience and careful adjustments, I refined my technique. Remember, precision in measuring, cutting, and sealing culminates in a flawless finish that elevates your entire shower. For a comprehensive guide on creating a luxurious shower experience, check out this resource.
 Many homeowners and DIY enthusiasts believe that choosing quality materials alone guarantees a perfect finish in flooring, carpet, showers, and baseboards. However, true mastery lies in understanding the nuances often overlooked—like proper subfloor preparation, precise measurement techniques, and suitable sealing methods. A prevalent myth is that nails or glue are enough to hold everything together; in reality, failing to address thermal expansion gaps or moisture control can lead to costly repairs down the line.
One trap I often see is ignoring the lateral movement of floors and trims, especially in areas with significant temperature fluctuations. Not accommodating for expansion can cause gapping in baseboards or buckling in floors, which many mistake for poor craftsmanship. Advanced installers understand the importance of using expansion joints and proper underlayment to mitigate these issues.
Curious about how to avoid these pitfalls? Consider the expert insight that improper moisture barriers can compromise your entire project. For example, a study by the National Association of Home Builders highlights that moisture problems are responsible for over 60% of flooring failures in humid climates, emphasizing the need for meticulous moisture management.
Have you ever fallen into this trap? Let me know in the comments.
What subtle errors can cause ongoing damage in seemingly perfect installations?
Addressing this requires a keen eye for detail, like ensuring your subfloor is entirely flat before laying flooring or tiles. An uneven subfloor not only causes visible imperfections but also stresses the materials, leading to cracks or squeaks over time. The secret is in the preparation; uneven surfaces are a common cause of premature failure and are often the first thing overlooked by even seasoned DIYers. Full details can be found in this comprehensive guide on durable flooring installation for a stylish home.
Maintaining your flooring, carpets, showers, and baseboards isn’t just about fixing issues as they arise; it’s about adopting the right tools and methods to ensure longevity and flawless appearance over time. Investing in quality equipment and honing your technique will pay dividends, saving you time and money in the long run.
Use a High-Precision Wet/Dry Vacuum to Keep Surfaces Clean
I always rely on a professional-grade wet/dry vacuum, like the −RIDGID wet dry vac−, for cleaning after installation or maintenance. Its powerful suction and versatile attachments allow me to remove dust, debris, and water quickly without scratching delicate surfaces. Regular clean-up prevents dirt buildup that can cause scratches or mold in grout lines, especially in showers. Keeping a clean surface also makes inspections easier and prevents minor issues from turning into costly repairs.
Implement Moisture Meters to Prevent Future Damage
Before sealing or installing new flooring, I measure moisture levels with a high-quality moisture meter, such as the Protimeter Surveymaster. This ensures the subfloor and environment are suitable, preventing future warping or mold. Moisture imbalance is a sneaky factor behind many repairs, including buckling hardwood or peeling vinyl planks. Investing in reliable tools like these is well worth the peace of mind.
Choose Coupling and Fitting Tools for Precise Cuts
When working with pipes or fixtures, especially in showers, I use a geometric pipe cutter and a ratcheting pipe bincer. These tools provide clean, accurate cuts, reducing the risk of leaks or structural issues. Proper fitting around drains or fixtures is critical for a seamless look and long-term durability. The investment in these specialized tools means I can handle complex cuts quickly, improving the quality of my work.
Consider Automated Cutting Software for Pattern Precision
For expansive projects, such as large tile installations or intricate carpet patterns, I turn to CAD-based software like Plan-it Visualizer. It helps me map out layouts, ensuring perfect pattern repeats and optimal use of materials. This is especially useful when scaling projects or replicating specific designs. Future trends clearly point toward integrating automation to reduce human error while increasing efficiency—something that pro-installers are already adopting.
How do I maintain flooring and trims over time?
Regular inspections and gentle cleaning extend the life of your surfaces. Use a microfiber mop or soft-bristle brush for floors, avoiding abrasive scrubbers. Applying protective coatings, like polyurethane on wood or sealants around the shower, prevents stains, scratches, and water damage. Additionally, addressing minor issues, such as small gaps or nail pops, early helps preserve the integrity of your installation and prevents more extensive repairs down the line. For basements or high-moisture areas, monitoring moisture levels with specialized meters is a game-changer, as discussed in the guide to durable flooring.
Looking ahead, the integration of smart sensors and AI-assisted maintenance schedules will make long-term upkeep even easier. Technologies like IoT moisture sensors and automated cleaning systems are already on the horizon, promising a future where your surfaces maintain themselves with minimal effort.
One tip I encourage you to try today is using a digital moisture meter before sealing or installing new materials. It’s a small investment that can save you from significant issues in the future. Save yourself the headache and ensure your work stands the test of time—precision tools and proactive maintenance are the way forward.

High-precision moisture meter used in flooring preparation for longevity
Throughout my years working with flooring, carpets, showers, and baseboards, I’ve learned that the tiniest detail can make or break the entire project. One of the most overlooked yet critical aspects is how to accurately cut around round drains and fixtures to achieve that perfect, professional look. And let me tell you—getting this right isn’t just about aesthetics; it’s about the longevity and durability of your work.
Hidden Lessons from My Toughest Installations
- Pacing is Power: Rushing through the cutting process often leads to cracks or uneven edges. Patience and controlled movements were game changers for me—slowly guiding the drill and taking my time around complex shapes created a flawless finish.
- Precision Over Guesswork: Drawing my circles with a compass or a string gave me peace of mind that the tile would fit perfectly. It might be tempting to eyeball the measurements, but accuracy saves time and materials in the long run.
- Sealing Makes All the Difference: Before setting the tile, sealing around the hole with waterproof silicone prevented water infiltration and mold buildup. This step is often skipped, but it’s vital for a durable, leak-proof shower floor.
- Tools Can Elevate Your Craft: Investing in a high-quality diamond hole saw or carve-out bit tailored for porcelain or ceramic tiles dramatically improved my cuts. Using the right tools turns a tricky task into a manageable one, even for the DIY enthusiast.
- Every Fit Tells a Story: Dry fitting the tiles over the drain before final installation helped me catch misalignments early. Making small adjustments with a diamond file ensured a seamless, professional appearance—no forced fits or gaps.
Tools and Resources That Make the Difference
- Diamond-Tip Hole Saws: For clean, accurate cuts, I trust tools like the diamond-tipped hole saws. They minimize chipping and allow precise control around delicate tiles.
- Moisture Meters: Monitoring moisture levels with instruments such as the Protimeter Surveymaster helps prevent future issues like warping or mold—an investment that pays for itself.
- Pattern Planning Software: For intricate layouts, CAD tools like Plan-it Visualizer allow me to visualize the final look, reducing errors and material waste.
- Sealants and Waterproofing Products: Proper sealing around drains with waterproof silicone ensures your masterpiece remains leak-proof over time.
Chasing Excellence in Every Step
Remember, the difference between a good and an exceptional tile job often lies in the details—like meticulously scribing around a round drain. Embrace patience, invest in the right tools, and plan meticulously. Every careful cut and sealed edge contributes to a shower that’s as beautiful as it is built to last. For inspiration on elevating your entire bathroom, explore this guide on creating a spa-like shower experience. Your dedication to mastering these nuances turns a simple project into a work of art, lasting for years to come.
Beyond the Basics: Embrace the Art of Precision
The most satisfying aspect of a well-executed round drain cut isn’t just the perfect fit—it’s the confidence it instills. It’s about knowing that every tile, every sealant, and every measurement was thought through. This level of craftsmanship elevates your work from being merely functional to truly exceptional. Take your time, apply what you’ve learned, and enjoy the process of creating seamless, durable installations that stand the test of time.
Your Turn to Elevate Your Craft
Have you ever faced challenges with fitting tiles around irregular fixtures? What techniques have worked best for you? Share your experiences below—I’d love to hear your tips and stories on achieving flawless finishes around round drains and fixtures.