I remember so many mornings stepping onto a newly installed carpet, only to feel a strange bounce under my feet—almost like walking on a trampoline. That unsettling sensation wasn’t just uncomfortable; it was a dead giveaway that the installer missed the mark. At first, I thought it was just the newness wearing off, but months later, the problems persisted: uneven floors, squeaks, and excessive wear. It was a lightbulb moment for me: not all carpet installations are created equal, and many downright cut corners.
Why Cutting Corners in Carpet Installation is Costing You More Than You Think
Let’s face it. When you’re investing in your home, the last thing you want is to deal with issues that stem from poor workmanship. Especially with carpet pads—those thick layers underneath your carpet that provide cushion and insulation—they can make or break the longevity and comfort of your flooring. Unfortunately, in 2026, it’s still common to find low-quality installs where cheap materials and rushed work lead to problems down the line.
So, why does this matter now? Because a poorly installed carpet pad can cause problems that aren’t immediately visible. It might seem like a minor detail, but over time, these flaws can lead to uneven floors, rapid wear, or even structural issues. A report from the home flooring experts shows that subpar installation can reduce your flooring’s lifespan by up to 50%. That’s a lot of money left in the drain for a quick fix later on.
Is Cheaper Always Cheaper?
I won’t sugarcoat it. I made the mistake early in my home renovation journey—choosing the cheapest installer because I was on a tight budget. That cost me a lot in the end. From uneven seams to a bouncy feel underfoot, I learned the hard way that cheap isn’t always worth it. Trust me, knowing how to identify a shoddy job early can save you headaches and cash in the long run. For a more comprehensive look into professional installation secrets, you can visit this guide.
Now, I want to share with you some telltale signs that you might be facing a cheap carpet pad installation—so you don’t have to go through what I did. Ready to spot those red flags? Let’s dive into the first warning sign that your installer might be cutting costs where it counts.
Preparing Your Space for Perfect Installation
Start by clearing the entire room—furniture, rugs, and any obstacles. This gives you a clean canvas to work on and avoids accidental damage. Next, inspect the subfloor for moisture, unevenness, or debris, which can compromise the installation quality. Use a level to check for dips or humps, and address these issues before proceeding, much like leveling a foundation before building. I learned this the hard way when I neglected this step and ended up with a bouncy carpet feeling—an easy fix in theory, but a mess in practice if ignored initially.
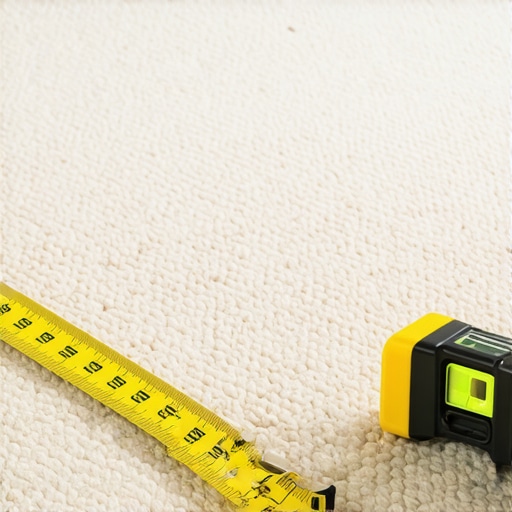
Measuring and Selecting Your Materials
Accurate measurements are crucial. Measure the room’s length and width at multiple points to account for irregularities—don’t rely on a single measurement. Add around 10% for waste and miscuts. When choosing your carpet and pad, prioritize quality over price. Visit this guide to understand options that suit your needs. I once bought a cheap pad, which resulted in quick wear and squeaks—an expense I could have avoided with proper research.
Installation of the Carpet Padding
Lay the carpet pad first, ensuring it fits tightly without overlapping. Secure it with staples or tape along the edges where necessary, but avoid stretching it tight, which can cause future buckling. Think of it like building a suspension bridge—anchors and tension matter. During my own project, I used a staple gun to attach the padding securely, which prevented any shifting during the carpet laying process. Properly installed padding provides the foundation for a comfortable, durable carpet.
Cutting and Fitting the Carpet
Unroll the carpet and position it with at least 2 feet of excess along each wall. Use a straight edge to cut the carpet to size, allowing for a few extra inches to adjust as needed. Stepping carefully, stretch the carpet towards the opposite wall, ensuring it isn’t sagging or puckering. Employ a knee kicker tool to securely attach the carpet to the tack strips along the perimeter. This method is like tuning a tightrope—precision in stretching avoids wrinkles or bubbles. I once tried to skip the stretching step, which resulted in visible bumps several weeks later—an avoidable mistake that stressed the importance of patience and technique.
Smoothing and Securing Edges
Pull the carpet tight and secure it with a beading or tack strips, pressing firmly to prevent future wrinkles. Use a power stretcher for larger rooms; it acts like a giant pair of hands, pulling the carpet snugly into place. I borrowed a power stretcher from a friend for my hallway, which made a significant difference in achieving a professional finish, saving me hours of manual effort and preventing loose edges. Proper edge securing ensures safety and longevity, reducing trip hazards and deformities over time.
Final Trim and Clean-up
Trim excess carpet with a sharp utility knife, leaving about half an inch to tuck into the baseboards. Use a carpet tucker tool to press the edges into the wall for a seamless look. If you’re installing new baseboards, do so after confirming the carpet fits well; this prevents gaps and creates a tidy transition. During my last project, I discovered that trimming too tightly caused the carpet to fray; allowing a small margin made the finish more durable. Finish by cleaning the area thoroughly to remove debris, ensuring your new carpet remains pristine. These meticulous steps are the final touch that separates a DIY attempt from professional quality.
Throughout the process, remember that each step influences the next. If you want to explore more about updating your baseboards or other finishes to complement your new flooring, visit this resource. Mastering these tasks with precision guarantees durability and beauty that will last for years, turning your home into a true sanctuary.

Most homeowners and even some professionals tend to view flooring, baseboards, showers, and carpet installations as straightforward tasks, but this oversimplification leads to common pitfalls that compromise long-term durability and aesthetics. A widespread myth is that following step-by-step instructions guarantees a flawless finish—yet, in reality, neglecting the nuanced details can cause issues that surface years down the line.
One often overlooked nuance is the importance of substrate preparation. Many assume that a clean and dry subfloor suffices; however, subtle imperfections like minor dips, residual moisture, or debris can significantly affect adhesion and flatness. In fact, a study by the home flooring experts highlights that inadequate surface prep accounts for nearly 30% of flooring failures, especially in high-traffic areas.
Why-does-subfloor-slope-matter-for-flooring-lastingness?
Advanced installers know that even a slight slope of a few millimeters can lead to uneven wear, creaking, or bubbling. The reason is that the floor’s load distribution becomes uneven, causing stress points that accelerate deterioration. Moreover, improper moisture barriers or inconsistent adhesion can trap moisture, fostering mold and rot over time. This is why meticulous level checks and moisture testing are critical before laying new materials. Skipping this step or rushing through it can escalate small flaws into costly repairs later, undermining the initial investment.
Similarly, the misconception that larger gaps or minimal spacing won’t cause trouble is false. For example, in baseboard installation, leaving gaps for expansion is essential, but excessive spacing can lead to aesthetic issues and warping. Using the correct scribing techniques and securing with the appropriate fasteners ensures tight, seamless finishes. If you want to get the subtle details right, exploring professional tips can help refine your approach.
Another mistake is underestimating the importance of proper expansion joints in large areas, especially in flooring and showers. Neglecting these can cause materials to crack or buckle as they expand and contract with temperature changes. For instance, in shower renovations, the use of flexible waterproofing membranes and well-placed expansion joints prevents cracking and water infiltration, prolonging the lifespan of your installation. Review this guide for comprehensive waterproofing strategies.
Attention to these details might seem tedious initially, but they form the backbone of lasting, professional-quality results. Overcoming the myth that shortcuts are harmless is essential to avoiding costly repairs and frustrations later. Remember, the devil is in the details—an advanced understanding of these nuances empowers you or your contractor to deliver flawless finishes every time.
So, have you ever fallen into this trap? Let me know your experiences in the comments, and stay vigilant about the hidden nuances that make or break your home upgrades!
< >
>
Keep It Running: Tools I Advocate For Longevity
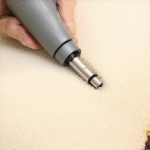
Maintaining your flooring projects over time is crucial to preserve their beauty and structural integrity. I personally rely on a few specialized tools that make this process more effective and less time-consuming. One essential is the power grout remover. Unlike manual scrapers, this tool helps you efficiently eliminate mold or stubborn grime from shower tiles, ensuring water doesn’t seep behind surfaces and cause rot. I use models like the Dremel Rotary Tool with grout removal discs because of their precision and adjustable speed, which minimizes damage to surrounding tiles.
Another indispensable gadget is a handheld moisture meter. When dealing with installations like showers or flooring, it’s vital to monitor moisture levels regularly. I prefer the Protimeter Aquant for its quick readings and reliable accuracy, helping me catch potential moisture issues early before they escalate into costly repairs. This is especially important given that improper moisture management is a leading cause of tile and waterproofing failures over years.
For regular cleaning and preventive maintenance, I recommend investing in a steam cleaner. The McCulloh Steam Machine has proven effective at deep cleaning grout lines without harsh chemicals, keeping your surfaces hygienic while extending their lifespan. Regular upkeep with the right tools will significantly decrease the need for repairs, saving you money and frustration.
What is the Future of Maintenance Tools for Flooring and Finishes?
Looking ahead, I predict smart, IoT-connected devices will revolutionize how we care for our homes. Imagine moisture sensors that automatically alert you via an app when levels are off, or robotic cleaners designed specifically for intricate tile patterns and baseboards. These innovations aim to transform passive maintenance into proactive care, ensuring your home remains pristine with minimal effort.
How do I Maintain My Floors and Finishes Over Time?
Routine inspections are your first line of defense. Regularly check for signs of wear, loose tiles, or edges beginning to lift, and address issues promptly. Use the moisture meter periodically, especially around water-prone areas like showers, to prevent unseen damage. Incorporate gentle, recommended cleaning methods—such as using pH-neutral cleaners and avoiding harsh chemicals—to preserve sealants and adhesives. By following a consistent maintenance schedule—at least biannually—you’ll extend the life of your investment significantly. For more in-depth insights into professional upkeep strategies, visit this guide.
Finally, never underestimate the power of preventive measures like installing waterproof membranes in showers or sealing grout lines every few years. These simple steps guard against water infiltration, mold, and other slow-acting damage. Embrace these tips, and your floorings and finishes will serve you well for decades to come — proving that the right tools coupled with consistent habits are key to lasting beauty and function.

The Hardest Lesson I Learned About carpet install,baseboards,showers,flooring installation
One of my most valuable insights came from a mistake I made early on: rushing through substrate preparation. I believed that a clean, dry surface was enough, but I overlooked subtle dips and residual moisture, which led to uneven flooring and squeaks. Now, I understand that meticulous surface prep is the foundation of durability and aesthetic perfection—skipping this step can cost you in repairs and frustration.
3 Myths About carpet install,baseboards,showers,flooring installation That Held Me Back
Myth one: Larger gaps in baseboards are harmless. The truth: improper scribing causes gaps that collect dust and look unprofessional. Myth two: A quick stretch is enough for a perfect carpet. The reality: patience with proper tension avoids ripples and bubbles. Myth three: Waterproof membranes are optional. In reality, they are essential in wet areas to prevent mold and decay. Debunking these myths saved me money and improved my results immensely.
What Experts Won’t Tell You About carpet install,baseboards,showers,flooring installation
Experts know that even small details make a big difference—like using a moisture meter to detect hidden issues or applying expansion joints in large areas to prevent cracking. These nuances aren’t always evident but can determine the lifespan of your installation. Learning to recognize and prioritize these expert techniques elevates your projects from average to exceptional, ensuring lasting beauty and performance.
Curated Resources to Elevate Your Skills
My Essential Toolkit for flooring and finishing includes a power stretcher—trustworthy for professional-grade carpet installation because it ensures perfect tension and longevity. I recommend this guide for mastering stretching techniques. For precise substrate checks, a Moisture Meter like the Protimeter Aquant has been indispensable; it helps me avoid moisture-related failures. Lastly, a multi-purpose utility knife is essential for clean trims and adjustments, turning a simple task into a precise craft.
Your Next Step Toward Flawless Floors
Don’t let overlooked details or myths hold back the long-term beauty of your flooring and finishing projects. Embrace expert tips, treat each step with care, and invest in quality tools. Your home deserves to look stunning today and stand strong for years to come. Whether you’re tackling a DIY upgrade or guiding your contractor, remember that paying attention to the little things can make all the difference. Ready to elevate your home? Share your experiences or questions below—I’d love to hear your story on creating durable and beautiful spaces.
,

One thought on “Is Your Carpet Pad Too Thick? 3 Ways to Spot Cheap Installs in 2026”
Emily Johnson
February 27, 2026 at 2:00 amThis post really hits home about the importance of detailed substrate prep and choosing quality materials for lasting carpet installation. I remember a time when I skipped the moisture testing before laying down a new carpet, and months later, I faced bubbling and uneven wear that was a nightmare to fix. It’s surprising how small details like ensuring a flat, dry subfloor can make such a difference long-term. I’ve also learned that fitting the carpet properly with the right tension and securing edges with professional tools can save a lot of headaches down the line. Has anyone here faced similar issues with moisture or improper fitting? What tools or techniques proved most helpful in avoiding such problems? I think investing the extra time and resources upfront really pays off in a durable, professional-looking finished product. It’s a good reminder that patience and attention to detail are key when tackling flooring projects ourselves or with contractors.