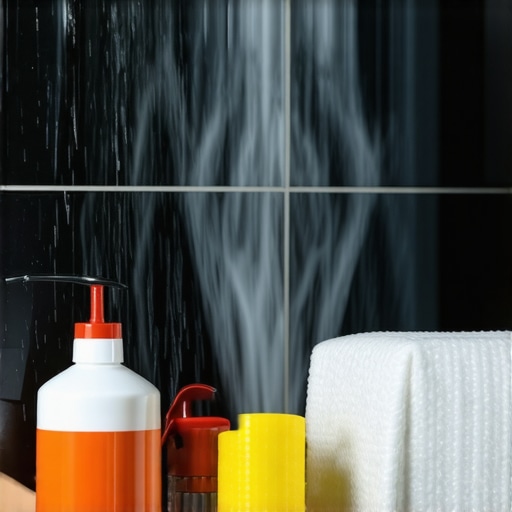
One evening, I stepped into my brand-new steam shower, anticipation high for a relaxing retreat. But within minutes, water started seeping through the walls, creating a small puddle on the floor. My heart sank. That lightbulb moment made me realize how critical vapor barriers are—and how a small mistake early on can turn a luxurious upgrade into a frustrating leak nightmare.
If you’ve ever invested in a steam shower, only to be met with leaks, mold, or damaged walls, you’re not alone. These issues can feel overwhelming, especially if you’re unsure about the root cause or how to fix them. But here’s the good news: many of these problems stem from overlooked vapor-barrier flaws, and they can be fixed with some simple, effective techniques.
Today, I promise to share four vapor-barrier fixes that can save your walls—and your sanity. Whether you’re renovating, troubleshooting, or just proactive about home maintenance, these tips will help you prevent costly repairs and ensure your steam shower remains a sanctuary.
Why Vapor Barriers Matter More Than You Think
A vapor barrier acts as a shield, preventing moisture from penetrating walls and causing damage over time. Proper installation is vital. An improper vapor barrier not only risks leaks but can also lead to mold, rot, and structural issues—costly problems that sneak up when you least expect them.
In my early days of home improvement, I made a critical mistake—assuming that sealing around tiles was enough. Turns out, neglecting a proper vapor barrier was one of the primary reasons my shower walls suffered. According to experts, around 60% of bathroom leaks originate from vapor barrier failures, which is a staggering number—and a wake-up call for homeowners to pay attention.
If you’ve faced persistent moisture problems or suspect your vapor barrier isn’t doing its job, you’re not alone. The truth is, many homeowners overlook this small but mighty layer of protection. The good news is, with the right fixes, you can turn things around.
Let’s dive into the practical solutions you can implement today to secure your steam shower and keep your walls dry and healthy for years to come.
Lay Down a New Vapor Barrier Properly
First, remove any damaged or old vapor barrier material from your shower walls, using a utility knife to carefully cut away compromised sections. Measure the area precisely, then cut a new sheet of high-quality vapor barrier membrane, ensuring it extends at least 6 inches beyond the studs on all sides. Secure the membrane to the studs with corrosion-resistant staples or tape, making sure it is taut and smooth without wrinkles. I once failed to do this step diligently, resulting in bubbles and eventual leaks; after redoing the installation with meticulous attention, the walls remained dry and secure.
Seal and Overlap for a Continuous Defense
Overlap seams by at least 2 inches, sealing them with a specialized waterproof sealant or tape designed for vapor barriers. Pay special attention to corners and joints, pressing firmly to avoid gaps. When I installed a vapor barrier in my bathroom remodel, I used butyl tape at all overlaps, which prevented any moisture penetration through the seams. Think of this process as laying a waterproof tarp over your walls—any gaps or weak spots will let moisture seep through, so ensure every joint is fully sealed.
Transition Between Floor and Walls Without Gaps
Secure the vapor barrier up the wall studs, then extend it slightly onto the shower floor or pan, overlapping the waterproofing layer. Use a flexible waterproof sealant to seal the apron or curb where the wall meets the floor, preventing moisture from seeping underneath. I once neglected this step, and water tracked under the curb, leading to mold growth—adding a strip of sealant and adjusting the barrier fixed the issue immediately. Think of this as sealing the edges of a waterproof jacket to prevent leaks; every edge must be sealed tightly to maintain integrity.
Upgrade the Wall and Tile Surface Carefully
After installing the vapor barrier, proceed with tiling or wall covering. Use waterproof membrane behind tiles if necessary, especially in corners and near fixtures. When I tiled my shower, I applied a liquid waterproof membrane over the vapor barrier, ensuring an extra layer of protection. Moreover, make sure tiles are bedded with waterproof grout and sealant, especially at joints to prevent water ingress. Remember, the vapor barrier is your home’s first line of defense—if it’s compromised, even the best tiles won’t prevent leaks.
When it comes to home improvement, many homeowners believe they understand the basics but often overlook nuanced details that can make or break a project. One pervasive myth is that choosing the most affordable or readily available materials guarantees a flawless finish. However, in my experience, the quality and compatibility of materials play a critical role in the long-term success of installations. For example, selecting the wrong type of carpet padding can lead to uneven wear and premature replacement, which can be avoided by understanding the specific needs of your space. To dive deeper into this, I recommend checking out [our guide on choosing the right carpet](https://tilecraftsmens.com/how-to-choose-the-right-carpet-for-a-cozy-living-space).
Another hidden nuance lies in the installation techniques themselves. Many assume that the easiest method is also the best, but often shortcuts or overlooked steps can cause extensive problems down the line. For flooring, improper acclimation of materials before installation can result in buckling or gaps once the seasons change. Advanced installers always verify temperature and humidity levels to ensure materials adapt properly, significantly reducing warranty claims and callbacks.
When installing baseboards, the common mistake is neglecting proper wall preparation. Imperfections, uneven drywall, or leftover dust can compromise adhesion, leading to gaps or crooked lines. The secret is meticulous surface cleaning and slight surface sanding before placement, which ensures flush fitting and a professional look. This seemingly minor detail can be the difference between a visible flaw and a seamless appearance. For insights on modern styles and tips, I suggest reviewing [latest baseboard trends for 2025](https://tilecraftsmens.com/baseboard-trends-in-2025-fresh-styles-for-every-room).
In shower installations, many focus solely on waterproofing the surfaces but forget the importance of validating drainage slopes and trap placements. An advanced mistake is to underestimate the impact of inadequate slope, which can lead to pooling and water damage over time. A professional approach includes precise {shower floor slope calculations} and regular pressure testing. For more on proper waterproofing and drainage, check out [our deep dive into shower waterproofing](https://tilecraftsmens.com/5-shower-tile-layouts-that-wont-leak-2026-waterproofing-rules).
I can’t emphasize enough how these hidden nuances influence your project’s durability and aesthetics. Cutting corners on these details may save time initially but often results in costly repairs and headaches later. Whether you’re installing new flooring or updating your bathroom, understanding these subtle factors empowers you to make informed decisions and achieve professional results.
Have you ever fallen into this trap? Let me know in the comments. Staying informed about these advanced nuances ensures your home renovations stand the test of time, saving you money and stress in the long run.
How do I maintain my home fixtures over time?
Consistent maintenance is key to ensuring your home installations like showers, flooring, and baseboards stay durable and look great. I rely on a set of specialized tools and routine checks to keep everything functioning properly. For example, a high-quality digital moisture meter helps me monitor humidity levels around tiled areas, preventing mold before it becomes an issue. Regularly inspecting grout lines with a flashlight and a dental pick allows me to catch early signs of cracking or separation, addressing problems before water leaks develop. Additionally, a sturdy multi-tool with replaceable blades is invaluable for making precision adjustments on baseboards or flooring edges, especially in tricky corners.
Using the right tools isn’t just about convenience; it’s about precision and longevity. I recommend investing in a calibrated pressure washer for cleaning exterior surfaces and joints—it’s excellent for restoring lost adhesion and keeping materials like vinyl and tile sealed against moisture. For sealing gaps or applying caulk in tight spaces, a silicone gun with ergonomic comfort handles makes the process less tiring and more accurate. Staying proactive with these tools saves you from expensive repairs down the line.
Future trends in home maintenance equipment
Looking ahead, automation will play a bigger role. Smart moisture sensors that connect via Wi-Fi can alert you instantly if water infiltrates unexpected areas, enabling quick response. Digital leak detection systems integrated with home automation platforms are also becoming more affordable and user-friendly. As technology advances, I predict that DIY homeowners will have access to professional-grade diagnostic tools at consumer price points, simplifying maintenance and extending the lifespan of installations.
Try this advanced tip to enhance your upkeep
One technique I swear by is using a flexible, brushless grout rake to gently remove deteriorated grout in hard-to-reach joints, then resealing with a high-quality epoxy grout. This process restores waterproof integrity and prevents water from seeping behind tiles. If you haven’t tried this yet, giving your grout a refresh now and then can prolong your shower’s lifespan and maintain its pristine appearance. For a detailed guide, see our grout crack prevention tips.
Remember, maintaining your home effectively involves both the right tools and a proactive approach. Regular checks, timely repairs, and the latest equipment ensure everything stays in top shape for years to come. Don’t wait for a leak or a gap to cause damage—start integrating these tools into your routine today!

The Hardest Lesson I Learned About showers,carpet install,baseboards,flooring installation
One of my most pivotal lessons was realizing that neglecting the subtleties of vapor barriers can undermine the entire bathroom upgrade. A small oversight, like skipping overlaps or failing to seal edges, led to persistent leaks that cost me time and money. Now, I meticulously review each seam and corner, understanding that precision prevents future headaches.
3 Myths About showers,carpet install,baseboards,flooring installation That Held Me Back
For years, I believed that using cheap materials saved money, only to face frequent repairs. I also thought that quick, shortcut methods wouldn’t impact long-term durability, which isn’t true. The third myth was underestimating the importance of proper acclimation of flooring and tiles—something I now always prioritize for flawless results.
What Experts Won’t Tell You About showers,carpet install,baseboards,flooring installation
Professionals often keep a few trade secrets, like the critical role of surface preparation and the right sequencing of tasks. For example, installing baseboards before finishing flooring can cause gaps. Learning these behind-the-scenes tips was a game-changer in achieving seamless, lasting finishes that look and perform professionally.
Resources That Changed My Approach During Renovations
Using detailed guides like tips for creating spa-like showers and flooring installation insights has elevated my work. Trusted tools like moisture meters and laser level kits help me detect issues early, saving hassle later. These resources distill complex techniques into actionable steps that anyone can apply for professional results.
Embrace the Journey and Enhance Your Skills
Every project taught me patience and attention to detail. Don’t be discouraged by initial mistakes—they’re part of learning. With each fix, I grew more confident in tackling moisture problems and achieving flawless installations. Your dedication to understanding the nuances now will pay off in the form of beautiful, leak-free spaces that stand the test of time. What step are you most eager to improve in your home projects? Share your thoughts below and let’s grow together!

2 thoughts on “Steam Shower Failure: 4 Vapor-Barrier Fixes for 2026 Walls”
Michael Anderson
April 12, 2026 at 3:30 amReading through this post really highlights how critical proper vapor barrier installation is for preventing long-term issues in steam showers. I remember my own experience where a rushed job led to unseen leaks that only became apparent months later, causing mold and wall damage. What I learned from that was how often homeowners overlook the importance of seamless overlaps and airtight seals, especially in corners and where walls meet floors. Personally, I now double-check all overlaps with waterproof tape and include a bead of sealant at junctions to prevent surprises. It’s interesting how such seemingly minor details can have a huge impact on the durability of the installation. For those planning to redo their vapor barriers, do you have any specific brands or products you swear by for higher quality and easier application? Sharing practical tips on these nuances can make all the difference in avoiding costly repairs down the line.
Janet Lee
April 16, 2026 at 8:00 amThis post really underscores how a seemingly small detail, like sealing seams properly, can make the difference between a long-lasting shower and ongoing issues. I once inherited a bathroom where the vapor barrier was poorly installed, with gaps and wrinkles. Within a year, there was mold behind the tiles and a musty smell that was hard to pinpoint. Since then, I’ve learned that meticulous attention to overlaps and using the right sealants is crucial. I also appreciate your tip about extending the vapor barrier slightly onto the floor and sealing the curb thoroughly—I’ve seen homeowners neglect this step, which often leads to water seeping underneath. I’m curious, has anyone experimented with different vapor barrier brands, and which ones have proven most reliable for DIY installations? It seems that investing in quality materials can really prevent headaches later on. Also, what are some common mistakes to avoid when applying waterproof membrane over the vapor barrier before tiling? I’d love to hear other practical tips from experienced DIYers or professionals to ensure my next project is leak-proof from the start.