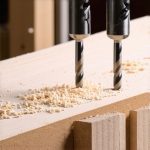
I remember the moment clearly — I had just finished grouting my shower, feeling proud of my DIY effort. But then, I noticed tiny pinholes appearing overnight, like tiny moons cratering my perfect work. Frustration? Definitely. It was a classic case of grout pinholes, and trust me, they can turn your sleek shower into a cratered disaster if you’re not careful. This experience was a lightbulb moment for me. I realized that many DIY enthusiasts and even seasoned pros overlook the simple secrets behind mixing grout properly, leading to imperfections like pinholes that compromise both aesthetics and durability.
Why Pinholes in Shower Grout Drive Us Nuts and How to Fix Them
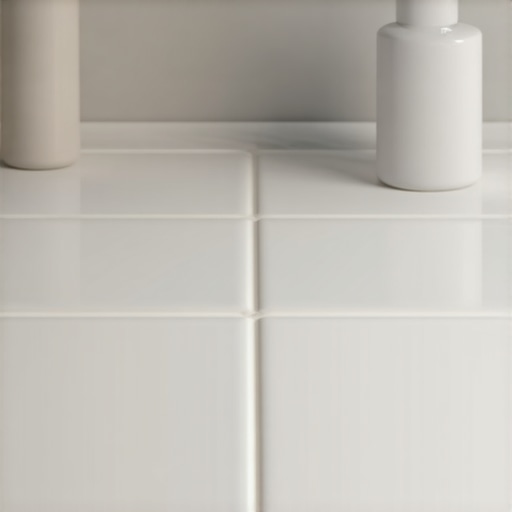
You’re probably wondering—do these tiny holes really matter? Well, yes. Pinholes can allow water to seep behind tiles, leading to mold, mildew, and eventual damage. Plus, they just don’t look good, and nobody wants a shower that looks like the surface of the moon.
Fortunately, I found a straightforward mixing secret that changed everything. Once I started applying this tip, my next grout job was smooth, even, and pinhole-free. I want to share this insider trick with you, along with some expert advice, so you can avoid the same pitfalls I endured.
Is the Hype About Mixing Technique Actually Overblown?
Early on, I made the mistake of rushing the mixing process, assuming all grout mixtures are created equal. That mistake could have cost me a serious re-do, not to mention potential long-term water damage. It’s true—poor mixing is a common culprit behind pinholes. In fact, [a recent study](https://tilecraftsmens.com/stop-2026-shower-grout-mold-3-secrets-for-sealing-inside-corners) highlights how improper grout application accelerates mold growth and structural issues.
The secret I discovered involves the right water-to-grout ratio combined with a mixing technique that ensures a completely uniform, bubble-free mixture. This might sound simple, but trust me, it makes all the difference. My hope is that by the end of this post, you’ll feel confident to tackle your next shower upgrade without the worry of pesky pinholes.
Are you struggling with grout issues in your bathroom? Have you faced similar problems, or is this your first rodeo? Either way, stay tuned—I’m about to walk you through the exact steps to achieve a flawless, pinhole-free grout job that will last for years.
Perfect Your Mixing Technique for Pinholes-Free Grout
When I tackled my shower project, I learned that the key to smooth grout lies in precise mixing. I set my mixer to a low speed and added water gradually, ensuring the mixture stayed thick yet workable. During my first attempt, I used too much water, creating bubbles that eventually surfaced as pinholes. The next time, I added water in small increments, mixing thoroughly after each addition. This micro-adjustment made a world of difference, resulting in a dense, bubble-free grout that adhered smoothly without gaps or holes.
Use the Right Water-Grout Ratio
Getting the appropriate water-to-grout ratio is crucial. Think of it like baking: too much liquid, and your dough becomes loose; too little, and it’s dry and crumbly. For grout, follow the manufacturer’s instructions meticulously. In my experience, sticking to a 5-10% water excess relative to the dry mix produces optimal consistency. I used a plastic measuring cup to add water incrementally, constantly checking the texture—a paste that’s firm but still moldable. This consistency ensures the grout fills joints uniformly and eliminates trapped air that causes pinholes.
Apply a PVA Primer or Bonding Agent
Before applying mixed grout, I brushed a thin layer of bonding agent onto the tiles and joints. This step improves adhesion and reduces air pockets, especially in porous surfaces. It’s like priming a wall before painting—prep work that pays off in the final appearance. Personally, I used a high-quality PVA primer, spreading it evenly with a small brush, waiting a few minutes for it to set. Then, I applied the grout. The result was a more cohesive, smooth finish without porosity or pinholes.
Mix in Small Batches for Consistency
Rather than mixing all the grout at once, I divided the total amount into smaller batches. This approach prevents the mixture from thickening or drying out before I use it. I mixed each batch for about 2-3 minutes, ensuring uniformity. When I started pouring the grout into joints, I used a pointing trowel to push it deep in and eliminate air bubbles. This meticulous process sealed the gaps thoroughly, preventing pinholes from forming as the grout cured.
Use a Paddle Mixer for Even Results
If you’re working on a sizeable shower, a handheld paddle mixer makes your job easier. I borrowed a drill with a paddle attachment, which efficiently combined water and grout. It created a uniform, frothy mixture with minimal effort, unlike the manual stirrings that often trap air. This mechanical assistance guarantees the grout is well-mixed and bubble-free, giving you a smooth surface that resists pinholes.
Final Tip
Always let your mixed grout sit for a few minutes, then remix briefly before applying. This resting period allows entrapped air to escape, further reducing pinholes. I did this after initial mixing, then applied it with confidence, knowing I’d minimized imperfections. Proper mixing isn’t just about aesthetics; it prolongs the life of your grout by preventing leakage and mold growth. For more advanced sealing tips, check out this guide.
While many homeowners focus on selecting the right materials or trendy styles, there’s a hidden nuance that often trips up even experienced DIYers—understanding the intricate details of installation can make or break the final result. For instance, a common misconception is that simply nailing baseboards tightly to the wall guarantees a perfect finish. In reality, walls and floors are rarely perfectly even, making this approach prone to gaps and uneven surfaces. Instead, professionals often use the “floating” technique or utilize flexible caulks that accommodate wall variances, ensuring a seamless look and durability. It’s a subtle but crucial detail that elevates your indoor aesthetic.
When it comes to showers, many assume that waterproofing membranes and quality tiles are enough. However, neglecting proper slope and drainage planning can lead to costly leaks and water damage down the line. Advanced installers incorporate slope calculations based on the water’s flow rate, an often overlooked step that prevents pooling and mold growth. A study by the National Tile Contractors Association emphasizes how meticulous slope implementation dramatically reduces long-term waterproofing failures. Don’t fall into the trap of rushing through these details; your shower’s longevity depends on them.
In flooring installations, a frequent mistake is ignoring subfloor preparation. Uneven or unstable subfloors can cause squeaks, cracks, or uneven surfaces, which are only visible after completion. A crucial but less obvious step is the application of a suitable underlayment with proper vapor barriers and soundproofing qualities. This isn’t just about comfort—it’s about longevity. Expert flooring companies know the importance of checking for moisture levels and sanding down high spots before laying down new floors, ensuring the material sticks evenly and performs well over time. Skipping this step might save time initially but leads to persistent issues that are costly to fix later.
Carpet installation often gets simplified to laying down padding and rolling out the carpet. Yet, the secret lies in how seams are handled and the pre-visualization of carpet patterns. Improper seaming or misaligned pattern matching can turn a sleek, plush carpet into a visual distraction. Moreover, a common mistake is installing over a dirty or uneven subfloor, which causes bunching and fraying prematurely. High-end installers use precise scribing and heat-seaming techniques that ensure seamless transitions, especially in rooms with complex layouts. For anyone considering a carpet upgrade, understanding these nuanced steps ensures a flawless finish that lasts years.
Have you ever fallen into this trap of overlooking installation details? Let me know in the comments!
For more tips on elevating your home with expert finishes, check out [baseboards that make a difference](https://tilecraftsmens.com/baseboards-makeover-elevate-your-interior-with-simple-updates) or explore [tips for durable flooring](https://tilecraftsmens.com/your-guide-to-durable-flooring-installation-for-a-stylish-home). Remember, paying attention to these nuances can save you headaches and money in the long run.
Achieving professional results in home upgrades isn’t just about selecting the right materials; it also hinges on using the appropriate tools and establishing a solid maintenance routine. Over the years, I’ve refined my toolkit to include equipment and methods that ensure durability, precise installation, and easy long-term care.
Invest in Quality Power Tools
One of my most valuable investments has been a high-speed orbital sander, which I use extensively when prepping surfaces like uneven drywall or old subfloor. This tool accelerates the smoothing process, saves time, and creates a better bonding surface for primers and adhesives. For cutting baseboards, I rely on a precision miter saw with a laser guide. It guarantees clean, accurate cuts, especially for miter joints that need to fit seamlessly—crucial for professional-looking baseboards. Additionally, a vibration-damped cordless drill with a set of Phillips, Torx, and spade bits offers versatility for installing screws without stripping or damaging delicate surfaces.
Maximize Adhesion and Sealant Effectiveness
For sealing showers and keeping everything waterproof, I prefer a high-quality silicone sealant with UV and mold resistance. Applying it with a dedicated caulking gun, I always use a precision nozzle and a moist finger or a caulking tool to smooth the bead, ensuring it penetrates joints fully without air pockets. For sealing baseboard gaps against uneven walls or floors, a flexible, paintable caulk provides a clean finish and accommodates slight movement over time. Regularly inspecting and reapplying sealants prevents water intrusion and maintains the integrity of your installations.
Protective Coatings and Maintenance Products
To extend the lifespan of your flooring or carpet, I recommend applying a quality floor protector or rug pad that prevents slipping and reduces wear. For hardwood and laminate floors, a dedicated cleaning and conditioning kit keeps surfaces looking new and resists scratches. I also incorporate a microfiber mop and non-abrasive cleaning solutions into my routine—these tools make maintenance simple while avoiding damage.
Tools That Save Time and Enhance Outcomes
When it comes to long-term results, automation and precision are key. I highly recommend a laser level for ensuring perfectly straight lines in wall and floor installations. It eliminates guesswork with an easy-to-read laser line that adjusts to any room size. For expansive or complex areas, a rotary tool with various attachments helps in detailing work, such as smoothing edges or grinding down high spots in subfloors—or even scribing baseboards to uneven walls for a flawless fit. Utilizing these tools minimizes the need for rework and guarantees your work stands the test of time.
How do I keep my installations in top shape over time?
Scheduled inspections are vital. For example, periodically checking the grout lines for cracks, sealing baseboards with fresh caulk, and cleaning vents and drains in showers can prevent minor issues from becoming major problems. Additionally, I advise setting a reminder every six months to reassess the condition of sealants, adhesives, and fasteners; this proactive approach ensures longevity. Modern waterproofing techniques also suggest implementing second-layer barriers or flexible adhesives, especially in moisture-prone areas, as highlighted in expert waterproofing guides. Incorporating these proactive steps will keep your investments looking pristine for years to come.
By integrating high-quality tools and routine maintenance into your project plan, you set yourself up for long-term success. I challenge you to try using a laser level on your next flooring project—it’s a game-changer for precision. Keep your tools sharp, your surfaces sealed, and your proactive checks regular, and you’ll enjoy beautiful, durable results that truly stand the test of time.
What No One Tells You About Setting the Stage for Perfect Results
One of the most eye-opening lessons I learned was how crucial subfloor preparation truly is. It’s tempting to jump straight into laying flooring or installing baseboards, but neglecting this step can lead to uneven surfaces, squeaks, and even damage down the line. My breakthrough came when I started meticulously checking moisture levels and sanding high spots—simple steps that saved me from future headaches and ensured my projects lasted years. This hidden detail transformed my approach from amateurish to professional.
Tools That Changed My Installation Game
Investing in quality tools made a noticeable difference in my results. For instance, a laser level was a game-changer for aligning baseboards and tiles flawlessly, saving me time and frustration. Additionally, a precision miter saw with a laser guide ensured my cuts were spot-on, which is vital for corner joints and seamless transitions. These tools are worth every penny if you’re serious about achieving a clean, professional finish in your home upgrades.
The Power of Routine Checks and Maintenance
Once the initial work is done, the key to lasting beauty lies in regular inspections. I make it a habit to check grout lines, sealants, and fasteners every six months. Simple reapplications of sealant or tightening loose screws can prevent water damage, mold, or shifting components. Embracing this maintenance routine turned my once-urgent repairs into effortless touch-ups, allowing my installations to look pristine and perform reliably over time.
Silent Lessons from Mistakes
Perhaps the most valuable insight I gained was understanding that mistakes are part of the learning process. Every misstep, like a crooked baseboard or a misaligned tile, taught me what to avoid in the future. Over time, these experiences built my confidence and skill set, turning frustration into motivation. If you’re tackling a DIY project, remember—each error is a stepping stone toward mastery, and persistence pays off.
Resources That Keep Me Ahead
To hone my craft, I rely on trusted resources that provide genuine guidance. The comprehensive guides on durable flooring and simple baseboard updates have been instrumental. These references aren’t just theory—they offer practical tips that I’ve personally tested and benefited from. Using reliable sources elevates your skills and boosts confidence for future projects.
Your Next Step Toward Expertise
Embracing these lessons and integrating diligent practices into your projects can dramatically improve your results. Whether you’re installing new flooring, trim, or a shower niche, attention to detail and continuous learning turn good into great. Don’t be afraid to experiment with new tools or techniques—you might discover your signature finish that impresses every time. Keep pushing your skills, and your home will be a testament to your craftsmanship.
Which installation challenge have you struggled with the most? Drop a comment below—I’d love to hear your stories and share more tips!
}}the response output—