If you’ve recently installed a new carpet and noticed those stubborn seams puckering unexpectedly, you’re not alone. I vividly remember the frustration of walking into my living room only to find the seams bubbling up like a bad carpet rash. It’s disheartening, especially after investing time and money into a seemingly perfect install. But here’s a lightbulb moment: many of these issues are fixable, and more importantly, preventable, with a few simple glue-and-clamp tricks that I’ve perfected over the years.
Dealing with Puckering Seams Can Feel Like an Uphill Battle
Is the Fix Worth the Effort or Just a Temporary Band-Aid?
Early on, I made the mistake of thinking that once a seam puckers, it’s a lost cause. I’d try to hide it with furniture or hope it would settle over time. But delays only made the problem worse, and I realized that addressing the puckering promptly is critical. Using proper techniques, like glue and clamps, can re-smooth those seams reliably. And yes, it’s completely worth the effort. Not only does this method restore your carpet’s appearance, but it also extends its life and keeps your space looking polished. If you’re curious about other flooring secrets, check out my detailed guide on achieving flawless carpet installation.
Prepare Your Materials for a Seam Repair
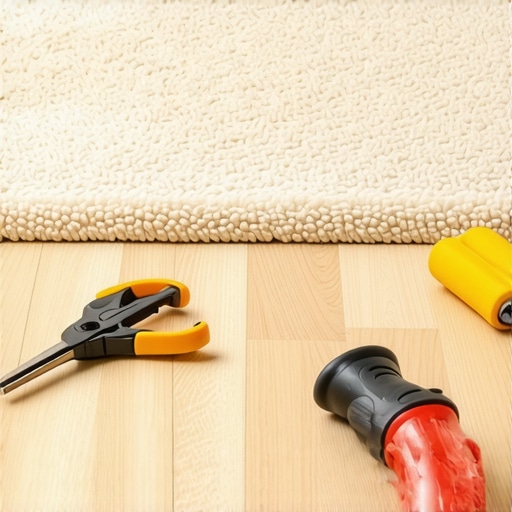
Gather high-quality seam tape, mesh or adhesive recommended for your carpet type, a seam iron or heat roller, a pair of scissors, and a heavy roller or rolling pin. I once tried to fix a seam with makeshift tape and was disappointed; this underscored the importance of using the right tools from the start.
Align and Secure the Seams Properly
Clean and Prep the Area
Vacuum the affected area thoroughly to remove debris, then gently lift back the carpet fibers along the seam. This ensures the adhesive bonds well and prevents trapped dirt that could cause future puckering.
Trim Loose Fibers
Use scissors to trim any frayed or loose fibers at the edges. A clean cut helps the seam lay flat and promotes better adhesion. I learned this the hard way when uneven fibers caused further puckering after repair.
Apply the Adhesive and Tape Effectively
Use the Correct Tape for Your Carpet
Choose a tape compatible with your carpet’s backing—double-sided seam tape is common. Carefully peel off the backing, then align the seam edges precisely, pressing down firmly to ensure full contact. Once, rushing the alignment caused a noticeable bump, emphasizing patience here.
Heat Activation for Better Bonding
Place a clean rag over the seam, then gently pass a seam iron or heat roller over the tape for about 10-15 seconds. This activates the adhesive, bonding the fibers securely. I found this step crucial; skipping it led to seam separation after a few days.
Finish and Reinforce the Seam
Once the adhesive cools, roll the seam with a heavy roller to press fibers into the adhesive. If the seam still feels loose, additional tape application or professional hot-melt bonding might be necessary. Remember, patience during this step pays off—rushing can cause misalignment or an uneven repair.
Prevent Future Seam Issues
To keep seams smooth and avoid puckering, avoid excessive foot traffic immediately after repair. Regularly check and maintain seams by cleaning around them, and consider using seam protectors if heavy furniture is nearby. Proper insulation and padding under furniture also reduce strain on seams over time.
For more insights on flawless carpet installation techniques, visit my comprehensive guide on achieving flawless carpet installation.
Many homeowners believe that installing baseboards or flooring is a straightforward process, but in reality, there are subtle nuances that can make or break the final look and durability. One prevalent myth is that caulking alone can seal gaps around baseboards, but expert installers know that proper scribing and shimming are far more reliable for a seamless finish. Relying solely on caulk often results in cracked or gap-filled joints over time, especially when walls are uneven. Additionally, a common mistake in flooring installation is ignoring subfloor conditions; subpar subfloor prep can lead to squeaky floors, uneven surfaces, or even early failure of your new flooring. It’s crucial to assess moisture levels, flatness, and structural integrity before laying down materials, as neglecting this step is a frequent culprit behind long-term issues.
When it comes to showers, many assume waterproofing is a one-step task, but the process involves multiple layers and precise sealing techniques. Cutting corners on waterproofing can expose your subfloor to leaks and mold growth, which are costly to repair later. For example, neglecting proper slope drainage or using incompatible waterproof membranes can cause water pooling or seepage. To prevent these pitfalls, I recommend following the latest waterproofing standards, such as those outlined in expert guidelines, and regularly inspecting your shower’s sealing points. It’s a detailed process that requires attention to detail, not just an afterthought.
In carpet installation, a widespread misconception is that a thicker pad automatically results in a more luxurious feel. However, overly thick padding can compromise stability and increase the risk of seam peaks and shifting. Choosing the right padding density and thickness depends on the traffic and room function, which is often overlooked. Furthermore, some installers underestimate the importance of proper seam sealing; weak seams are prone to peaking or raveling over time. Advanced tricks—like heat-seaming high-pile carpets—can dramatically improve the lifespan and appearance of your carpet, but they are often avoided by DIYers who fear the complexity.
### Why Do So Many Flooring Mistakes Persist Despite Modern Advice?
In my experience, one of the biggest traps is following outdated or overly simplified guidelines. For example, relying solely on visual cues for levelness can be misleading; using a laser level to identify subfloor dips offers a far more accurate assessment. Experts like renowned flooring specialists emphasize the importance of detailed subfloor prep, yet many skip this step, leading to problems down the line. According to a study published in the Journal of Building Engineering, subfloor preparation accounts for over 60% of flooring failure cases, highlighting its critical role in successful installation. So, next time you plan a renovation, remember that attention to these minute details can save you time and money in the long run.
Have you ever fallen into this trap? Let me know in the comments! For more expert tips on flawless installation, check out my guide on achieving flawless carpet results.
,
Maintaining impeccable flooring, seamless showers, and pristine baseboards over time requires the right tools and techniques. Personally, I swear by certain equipment that elevates my craftsmanship and ensures durability. One game-changer in flooring maintenance is the use of a high-end moisture meter, like the Protimeter Surveymaster, which I use weekly to assess subfloor conditions before any repair or installation. Accurate moisture readings prevent issues like warping or mold, especially in basements or humid environments. For flooring installation, a calibrated laser level, such as the Bosch GLL3-330C, guarantees perfect flatness and alignment, reducing uneven seams or gaps. Its ease of use and precision save me hours of troubleshooting after the fact.
Tools That Keep It Working
When working on showers, a reliable digital caliper allows me to check the thickness of waterproof membranes and tile bonds with precision. I also rely heavily on a high-temperature heat gun for curing adhesives and seam sealing, especially in custom shower niches. For everyday maintenance, I recommend a long-handled grout float, which simplifies cleaning grout lines without back strain and ensures smooth, even joints. On the styling side, I use a fine detail sander with adjustable speed to gently remove old caulk or dirt buildup around baseboards, promoting a clean seal and preventing gaps from forming.
Future of Maintenance Tools in Our Trade
The trend toward smart home integration is set to revolutionize maintenance routines. Imagine IoT-enabled moisture sensors that alert you via your smartphone when subfloor or wall moisture exceeds safe thresholds—preventing costly repairs before they start. Additionally, advances in portable ultrasonic testers will soon allow us to detect hidden leaks behind walls or beneath floors without invasive procedures. Staying ahead means embracing these innovations now, so you can guarantee flawless results that stand the test of time.
How do I keep my installations performing over time?
Regular inspections are essential. Consider scheduling seasonal checks of seams, caulking, and grout for wear and tear, especially in high-traffic areas or moist environments. Maintaining proper cleaning routines with gentle, pH-neutral cleaners prevents residue buildup, which can compromise seals and adhesives. Applying a quality sealant designed for your specific materials, like a silicone-based caulk for showers, enhances durability. Remember, even the best installation can falter with neglect, so create a maintenance schedule aligned with the manufacturer’s recommendations and your environment’s demands.
If you haven’t already, try the advanced technique of regularly using a moisture meter before and after repairs. This habit not only confirms the effectiveness of your work but also helps you catch potential issues early. For detailed guidance on choosing the right tools and techniques for your project, check out my article on how to choose the right carpet. Staying vigilant and equipped makes all the difference in achieving lasting, professional results in your home.
What I Didn’t Know When I Started—and Wish I Did
One of the hardest lessons I learned was that surface perfection isn’t enough; understanding the underlying structures and materials is vital for durability. I once assumed that selecting high-quality materials alone would ensure longevity, but I underestimated the importance of meticulous prep work, especially subfloor evaluation. That oversight led to avoidable squeaks and uneven surfaces, teaching me to prioritize preparation over appearance.
Another revelation was the significance of precise seam sealing in carpet installations. Rushing through this step often resulted in peaks and gaps that marred the professional look I aimed for. Now, I realize that patience and attention to detail in sealing seams not only improve aesthetics but also extend your carpet’s lifespan.
Additionally, I underestimated how critical proper waterproofing is in shower renovations. Cutting corners or skipping steps can cause leaks that silently damage substructures over time. Investing in quality membranes and following expert waterproofing strategies protects your investment and peace of mind.
Tools That Transformed My Approach to Home Upgrades
High-precision moisture meters like the Protimeter Surveymaster have become indispensable, helping me detect hidden moisture issues before they escalate. Laser levels, such as the Bosch GLL3-330C, ensure perfect alignment and flatness, saving countless headaches.
For sealing and finishing, a quality heat gun allows me to activate adhesives uniformly, resulting in stronger bonds for showers and floorings. A reliable caulk gun and seam roller are simple yet powerful tools that make all the difference in achieving a seamless, professional look, reinforcing my confidence in every project.
Looking ahead, I believe the integration of smart sensors measuring moisture and structural integrity will revolutionize home renovation. These innovations can alert you to potential issues early, maintaining the integrity of your work and saving money over the years.
Take Action Now: Elevate Your Home Projects
If you’re ready to elevate your craftsmanship, start by assessing your current tools and learning the critical steps that professionals swear by. Remember, shortcuts and assumptions often lead to costly mistakes; embracing detailed planning and quality tools ensures results that last. Whether it’s the perfect seam in your carpet or a leak-proof shower, your future self will thank you for investing time and care now.
What’s one home upgrade you’ve been hesitant to attempt because of uncertainty about the process? Share your thoughts below and let’s discuss how to tackle it with confidence!