

I vividly remember the first time I installed new baseboards in my living room. I was proud of my work—until I stepped back and noticed a glaring gap at the miter joint. Frustration crept in. No matter how carefully I cut, those tiny gaps seemed stubbornly resistant. It was a real lightbulb moment: I realized I needed a better approach to achieve that perfect, seamless look.
Why Fixing Miter Gaps Matters More Than You Think
Those tiny gaps in your baseboards aren’t just an eyesore—they can undermine the entire look of your room. Plus, gaps can collect dust and dirt, making cleaning more difficult and leading to potential damage over time. But here’s the good news: with the right technique—the Glue-and-Pin Method—you can seal those gaps and elevate your interior design effortlessly.
Is the Glue-and-Pin Technique Actually Worth the Hype?
Early on, I doubted whether this method would really make a difference. I had tried traditional miter cuts with some filler, only to be disappointed when the gaps reappeared or the filler cracked. In fact, I learned the hard way that rushing the cuts or neglecting proper support can lead to less-than-perfect joints. But once I embraced the glue-and-pin approach, my baseboard projects looked professional and clean every time. The secret lies in precise cuts, quality glue, and a few cleverly placed finishing pins—no gaps, no hassle. Want to see how it all comes together? Check out this detailed [guide on installing baseboards](https://tilecraftsmens.com/baseboards-makeover-elevate-your-interior-with-simple-updates) to get started on your own flawless finish.
Prepare Your Materials and Workspace
Start by gathering quality miter saws, fast-drying wood glue, finishing nails, a pneumatic nailer (or hammer and nails), a stud finder, and a detailed plan. Clear your workspace of debris, ensure good lighting, and set up a stable work surface. I once worked in a cramped corner, which made precise cuts challenging—so clear space is key.
Cut Accurate Miter Joints
Set your saw to 45 degrees for inside and outside corners. Cut baseboards with careful measurements, marking each piece thoroughly. To avoid gaps, double-check measurements against the wall or corner. I once mismeasured, resulting in a tricky repair that required extra sanding and patience—accuracy saves time.
Use the Center Line Method for Consistent Cuts
Draw a center line along the back of each board. When cutting, align this line with the saw’s blade to ensure perfect miter angles. This technique guarantees matching joints, especially at intricate corners. I found the line method remarkably helpful in achieving tight fits without gaps.
Apply Glue and Set the Joints
Spread a thin, even coat of high-quality woodworking glue onto the miter edges. Firmly join the pieces, making sure the cuts align seamlessly. Hold or clamp until set—clamps help prevent movement. Once, I skipped clamps, and the joint shifted slightly, causing mismatched corners later. Patience here makes a difference.
Nail the Baseboards for Stability
Position finished nails at strategic points—usually about every 16 inches—to secure the baseboard to wall studs. Use a pneumatic nailer for speed and consistency; if not, a hammer works with care. Be sure to countersink nails slightly below the surface for filling. I once nailed too deep, creating a bump that needed sanding and filler, wasting extra time.
Correct Small Gaps and Imperfections
If minor gaps appear, don’t panic. Use a high-quality filler or paintable caulk to seal seams before sanding smooth. For visible gaps, applying a little wood glue into the joint before nailing can fill tiny cracks. I’ve found that careful sanding after filling yields a professional finish—more than just aesthetic, it prevents dirt buildup.
Finish for a Seamless Appearance
Sand the joints lightly with fine-grit sandpaper to smooth out uneven spots or excess filler. Then, prime and paint or stain the baseboards to match your decor. This step ties everything together and covers any minor imperfections. Remember, a well-finished edge looks almost invisible, elevating the entire room.
Inspect and Adjust as Needed
Finally, step back and examine your work. Use a level to check alignment—adjust with additional nails or filler if needed. I once found a baseboard slightly out of line after painting, which I corrected with a few strategic shims behind the trim—details matter for a polished look.
By mastering these steps—careful measuring, precise cuts, proper glue application, strategic nailing, and finishing—you can seal those stubborn gaps and achieve a flawless baseboard look that lasts. For more advanced ideas on molding styles that can complement your craftsmanship, visit this link on baseboard upgrades.
Many DIY enthusiasts and even seasoned homeowners often believe they understand the basics of home installations, but beneath the surface lie nuances that can make or break a project’s success. One prevalent misconception is that following standard guidelines guarantees perfect results. For instance, in carpet installation, it’s common to think that stretching the carpet as tightly as possible ensures longevity, but over-stretching can lead to premature wear and seams pulling apart over time, especially in high-traffic areas—something a professional contractor is keenly aware of, as emphasized in expert resources on durable flooring [see here](https://tilecraftsmens.com/your-guide-to-durable-flooring-installation-for-a-stylish-home).
When it comes to shower renovations, many assume waterproofing membranes are a one-time layer, but overlooking proper sealing of seams and drain penetrations can cause leaks that damage subfloors over years—this is a trap that even experienced DIYers fall into without the right attention to detail. An advanced mistake involves neglecting the moisture barrier’s chemical compatibility with tile adhesives, which experts warn can lead to mold retreats and structural rot, as highlighted in professional studies on shower waterproofing [see here](https://tilecraftsmens.com/why-your-shower-drain-flange-is-sitting-too-high).
Installing flooring might seem straightforward, but a common error is not accounting for the expansion gap around the room’s perimeter. Ignoring this space results in buckling as the flooring contracts and expands with humidity changes—something I’ve seen many beginners learn the hard way. The real nuance involves knowing the correct gap size based on the material and room conditions, which an article on seamless flooring installation covers comprehensively.
Baseboard installation also harbors misconceptions. Many assume that simply nailing the trim into wall studs is sufficient, but improper alignment, especially in older homes with uneven walls, leads to gaps and cracked paint. Here, advanced techniques such as shim placement and precise scribing are essential skills. For aesthetic finishes, understanding the best miter cuts and gap-filling methods can save hours of sanding and patching, as discussed in detailed guides on moldings.
An advanced question that arises in all these cases concerns environmental factors: How do temperature and humidity fluctuations influence the longevity of these installations? Experts have shown that controlling indoor climate during and after installation dramatically reduces universal issues like contraction gaps, warping, and adhesive failure—integrating climate control strategies is often overlooked by casual DIYers.
In essence, mastering these nuances requires more than just following step-by-step instructions; it demands an understanding of the materials’ behaviors, environmental impacts, and refined techniques. This knowledge elevates projects from decent to professional-grade and prevents costly mistakes down the line. If you’ve ever fallen into one of these traps, share your experience in the comments. Remember, informed choices today save frustration and money tomorrow.
Keep It Running: Essential Tools and Maintenance Strategies
To ensure your flooring, showers, and baseboards stay in top condition over the years, investing in the right tools and adopting regular maintenance routines is crucial. Personally, I rely on a high-quality cordless multi-tool for detailed trimming and adjustments, especially when dealing with uneven walls or tight corners. Its versatility makes it invaluable for tasks like re-caulking shower edges or fine-tuning trim pieces without damage.
For cleaning, a steam cleaner with adjustable settings has revolutionized my approach, gently deep-cleaning carpets and tile surfaces without harsh chemicals. This not only prolongs the life of your flooring but also maintains a healthier environment. Regular inspections—checking for loose baseboards or grout cracks—help catch issues early before they escalate into costly repairs. Incorporate a soft-bristle brush attachment into your toolkit; I use it to scrub grout lines and remove stubborn dirt, ensuring floors look great and last longer.
Predicting the Future of Home Maintenance Tools
The trend is moving toward smart, automated maintenance devices. Imagine robotic vacuums that now include mopping features tailored for tile and hardwood floors, or app-connected moisture meters that monitor humidity levels in real-time to prevent wood warping. Staying aware of these innovations allows homeowners to proactively maintain their investments, reducing long-term costs and effort.
How do I maintain my flooring and trim over time?
Consistent cleaning with appropriate tools is key. For high-traffic carpet areas, I recommend deep-cleaning with a commercial-grade extractor every six months, combined with spot treatments for stains. In tile showers, sealing grout lines annually prevents water penetration and mold growth, which professionals emphasize as essential for durability. For baseboards, periodically repainting or touch-up painting keeps them looking fresh and prevents chipping from impact or moisture exposure.
Remember, the right tools make routine maintenance more efficient and effective. For instance, using a rubber squeegee after showers removes excess water and prevents mold buildup—much better than just allowing moisture to linger. Additionally, inspecting caulking and grout joints monthly helps identify early signs of deterioration, enabling prompt repairs and avoiding larger issues. Learn more about proper grout maintenance in this expert guide on grout care.
Try implementing a detailed maintenance checklist that includes tool-specific routines—like using a microfiber cloth for dusting baseboards or a specialized grout brush. Regular upkeep not only extends the lifespan of your installations but also keeps your home looking pristine. Incorporate these tips today to protect your investment and enjoy beautiful, long-lasting results.
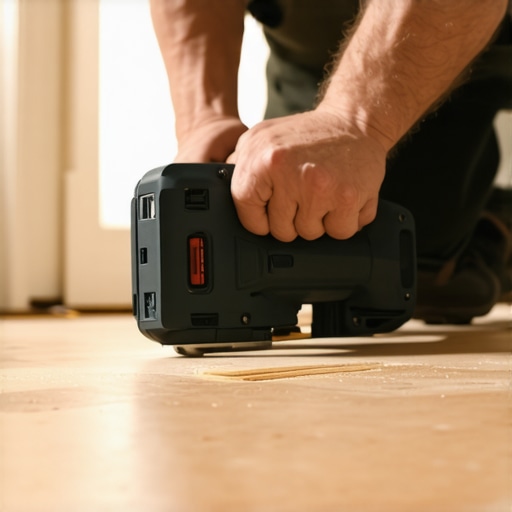
Lessons I Didn’t Expect to Learn About Baseboard Finishing
One of the biggest revelations was realizing that even meticulous measurements can fall short if wall imperfections aren’t accounted for—that’s where scribing and shimming come into play. Also, I discovered that patience during glue drying and nailing is crucial; rushing these steps often leads to gaps and misalignments that undermine the entire project. Lastly, I learned that finishing touches like sanding and repainting can make a world of difference, transforming a good installation into a seamless masterpiece. These insights, gained through hands-on experience, are invaluable for anyone aiming for professional-looking results.
Tools and Resources That Truly Elevate Your Installation Game
My go-to toolkit includes a quality miter saw set precisely at 45 degrees, ensuring accurate cuts every time—check out this guide for tips on optimal setup. A pneumatic nailer is indispensable for quick, clean fastening; I trust brands like Bostitch for durability. For measurements, a laser distance meter reduces errors and saves time. For learning advanced techniques, I often revisit this resource on baseboard upgrades, which offers practical advice. And don’t overlook the importance of quality filler and paint tailored for trim—small details that elevate the final look. These tools and resources have become essential in achieving a truly seamless finish.
Your Turn to Create Perfect Spaces
Embarking on your own home improvement journey can be daunting, but with the right techniques and tools, you can achieve professional results that boost your confidence and home value. Remember, mastering the glue-and-pin method for baseboards not only seals gaps but also instills a sense of pride in your craftsmanship. So why not pick up your tools today, apply these insider lessons, and turn your living space into a masterpiece? After all, the effort you invest now will bring lasting beauty and satisfaction for years to come.