

Picture this: I was right in the middle of installing new baseboards when I heard that dreaded cracking sound. You know the one—the sharp, unsettling split of wood under pressure. My heart sank as I watched a small split form at the nail hole, ruining what I thought would be a perfect finish. Isn’t it frustrating when simple nails cause such a big headache, especially on delicate wood profiles?
Why Splitting Baseboard Nails Can Feel Like a Personal Attack
From my experience, dealing with split nails isn’t just about fixing a cracked piece of wood. It’s about the added time, the frustration, and the risk of damaging the entire look of your room. The real issue? Thin wood profiles are especially vulnerable, and standard nails often do more harm than good if you’re not careful. I learned this the hard way early on, by driving nails too hard without considering the profile’s fragility—a rookie mistake that many DIYers can relate to. Fortunately, after some trial and error, I found a way to prevent these splits and ensure my baseboards stay intact and looking sharp.
Does Using Stop Baseboard Nails Make a Difference?
If you’ve ever wondered whether special nails or techniques really help, I’ll tell you — they do. But it’s also about how you use them. Early in my projects, I assumed any nail would do, which led to more splits and a lot of rework. That’s when I discovered that the right kind of nails and proper installation methods can change everything. Anyway, if you’re tired of battling cracks and splits, stick with me. I’ll show you exactly what worked for me, and the tips I wish I knew from the start. For more expert advice on installing baseboards that last, check out the latest baseboard trends.
Preventing Nail Splitting in Thin Wood Profiles: What You Need to Know
,
Select the Right Nails for Thin Profiles
Start by choosing nails specifically designed for delicate trim, such as 1.25-inch finish nails with a smaller diameter. These nails exert less pressure on the wood, significantly reducing the risk of splitting. I recall the time I used thicker, standard nails first and ended up with multiple cracks; switching to finer nails saved me from redoing the entire job. Always opt for nails that match the profile’s thickness and material for best results.
Prepare the Surface for Optimal Nailing
Before driving nails, carefully drill small pilot holes slightly smaller than the nail diameter. This creates a path that guides the nail in smoothly and prevents the wood from splitting under pressure. I learned this the hard way when I didn’t drill pilot holes and watched several nails cause splits. Using a drill with a fine bit is quick and worth the effort—your baseboards will thank you for it.
Utilize Proper Nailing Techniques
Keep the Nail at the Correct Angle
Hold the nail at a 45-degree angle to the board’s surface to maximize grip and minimize stress. Applying steady, firm pressure while angling the nail ensures it sinks straight and reduces the chance of splitting. I once tried pounding straight down and ended with cracked edges; adopting the angled approach solved this issue.
Use a Tapping Block and Hammer
Instead of smashing nails with full force, gently tap the nail with a hammer and a cushioning tapping block. This distributes the force evenly, preventing localized pressure that causes splits. I remember a messy session where I used too much force, and cracks appeared—learning to tap gently made all the difference.
Control the Nail Driving Pressure
Drive the nails slowly and stop once the head is flush with the surface. Over-driving nails can cause the wood fibers to split, especially near edges. During my projects, I found that stopping just before the nail seat prevents excess pressure. If the nail isn’t flush, use a nail set to tap it below the surface without forcing it in further.
Protect the Wood During Nailing
Applying a small amount of wax or soap to the nail can reduce friction and ease its entry, minimizing stress on the wood. I discovered this trick from experienced carpenters and found it especially helpful on thin profiles. It’s a simple step that preserves the integrity of your baseboards.
Finish with Proper Sealants and Touch-Ups
After installation, fill any small cracks with wood filler and sand smooth. This not only improves appearance but also strengthens the wood at vulnerable points. A final coat of paint or stain seals the surface and provides an extra layer of protection against future cracking. Proper finishing techniques ensure the longevity and visual appeal of your baseboards.
Consult Experts for Larger Projects
When working on large or intricate installations, getting professional advice can be invaluable. Experts understand the nuances of materials and techniques, helping you avoid common pitfalls. If you’re unsure about your project’s complexity or want flawless results, consider reaching out through this contact page for personalized tips or services. Proper preparation and technique make all the difference in preventing splits and achieving a professional look.
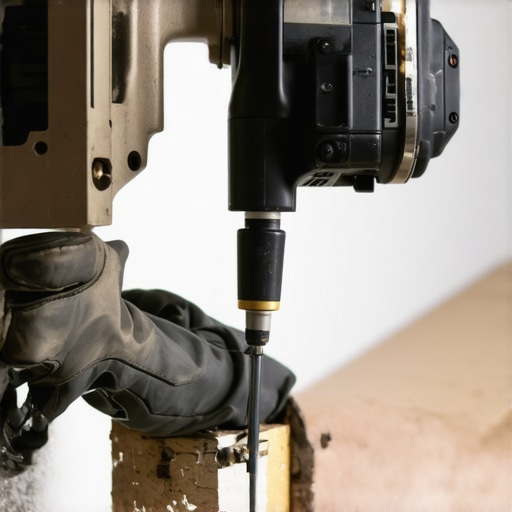 When tackling flooring, baseboards, showers, or carpet installations, many DIYers and even professionals often get caught up in misconceptions that can compromise the entire project. Let’s dig deeper into some of these hidden nuances and common myths, so you can avoid costly mistakes and achieve truly professional results.
One widespread misconception is that selecting the thickest possible flooring or baseboard material guarantees durability. However, in my experience, it’s not just about thickness; the quality of the material and the installation method matter more. For example, many assume that thicker hardwood planks are automatically better, but without proper acclimation and subfloor preparation, they can buckle or gap. For insights on durable, stylish flooring options, check out this expert guide.
A common trap during shower renovations involves neglecting proper waterproofing details, leading to leaks down the line. Some believe that sealing grout alone suffices, but expert advice indicates that membrane installation and sealing at critical joints are essential to prevent water infiltration and mold growth. An overlooked area is the shower niche; improper sealing here often causes persistent leaks, which can be costly to fix later. For advanced tips on shower waterproofing, consider this article.
In carpet installations, many assume that stretching the carpet is enough to eliminate ripples and slack. While stretching is important, the real nuance involves the proper tack strip tension and the type of padding used. Overlooking this can lead to early wear or bubbles forming. The secret lies in mastering the double-stretch technique, which guarantees a smooth, secure finish. For detailed camera-ready techniques, visit this resource.
Beyond these myths, some advanced mistakes often trip up seasoned installers. For instance, many don’t account for seasonal expansion and contraction of materials, especially in regions with extreme humidity fluctuations. This oversight can cause gaps in baseboards or cracked tiles. To avoid this, always allow generous expansion gaps and use flexible sealants. Proper planning in this regard can save you from frowned faces and rework.
Have you ever fallen into this trap? Let me know in the comments! Remember, precision and understanding of the hidden nuances bring your projects from good to exceptional. If you want to elevate your installation techniques further, explore trending methods like latest baseboard styles or top flooring trends for 2025.
Prioritizing Maintenance for Lasting Results
When it comes to flooring, baseboards, showers, or carpet installations, keeping everything functioning smoothly over time requires proactive maintenance and the right tools. My personal experience has shown that investing in quality equipment and adopting precise methods can dramatically extend the lifespan of your projects. For example, I always recommend having a high-quality pneumatic nailer. It ensures consistent nail depth and reduces the risk of splits or loose fittings, which are common issues in finish carpentry.
Essential Tools I Trust and Why
One staple in my arsenal is the corded electric grout saw. It might seem basic, but this tool allows me to remove or repair grout lines with minimal damage to surrounding tiles. The vibration and precision of a good grout saw prevent chipping and make regrouting much easier. For surface protection during sanding or finishing, I rely on a set of quality sanding sponges with fine grits. They give me control over smoothing edges or filling imperfections without gouging the surface.
Beyond handheld tools, I emphasize the importance of software for planning. When customizing layouts or forecasting wear patterns, I use CAD-based flooring visualization programs. These help simulate how materials will behave over seasons, aiding in adjustments before installation begins. Using these tools reduces errors and enhances long-term performance — especially crucial with complex layouts involving intricate cuts or transitions.
How do I maintain flooring and baseboards over time?
Regular cleaning combined with preventive measures is key. For instance, applying sealants on grout lines or seams can prevent water infiltration and cracking. I also schedule seasonal inspections using a moisture meter to monitor changes in humidity that might cause expansion or contraction. These practices, paired with proper tool use, keep my installations looking their best for years.
Future Trends in Maintenance and Tools
Looking ahead, I predict that automation will play a bigger role in long-term maintenance. Smart sensors embedded in flooring could alert homeowners to high moisture levels or structural shifts, enabling timely interventions. Additionally, new adhesives with flexible, crack-absorbing properties are emerging, promising even greater durability. Incorporating advanced tools like robotic floor cleaners or automated grout dispensers might streamline upkeep, saving time and reducing errors.
Why is maintaining your flooring critical for longevity?
Proper care preserves aesthetics, prevents costly repairs, and ensures safety. A small investment in regular checks and quality tools can save you from major headaches down the line. I highly recommend trying the latest in grout sealing technology, which I recently adopted to improve water resistance. For expert guidance on project maintenance or tool selection, consider reaching out through this contact page.
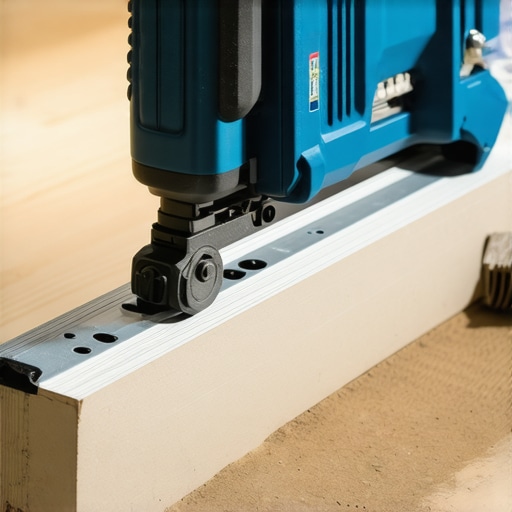
Here’s a picture of my favorite pneumatic nailer — an indispensable tool for ensuring consistent, damage-free nailing in baseboard installations. Its precision and durability make long-term maintenance much easier, preventing splits and loose fittings that can cause future issues.
What Slipped Past My Notice and Cost Me Time
One of the toughest lessons I learned was the importance of patience when nailing delicate wood profiles. Rushing to finish led me to overlook small cues—like the wood resisting the nail—that could have prevented splits. Now, I take a breath, prepare thoroughly, and proceed with care, knowing that in this craft, even minor details save hours of rework.
Choosing Tools That Do The Heavy Lifting
I found that investing in specialized tools like a fine-tipped drill bit for pilot holes and a quality tapping block transformed my installations. These aren’t just accessories—they’re essential allies, ensuring that every nail goes in smoothly, and the wood stays intact. Trust me, your baseboards will thank you.
Mastering Technique Over Force
It’s tempting to hammer with gusto, but I learned that controlled, gentle taps at the correct angle yield the best results. This approach distributes pressure evenly, prevents gaps, and keeps the profile looking professional. Employing a proper technique isn’t just about aesthetics—it’s about respecting the material.
Understanding Material Behavior for Longevity
Different woods respond differently to nailing, which means I had to adapt my approach. Thinner profiles require finer nails and more precise handling, especially in areas prone to expansion or contraction. Recognizing these nuances helps in planning for projects that stand the test of time.
The Power of Preparation in Avoiding Cracks
Pre-drilling small pilot holes before nailing is a game-changer. This simple step drastically reduces splitting and ensures perfect alignment, especially on intricate profiles. Skipping this step might seem quick now, but it often leads to frustration later—lesson learned the hard way.
Curated Toolbox for Flawless Finishes
From my experience, a few trusted tools make all the difference: a top-tier nailer, precise drill bits, quality sandpaper, and proper sealants. Together, they streamline the process and boost confidence. For recommendations tailored to your project, explore the latest installation trends.
Keep Moving Forward with Confidence
Remember, every mistake in nailing baseboards is an opportunity to learn. Patience, preparation, and proper technique are your best friends. Don’t hesitate to experiment and refine your approach—all skilled finish carpenters started somewhere. With these insights, you’re well on your way to achieving results that last years and look professional.
What’s Your Next Step in Perfecting Baseboard Installation?
Are you ready to apply these tips on your own project? Or maybe you’ve already encountered challenges along the way? Share your experiences below—let’s learn from each other’s journeys toward flawless finishing.
And remember, if you’re seeking expert advice or want to elevate your skills further, you can reach out through this contact page anytime. Happy nailing!