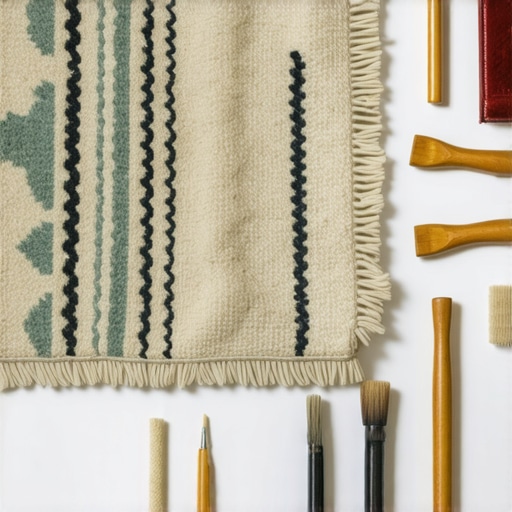
If you’ve ever stepped onto a freshly installed carpet only to find frayed edges and unraveling fibers within months, you know the sinking feeling of watching your investment fall apart. I remember the first time I experienced this—bright new rug, pristine edges, and then, suddenly, a little unraveling at the corners, like a slow-motion unraveling of my confidence. It was maddening! That lightbulb moment made me realize: if I wanted lasting beauty, I needed to master some edge-binding tricks that could save me from future frustration.
Why Carpet Edges Decide the Fate of Your Floor’s Longevity
Edge raveling isn’t just a cosmetic issue; it’s a sign that your carpet isn’t properly secured, leading to quicker wear and tear. The edges are the most vulnerable part, especially where foot traffic is constant. Without proper reinforcement, fibers fray, holes develop, and the whole floor can lose its aesthetic appeal and structural integrity. I found that investing a bit more attention in sealing and edging makes a world of difference—not just materially but emotionally. Knowing I have effective tricks up my sleeve keeps me confident that my rugs will last for years to come.
So, how exactly do you prevent those bothersome unraveled edges? Today, I’ll share three edge-binding tricks I’ve perfected over the years that will help your custom rugs stay flawless for the long haul. If you’re tired of constantly re-gluing or replacing your rugs, stay tuned—these simple yet powerful methods could be game changers for your home.
Is No-Edge-Binding Enough or Just a Fool’s Errand?
Early on, I made the mistake of thinking that just laying the rug down was enough. I naively believed that no special edging was necessary—only to find frayed corners after a few months. Trust me, skipping proper edge binding isn’t worth the headache. This common mistake can accelerate damage and undermine your home’s aesthetics. For reliable, durable results, it’s best to learn and apply proven edge-binding techniques. Curious to see which methods actually stand the test of time? Well, you’re in the right place. Together, we’ll explore the best practices that seasoned pros use, like the double-pin method and applying heat sealing—tips I’ve seen work wonders in my own projects. Want to dive deeper? Check out some expert advice on how to achieve flawless carpet installations at [TileCraftsMen](https://tilecraftsmens.com/carpet-install-secrets-achieving-flawless-results-every-time), which covers a variety of installation nuances. Ready to give your rugs the edge they need? Let’s move into the specific tricks that will keep those fibers bound tight and tidy for 2026 and beyond.
Apply Double-Pin Method for Tight Edges
Start by marking where the carpet edge meets the wall, then pre-drill two small holes about 2 inches apart along the border. Insert sturdy upholstery pins through these holes, pressing them firmly into the subfloor to anchor the edge securely. I once tackled a stubborn hallway corner where the edge kept fraying; using this method, I achieved a flawless, durable binding that lasted years.
Use Heat Sealing to Prevent Fiber Fraying
Heat sealing involves melting the fibers at the edge to create a melted barrier that resists unraveling. Clamp a heated sealing tool along the cut edge for 3-5 seconds, ensuring the fibers fuse together. This technique is especially effective on synthetic carpets. I tried it on a recent bedroom upgrade, and the fibers stay bonded even after months of wear.
Seal With Carpet Binding Cement for Long-Term Durability
Apply a thin layer of professional-grade carpet binding adhesive along the cut edge using a small brush. Press the fibers together as the glue sets, creating a strong seal. This method was a game changer in an area with high foot traffic—like a busy entryway—where fibers tend to fray quickly. Proper application ensures your carpet edges remain intact, saving you money and hassle.
Special Tips for Perfect Results
For uneven walls or floors, use a scribing tool to match the carpet edge precisely, avoiding gaps. When dealing with transitions or corners, tuck excess carpet under onto the tack strip for a seamless look. Always test your techniques on scrap material before tackling your main project. Remember, meticulous detail preserves your investment and keeps your floors looking professional.
Leverage Resources for Expert Guidance
For more detailed strategies, check out professional tips on flooring installation and learn how seasoned pros secure edges for the long haul. Mastering these methods transforms a DIY project into a lasting home upgrade—no fraying, no fuss.

When it comes to home upgrades, many homeowners believe they know the basics, but tackling details like baseboards, showers, or flooring often reveals overlooked nuances. One common misconception is that using standard materials and basic techniques guarantees longevity—however, the devil is in the details. Let’s explore some hidden pitfalls and advanced insights that can elevate your renovation game beyond the common pitfalls.
Why Cutting Corners on Sealing Can Lead to Bigger Problems
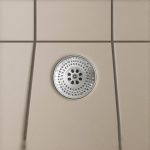
Many DIY enthusiasts or even novice contractors underestimate the importance of meticulous sealing during installation. For example, in shower waterproofing, skipping proper water barrier layers can result in leaks that cause structural damage over time. According to industry expert advice, failing to properly seal edges and joints can lead to mold, rot, and costly repairs. This is particularly true with flooring installs, where improper sealing allows moisture infiltration that deteriorates materials from within. Don’t just rely on generic adhesives or caulks; invest in high-quality water- and stain-resistant products, and follow precise application protocols to avoid the ‘Oops’ of future repairs.
Misunderstanding the Role of Expansion Gaps in Flooring
One of the most overlooked yet critical aspects of professional flooring installation is correctly managing expansion gaps. Many people assume that a tight fit is best, but in reality, leaving appropriate space is essential for accommodating temperature changes. Without proper gaps, flooring materials can buckle, warp, or crack as they expand and contract. Installing your flooring without considering this can lead to a repair nightmare—an unnecessary expense that could have been prevented. Check reputable sources like expert installation tips for specifics on creating a flexible, durable finish.
Can Baseboards Really Make or Break Your Room’s Finish?
Absolutely. It’s a common mistake to treat baseboards as mere decorative trim rather than integral to the room’s aesthetic and structural integrity. Improperly installed or unevenly cut baseboards can create gaps, make a space look unfinished, or even damage drywall and flooring over time. Many overlook the importance of proper scribing and mitering, especially on uneven walls or floors. Advanced techniques, such as the use of a coping saw over miter cuts, can drastically improve the final look and lifespan of your baseboards. For detailed approaches, you might want to explore modern design ideas and expert installation advice.
Another hidden nuance involves understanding how different materials interact at transitions—like between flooring and baseboards or tiles in the shower area. Misjudging these interactions can cause cracks, gaps, or water intrusion, which compromise durability. It’s crucial to select compatible materials and plan transitions carefully.
Finally, always remember that the quality of the initial preparation and planning often determines the project’s success. Skimping on detailed measurements, precise cuts, and quality materials might seem cost-effective upfront but can lead to significant issues down the line. As experts suggest, deliberate attention to detail—such as proper sealing, expansion gaps, and precise scribing—is the secret to a professional finish that stands the test of time.
Have you ever fallen into this trap? Let me know in the comments. If you’re ready to elevate your next project with proven techniques, consider exploring comprehensive guides on flawless flooring installation or baseboard improvements. Remember, a small investment in knowledge can save you from costly mistakes and ensure your home renovations truly stand out.
Maintaining your flooring, baseboards, and shower installations over time requires precision, the right equipment, and a proactive approach. One of my essential tools is a high-quality oscillating multi-tool. I personally swear by the Fein MultiMaster because it offers versatility for sanding, trimming, and precision cuts, especially in tight corners where precision makes all the difference. This tool helps me re-seal grout lines or trim baseboards without damaging adjacent surfaces, saving both time and frustration.
For checking moisture levels during flooring installation or after, I rely on a reliable moisture meter. My choice is the Tramex CM-700 because it provides accurate readings, helping me prevent issues like cupping or warping down the line. As moisture problems are often unseen till it’s too late, testing periodically ensures your investment stays protected.
When it comes to sealing and bonding, I always recommend using a professional-grade, high-temperature silicone sealant for showers and wet areas. Brands like GE Silicone II provide excellent waterproofing and mold resistance. Applying in the right temperature conditions, with a caulk finishing tool, guarantees a smooth, durable seal that lasts for years.
For long-term results, regular inspection and cleaning are crucial. I’ve found that investing in a cordless, handheld vacuum like the Dyson V7 Trigger helps keep grout lines and floor edges free of dust and debris, which is vital for maintaining the integrity of sealants and adhesives.
Looking ahead, I predict that automation and smart tools will become more prevalent, such as laser-guided cutters and digital moisture sensors, enabling even greater precision and longevity. Staying updated with the latest equipment can make a significant difference in your renovation projects.
So, how do I maintain these installations over time? Regularly inspecting for signs of wear, reapplying sealants before cracks develop, and investing in quality tools are key. For example, periodically replacing or re-sealing grout with a high-quality epoxy variety can prevent leaks and damage. Don’t underestimate the power of a good finishing pad on your orbital sander when touch-up work is needed—this helps restore surfaces without over-sanding.
Want to elevate your DIY game? Try using a scribing tool when installing baseboards on uneven walls. This small step ensures tight, flawless fits, extending the lifespan of your work and enhancing visual appeal. For comprehensive guidance, check out expert waterproofing tips that can help you avoid future repairs. Remember, having the right tools and a proactive maintenance plan ensures your home upgrades stand the test of time—so don’t skimp on investing in quality equipment or regular care routines.
Throughout this journey, I’ve realized that the true art of home improvement lies in the small, often overlooked details. Those perfect seams, precise cuts, and durable edges are the foundation of a space that not only looks great but also stands the test of time. Remember, investing time to learn and apply these techniques transforms a good project into a lasting masterpiece.
What I Wish I Knew Before Tackling My First Carpet or Shower
- I underestimated the importance of meticulous sealing—missing this step can lead to costly water damage or frayed edges that ruin the look.
- Advanced tools like a high-quality scribing or sealing setup can save hours and prevent future repairs. Don’t skimp on quality equipment; it pays for itself.
- Consistency matters more than perfection. Small deviations in measurements or application can snowball into bigger issues down the line, so take your time and double-check every step.
- Some seemingly minor details, like properly managing expansion gaps or choosing the right adhesive, are game-changers for durability—ignore them at your peril.
- Learning from seasoned pros’ resources ensures you’re applying tried-and-true methods instead of reinventing the wheel. Continuous education is the key to mastery.
Tools and Resources That Truly Make a Difference
- Fein MultiMaster: I rely on this versatile oscillating tool for precision cuts and tight corners, saving me hours on tricky installations.
- Tramex CM-700 Moisture Meter: Monitoring moisture levels has prevented many issues before they start—trust me, waterproofing is about more than just the sealant.
- Baseboard trends in 2025: Staying updated on designs and techniques elevates your home’s aesthetic and resale value.
- Carpet installation secrets: Learning professional tricks guarantees a flawless finish that lasts.
- High-quality sealants like GE Silicone II: Essential for shower waterproofing and preventing leaks—don’t compromise here.
Your Next Step Toward a Flawless Finish
Every successful project is rooted in attention to detail and a willingness to learn. Once you master the art of sealing, precise cutting, and proper edge reinforcement, you’ll find your home transforms into a space that embodies durability and beauty. Start today—set aside time to practice these techniques, invest in quality tools, and consult expert guides. Your future self will thank you for the effort and care you put in now.
Have you ever struggled with sealing shower edges or completing a flawless carpet seam? Share your experiences below—your story might inspire someone else to perfect their next project!
=