

Have you ever stepped onto a seemingly innocent section of your hardwood or tile floor, only to be met with a jarring squeak that echoes through your home? I recall the first time I experienced it—my heart sank. That unnerving squeal when you shift your weight just right, making you wonder if the floor is about to collapse beneath you. It’s more than just an annoyance; it’s a sign that something’s not quite right.
A Personal Battle with Unwanted Floor Noise
Early on, I tried everything—sprays, repairs, even listening to YouTube hacks promising a squeak-free life. But most of these solutions were band-aids, temporary fixes that failed when the humidity fluctuated or the subfloor shifted again. Frustration set in because I knew I needed a real, lasting answer—something foolproof that would genuinely silence those pesky squeaks once and for all.
Then, I stumbled upon a technique involving hidden counter-sink screws. This method is a game-changer, and I want to share it with you today because I’ve tested it thoroughly. This isn’t just another quick fix; it’s a professional-grade solution that keeps your floors tight and quiet for good—something I wish I had known from the start.
Why Floors Squeak and Why You Should Care
Squeaky floors aren’t just an aesthetic headache—they can be signs of underlying structural issues or loose fastening points. According to a study published in the Journal of Building Engineering, persistent squeaks can sometimes be linked to subfloor movement or even the deterioration of fasteners over time, especially in homes with fluctuating humidity levels. By addressing these root causes with precise techniques, you not only restore peace but also prolong the life of your flooring.
But here’s the catch—many DIY attempts fall short because of a common mistake early on: ignoring the importance of proper screw placement and technique. Trust me, I’ve been there. Early in my projects, I used visible nails or overtly drilled screws, which worsened the situation. It wasn’t until I adopted the hidden counter-sink screw method that I started seeing results I could be proud of.
In this post, I will walk you through the step-by-step process, share tips for avoiding common pitfalls, and show you how this approach can turn your squeaky nightmare into a silent, solid floor. Ready to finally silence those creaks? Let’s get started and make your floors as peaceful as they should be!
}# Tags: flooring, squeaky floors, home improvement, DIY solutions, hidden screw method, flooring repair, professional tips, home upgrades, quiet floors, flooring DIY, baseboard installation, subflooring, home renovation, squeak repair, hardwood flooring, tile floors, laminate, vinyl, home maintenance, home DIY, wall-to-wall flooring, flooring installation.
Locate the Culprit Before Drilling
Start by identifying exactly where the squeaks originate. Walk across the flooring, listening for the loudest spots, and mark these areas with painter’s tape. In my first attempt, I used a simple pencil to mark the exact squeak points—this kept me precise during drilling, avoiding unnecessary damage across the whole floor.
Prepare for Screw Installation
Once identified, clear the area around the squeak spot. Use a stud finder or tapping method to ensure no electrical wires or plumbing lines are beneath. Then, drill a small, shallow pilot hole at an angle—think of it as making a tiny entry point for your screw, similar to a pilot in woodworking. This prevents splitting the wood and ensures a snug fit.
Use Hidden Counter-Sink Screws Effectively
Insert a quality screw—preferably a drywall or decking screw—into the pilot hole. Tighten slowly until you feel resistance, ensuring the screw pulls the subfloor securely against the joist. Apply a pre-drill lubricant if necessary to ease insertion. I once forgot to countersink, and the screw head protruded, causing more squeaks—lesson learned. For a seamless finish, countersink the screw slightly below the surface with a countersink bit or a drill bit larger than the screw head. This makes the repair virtually invisible, much like the techniques described in professional flooring repair.
Seal and Finish the Repair
After inserting the screw, fill the small countersunk hole with wood filler or matching wood putty. Smooth with a putty knife, let it dry, then lightly sand for a flush surface. This process is akin to sealing grout in tile work—preventing future issues and preserving the repair’s integrity. Once finished, walk across the floor to test—silence, achieved.
Address Loose Floorboards and Subfloor Shifts
In some cases, loose planks are the root cause. Secure these with nails or screws at the edges, ensuring they are flush with adjacent boards. For large sections, consider removing baseboards and using shims or more extensive fastenings. The shimming technique is vital when working on uneven surfaces—I’ve used shims to correct baseboard height discrepancies, which also improved overall stability.
Fasten with Precision and Care
Always use the appropriate screw length—about 1.25 inches for typical subflooring—to avoid penetrating too deep or remaining too shallow. A good rule is to drive the screw until the head is slightly below the surface but not so deep that it damages the wood. Using a screwdriver or drill with adjustable torque prevents over-tightening.
Double-Check Your Work
Once all screws are in place, re-walk the floor, applying gentle pressure or shifting your weight. Any remaining squeaks should be significantly diminished or eliminated. If some persist, repeat the process or evaluate if additional fasteners are necessary. Remember, patience ensures a durable, noise-free floor—it’s worth the effort to tackle each squeak thoroughly.
If you need further advice on flooring projects or want to explore more advanced techniques, feel free to contact a professional. Proper execution of these steps ensures a long-lasting, silent floor, turning your DIY effort into a true home upgrade.
When it comes to home improvement, there’s a wealth of misconceptions about seemingly straightforward tasks like carpet installation, baseboard finishing, shower setups, and flooring lays. One common myth is that following standard procedures guarantees a perfect finish. However, experienced contractors know that small nuances—those details most DIYers overlook—dictate the longevity and aesthetic quality of their work.
For example, many assume that simply gluing and nailing carpet or flooring results in a seamless look. But the truth is, the precision of seam joining, the correct underlayment choice, and even the humidity during installation critically affect the final appearance. According to industry insights, neglecting proper moisture control, especially in hardwood and laminate installations, can lead to warping and gaps over time. This is why understanding and managing subfloor conditions is a nuance many installers tend to ignore, leading to costly mistakes down the line. Enhance your knowledge by reviewing our ultimate guide to durable flooring installation and avoid these pitfalls.
What are the most often overlooked details that undermine home finishings?
One trap that catches many is misalignment when installing baseboards. Everyone thinks they just need to cut straight miter joints, but the real secret lies in the scribing technique, which adapts to uneven walls. Using a back-shimming method ensures a tight fit and professional appearance, especially important in older or irregularly built homes. Moreover, over-tightening nails or screws can cause cracking or warping, so knowing the correct fastening pressure is vital.
Similarly, many are unaware of the importance of proper shower pan preparation. A tiny overlooked step, such as applying an appropriate slope during mortar bed installation, can prevent leaks and water pooling. A recent study from the Building Science Institute emphasizes that precise leveling and sloping are key to waterproofing success in showers, yet they often get overlooked due to time constraints or lack of experience. For advanced techniques on flawless shower setups, check out our shower repair tips.
On the flooring front, many think that a uniform expansion gap suffices everywhere, but in fact, the gap’s size and location matter significantly, especially near walls or transitions. Using the penny gap technique helps accommodate expansion without telegraphing to the surface, which otherwise can lead to buckling or cracking. Recognizing these nuances can save you from redoing hours of work in the future.
To all DIY enthusiasts and seasoned pros alike, understanding these subtleties requires patience and a sharp eye. Incorporate these advanced insights into your projects, and you’ll achieve finishing results that stand the test of time and usage. Ready to master these details? Check out our comprehensive step-by-step flooring guide for more tips. And don’t forget—what nuance have you overlooked before? Share your experiences in the comments, and let’s elevate our craft together.
Keep It Working with the Right Tools
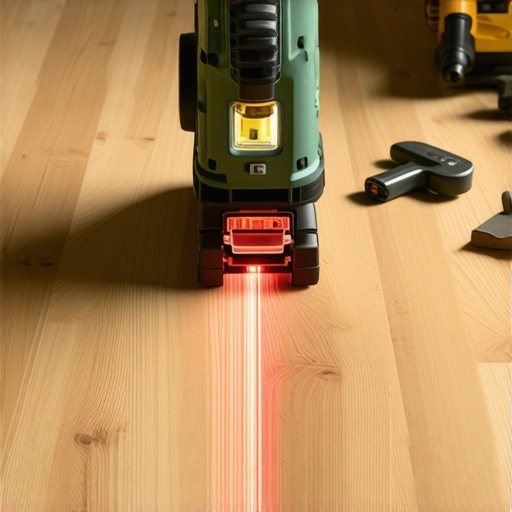
Achieving professional-quality results in flooring, baseboards, or shower installations hinges on employing precise and durable tools. I swear by my mallet with a rubber head—it’s gentle on surfaces yet effective at setting nails or clips without damage. For measuring, I always opt for a high-precision digital laser level; it ensures perfect alignment over expansive areas, preventing issues like uneven seams that can compromise the entire finish, as detailed in our comprehensive flooring guide.
When cutting materials like tiles or laminate, I recommend a wet saw with a diamond blade. The water cools the blade and reduces dust, giving you clean, precise cuts every time — essential for neat seams and professional joints. For drywall or backer board, my professonal cordless screw gun with adjustable torque is indispensable. It prevents overdriving screws, which can cause cracking or pop-outs, especially in delicate baseboard or shower wall work.
Anticipating Future Maintenance Needs
Automation and modern maintenance tools are transforming how we ensure long-term durability. For example, a moisture meter helps in pre-installation assessments, preventing issues like warping or mold growth. In my experience, regularly checking subfloor moisture levels before installing hardwood saves countless headaches down the line. Additionally, using a drain cleaning sensor periodically in shower drains can help catch clogs early before water damage occurs, extending the lifespan of your waterproofing methods.
Looking ahead, I predict the trend towards smart home sensors that monitor humidity, temperature, and even subfloor conditions will become standard in home renovations, making routine maintenance proactive and data-driven. This shift will dramatically reduce unexpected failures and costly repairs.
How can I maintain my flooring and finishes over time?
Start by scheduling regular inspections using these tools: a thorough visual check combined with moisture meters and, for showers, an inspection of waterproof seals. Keep finishes protected by using appropriate cleaners—avoid harsh chemicals that can degrade sealants or surface coatings—and employ protective mats or padding in high-traffic areas. Periodic re-caulking and sealing around shower niches, baseboards, and transitions is vital. Remember, maintaining a clean environment free of debris and excess moisture extends the life of even the best materials. For detailed preventative tips, explore our carpet installation secrets page, which applies similar principles of upkeep across different finishes.
Don’t forget to try one of the advanced techniques I mentioned—like using a digital laser level for perfect alignment. These small investments in precision tools not only elevate your craftsmanship but also reduce long-term repairs. For expert advice tailored to your project, feel free to reach out. Proper maintenance, combined with the right equipment, ensures your home improvements stay looking great and functioning flawlessly for years to come.
Lessons That Changed My Approach to Flooring and Finishes
- One of the toughest lessons I learned was the importance of patience. Rushing through small steps like precise screw placement or proper sealing can lead to costly rework. Taking the time to double-check each detail saves effort in the long run.
- I realized that understanding the nuances of materials—like the right type of filler or sealant—makes a significant difference. Using the appropriate product for each surface ensures durability and a clean finish, rather than opting for generic quick fixes.
- Finally, I discovered that investing in quality tools, even for DIY projects, elevates the results dramatically. A good laser level or a sharp saw helps me achieve professional-looking outcomes that last, without the need for constant repairs.
Resources That Elevated My Craft
- Our comprehensive guide to flooring installation: It breaks down each step with expert tips, helping me avoid common pitfalls and ensuring a seamless result. Trust me, detailed instructions like these make all the difference.
- High-quality tools: A digital laser level and a diamond blade wet saw are staples in my toolkit. Their precision and reliability have consistently improved my work quality, making challenging cuts easier and cleaner.
- Industry articles and tutorials: Staying updated with the latest techniques, like the back-shimming method or proper expansion gap practices, keeps my projects durable and professional-looking.
Your Next Home Upgrade Awaits
Remember, mastering these subtle yet significant details transforms your home improvement journey from DIY anxiety to genuine craftsmanship. Every step you take towards precision and knowledge builds a living space that’s not only beautiful but also lasting. Don’t wait—start implementing these insights today, and enjoy the satisfaction of a perfect finish.
Have you ever struggled with a tricky installation or overlooked a small but vital detail? Share your experiences below, and let’s learn together how to elevate our home projects to new heights.